How to Get Sound From Laptop to TV With HDMI (2026 Complete Guide)
Last updated: July 19, 2026 | Estimated reading time: 12 minutes
How to Get Sound From Laptop to TV With HDMI in 2026
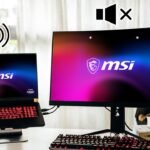
Connecting your laptop to your TV using an HDMI cable is one of the most popular ways to enjoy movies, presentations, and games on a larger screen. However, many users encounter a frustrating problem: the video displays perfectly, but no sound comes through the TV speakers. This issue is surprisingly common and can occur for a variety of reasons, from incorrect audio settings to driver issues. If you have been struggling to get audio from your laptop to your TV through HDMI, you are not alone. This comprehensive guide will walk you through every step needed to fix the problem and enjoy seamless audio-visual output on your television in 2026.
Whether you are using Windows 10, Windows 11, macOS, or even Linux, the steps to route audio through HDMI vary slightly. In this article, we will cover solutions for all major operating systems, troubleshoot common HDMI audio problems, and provide tips to prevent these issues from happening again in the future.
Table of Contents
- Why HDMI Audio Fails: Understanding the Problem
- Step 1: Check Your HDMI Cable and Connection
- Step 2: Configure Audio Settings on Windows
- Step 3: Windows 11 Specific Settings
- Step 4: Configure Audio Settings on macOS
- Step 5: Check TV Audio Input Settings
- Step 6: Update Audio and Graphics Drivers
- Step 7: Advanced Troubleshooting
- Step 8: Using External Speakers With HDMI
- HDMI Audio Settings Comparison by OS
- Frequently Asked Questions
Why HDMI Audio Fails: Understanding the Problem
HDMI cables are designed to carry both video and audio signals simultaneously. This is one of the primary advantages of HDMI over older connection types like VGA or DVI, which only transmit video. When you plug an HDMI cable from your laptop to your TV, both the video and audio data travel through the same cable. However, the operating system on your laptop needs to know that it should send audio data through the HDMI port rather than the built-in speakers or headphone jack.
In most cases, when HDMI audio stops working, it is because the operating system has defaulted to another audio output device. This can happen after a Windows update, after disconnecting and reconnecting the HDMI cable, or after installing new software that modifies audio settings. Understanding this is the first step to fixing the problem.
Another common issue is that some laptops have HDMI ports connected to the dedicated GPU rather than the integrated graphics. In these cases, the GPU driver needs to be properly configured to output audio through HDMI. This is especially common on gaming laptops and workstations with NVIDIA or AMD dedicated graphics cards.
Step 1: Check Your HDMI Cable and Connection
Before diving into software settings, it is important to verify that your physical connection is working properly. A faulty or loose HDMI cable can cause audio dropout, intermittent sound, or complete loss of audio.
Here are the steps to check your HDMI connection:
- Unplug the HDMI cable from both your laptop and TV, then reconnect it firmly on both ends
- Try a different HDMI port on your TV if one is available, as some ports may have different capabilities
- Test with a different HDMI cable if you have one available to rule out cable damage
- Check for bent or damaged pins on both the cable and the ports
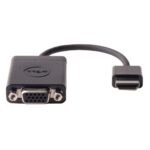
If you are using an HDMI adapter (such as USB-C to HDMI or DisplayPort to HDMI), ensure that the adapter supports audio passthrough. Some inexpensive adapters are video-only and will not transmit audio signals. This is a surprisingly common issue with budget adapters, and upgrading to a quality adapter that explicitly supports audio can solve the problem immediately.
Step 2: Configure Audio Settings on Windows
Windows is the most common operating system for laptop users, and fortunately, switching to HDMI audio output is straightforward once you know where to look. The process differs slightly between Windows 10 and Windows 11, so we will cover both.
Windows 10 Audio Configuration
- Right-click on the speaker icon in the system tray (bottom-right corner of your screen)
- Select “Open Sound settings” from the context menu
- Under the “Output” section, click on the dropdown menu next to “Choose your output device”
- Select your TV from the list of available devices. It may appear as the TV brand name, “HDMI Output,” or “Digital Output”
- Test the audio by playing a video or music file
Alternative Method: Sound Control Panel
- Right-click the speaker icon and select “Sounds”
- Click on the “Playback” tab
- Look for your TV or HDMI output device in the list
- Right-click on it and select “Set as Default Device”
- Click “Apply” and then “OK”
If your TV does not appear in the list of output devices, this could indicate a driver issue or a problem with the HDMI connection. Make sure your graphics drivers are up to date, as these drivers often include the HDMI audio driver as well. You may also want to check if you need to plug your monitor into the graphics card or motherboard, as this can affect audio output as well. For more details, see our article on whether to plug your monitor into graphics card or motherboard.
Step 3: Windows 11 Specific Settings
Windows 11 has a redesigned Settings app that moved audio options to a new location. Here is how to configure HDMI audio on Windows 11:
- Open the Settings app by pressing Windows + I on your keyboard
- Navigate to System in the left sidebar
- Click on Sound on the right side
- Under “Output”, find the “Choose where to play sound” section
- Select your TV or HDMI output from the dropdown
- Click on the device name to open additional settings where you can test the audio
Windows 11 also introduced a new feature called “Audio enhancements” that can sometimes interfere with HDMI audio output. If you experience problems, try disabling audio enhancements:
- Go to Settings > System > Sound
- Click on your HDMI output device
- Scroll down to “Audio enhancements” and set it to “Off”
This setting can cause compatibility issues with some TV models, and turning it off often resolves audio problems without any loss in sound quality.
Step 4: Configure Audio Settings on macOS
If you are using a MacBook or any Mac computer, the process of switching audio output to HDMI is slightly different. Apple has integrated audio settings into System Preferences (or System Settings on newer macOS versions).
macOS Ventura and Later
- Click on the Apple menu in the top-left corner
- Select System Settings
- Click on Sound in the left sidebar
- Under “Output”, you should see your TV listed
- Select your TV as the output device
macOS Monterey and Earlier
- Click the Apple menu and select System Preferences
- Click on Sound
- Click the “Output” tab
- Select your TV or HDMI device from the list
On macOS, you may also notice that the volume controls on your keyboard no longer adjust the TV volume when HDMI audio is selected. This is normal behavior, as macOS cannot control the volume of an external display through HDMI. You will need to use your TV remote or the TV’s built-in volume controls to adjust the sound level.
Step 5: Check TV Audio Input Settings
Sometimes the problem is not with your laptop but with your TV. TVs often have multiple input sources, and the audio settings may need to be configured separately from the video settings.
Here is what to check on your TV:
- Ensure the correct input is selected on your TV using the remote control
- Check the audio settings menu on your TV for any HDMI audio options
- Disable any internal speakers if you are using a soundbar or external speakers
- Check for firmware updates on your TV, as outdated firmware can cause HDMI audio issues
- Verify that the HDMI port you are using supports audio – some older TVs have HDMI ports that only support video
Many modern TVs also have a feature called CEC (Consumer Electronics Control) that allows devices connected via HDMI to control each other. Enabling CEC on your TV can sometimes resolve audio issues and also allows you to control the TV volume using your laptop keyboard. Check your TV’s settings menu for CEC, Bravia Sync (Sony), Anynet+ (Samsung), or SimpLink (LG) settings.
Step 6: Update Audio and Graphics Drivers
Outdated or corrupted drivers are one of the most common causes of HDMI audio problems. Both your graphics driver and audio driver need to be working correctly for HDMI audio to function.
Updating NVIDIA Graphics Drivers
- Visit the NVIDIA GeForce Experience website or open the application
- Go to the “Drivers” tab
- Click “Check for Updates”
- Download and install any available updates
- Restart your computer after installation
Updating AMD Graphics Drivers
- Open AMD Radeon Software
- Click on the Settings (gear icon)
- Select “Check for Updates”
- Install any available updates and restart your computer
Updating Intel Graphics Drivers
- Visit the Intel Driver & Support Assistant website
- Download and run the assistant tool
- Follow the prompts to update your Intel graphics driver
- Restart your computer after the update
In addition to graphics drivers, you should also check your audio drivers. Open Device Manager (right-click the Start button and select “Device Manager”), expand the “Sound, video and game controllers” section, and right-click on your audio device to check for driver updates.
Step 7: Advanced Troubleshooting
If you have tried all the steps above and are still experiencing HDMI audio issues, here are some advanced troubleshooting methods:
Run the Audio Troubleshooter
Windows includes a built-in audio troubleshooter that can automatically detect and fix common audio problems:
- Open Settings and go to System > Troubleshoot
- Click on “Other troubleshooters”
- Find “Audio” and click “Run”
- Follow the on-screen instructions
Restart the Audio Service
Sometimes the Windows Audio service can become unresponsive. Restarting it can resolve HDMI audio issues:
- Press Windows + R to open the Run dialog
- Type services.msc and press Enter
- Find “Windows Audio” in the list
- Right-click on it and select “Restart”
- Do the same for “Windows Audio Endpoint Builder”
Disable HDMI Sound and Re-enable It
Sometimes simply disabling and re-enabling the HDMI audio device can fix the problem:
- Open Device Manager
- Expand “Sound, video and game controllers”
- Right-click on your HDMI audio device
- Select “Disable device”, wait 10 seconds, then select “Enable device”
Check for Windows Updates
Microsoft frequently releases updates that fix audio and display issues. Make sure your Windows is fully updated by going to Settings > Windows Update > Check for updates.
Step 8: Using External Speakers With HDMI
If you want to use external speakers or a soundbar instead of your TV’s built-in speakers, you have several options. The most common approach is to connect your speakers to the TV’s audio output (optical, 3.5mm, or Bluetooth) rather than trying to route audio back from the TV to your laptop.
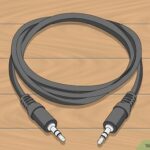
Alternatively, you can connect your speakers directly to your laptop’s headphone jack or USB port while still using HDMI for video only. This gives you more control over audio quality and volume, and is particularly useful if your TV’s speakers are not very good.
Some users also prefer to use a direct laptop-to-TV connection without HDMI when they want to use Bluetooth or other wireless audio methods. This approach can work well for streaming audio while keeping video on the big screen.
HDMI Audio Settings Comparison by Operating System
| Feature | Windows 10 | Windows 11 | macOS |
|---|---|---|---|
| Settings Location | System > Sound | System > Sound | System Settings > Sound |
| Volume Control | Keyboard or Taskbar | Keyboard or Taskbar | TV Remote Only |
| Troubleshooter | Built-in | Built-in | Not Available |
| Audio Enhancements | Available | Available (may cause issues) | Not Available |
| Multi-Output Support | Limited | Improved | Via Audio MIDI Setup |
| CEC Support | Partial | Partial | Full |
Frequently Asked Questions
Why is there no sound when I connect my laptop to my TV via HDMI?
The most common reason is that your operating system has not switched the audio output to the HDMI device. Go to your sound settings and select the TV or HDMI output as the default playback device. If the TV does not appear in the list, check your HDMI cable connection and ensure your graphics drivers are up to date.
Does HDMI always carry audio?
Yes, HDMI is designed to carry both video and audio signals. However, very old HDMI cables (pre-1.4) or certain adapters may only support video. Additionally, some older TVs have HDMI ports that do not support audio input. Always use HDMI 1.4 or newer cables for guaranteed audio support.
Can I control TV volume from my laptop when using HDMI?
On Windows, you can usually control the volume using your keyboard volume keys or the volume slider in the taskbar. On macOS, you typically cannot control the volume from the laptop and must use your TV remote. This is a limitation of how macOS handles HDMI audio output.
Why does audio work but sound crackly or distorted?
Crackling or distorted audio over HDMI can be caused by several issues: a damaged or low-quality HDMI cable, interference from other devices, incorrect audio format settings, or outdated drivers. Try using a different HDMI cable, updating your drivers, and checking that the audio format in your sound settings is set to a compatible format (such as 16-bit, 44100 Hz).
Do I need to install any special software for HDMI audio?
Generally, no special software is required. Windows and macOS both have built-in HDMI audio support. However, you may need to install or update your graphics drivers (NVIDIA, AMD, or Intel) to ensure the HDMI audio driver is properly configured. These drivers are typically available from the graphics card manufacturer’s website.
Can I use HDMI audio and laptop speakers at the same time?
By default, Windows will switch all audio to the HDMI output when you select it. However, you can use the “Stereo Mix” feature or third-party software like VoiceMeeter to split audio between HDMI output and laptop speakers simultaneously. On macOS, you can use the Audio MIDI Setup utility to create a multi-output device.
What should I do if my TV is not detected as an audio device?
If your TV does not appear in the list of audio devices, try these steps: unplug and reconnect the HDMI cable, restart your laptop, update your graphics drivers, try a different HDMI port on the TV, or use a different HDMI cable. If none of these work, your TV’s HDMI port may not support audio input, and you may need to use a separate audio cable.
Is there a difference between HDMI ARC and regular HDMI for audio?
Yes. HDMI ARC (Audio Return Channel) is a feature that allows the TV to send audio back through the HDMI cable to an external device like a soundbar or receiver. For laptop-to-TV connections, regular HDMI is sufficient for sending audio from the laptop to the TV. HDMI ARC is more relevant when you want to use external audio equipment with your TV.
Why did HDMI audio stop working after a Windows update?
Windows updates can sometimes change audio settings or install incompatible drivers. If HDMI audio stopped working after an update, try rolling back your audio driver, running the Windows audio troubleshooter, or reinstalling your graphics drivers. Check our guide on getting sound from laptop to TV with HDMI for more troubleshooting steps.
For more laptop audio troubleshooting guides and PC tips, explore our other articles on audio connectivity and display setup solutions.