How to Install SSD in Alienware Aurora R12 (2026 Complete Guide)
Last updated: July 19, 2026 | Estimated reading time: 14 minutes
The Alienware Aurora R12 is a powerful gaming desktop that was released in 2021, featuring Intel’s 11th-gen Rocket Lake processors and a unique chassis design. If you own an Aurora R12 and want to add more storage or upgrade your existing drive to a faster SSD, you are in the right place. In this comprehensive guide, we will walk you through everything you need to know about installing an SSD in the Alienware Aurora R12 in 2026 — from identifying compatible drives and gathering the right tools, to step-by-step installation, BIOS configuration, and cloning your operating system.
The Aurora R12 supports multiple storage configurations, including both M.2 NVMe SSDs and 2.5-inch SATA SSDs. Whether you want to add a second drive for extra game storage or replace your boot drive with a faster NVMe SSD, this guide covers all the scenarios. The Aurora R12’s chassis has a somewhat unique internal layout compared to standard ATX cases, so understanding the specific mounting points and cable routing is essential before you begin.
Table of Contents
- Compatible SSD Types
- Tools Needed
- Step-by-Step Installation
- BIOS Configuration
- Cloning Your Operating System
- Common Mistakes
- FAQ
- Conclusion
Compatible SSD Types
Before you purchase an SSD for your Aurora R12, it is important to know exactly which types of drives are compatible. The Aurora R12 supports two main form factors: M.2 NVMe SSDs that install directly on the motherboard, and 2.5-inch SATA SSDs that mount in the drive bay. Here is a detailed breakdown of compatible drives:
| SSD Type | Interface | Max Speed | Aurora R12 Slots | Notes |
|---|---|---|---|---|
| M.2 NVMe PCIe 3.0 | PCIe 3.0 x4 | 3,500 MB/s | 2 M.2 slots | Best compatibility; works in both slots without BIOS update |
| M.2 NVMe PCIe 4.0 | PCIe 4.0 x4 | 7,000 MB/s | 2 M.2 slots | Compatible but limited to PCIe 3.0 speeds on B560 chipset |
| M.2 SATA | SATA III | 550 MB/s | 1 M.2 slot (slot 2 supports SATA) | Check manual — not all M.2 slots support SATA mode |
| 2.5-inch SATA SSD | SATA III | 550 MB/s | 2 SATA bays | Requires SATA data cable and SATA power from PSU |
If you are wondering about which M.2 slot to use, check out our detailed guide on does it matter which M.2 slot I use, which explains the differences between primary and secondary M.2 slots on modern motherboards.
Tools Needed
The Aurora R12 is relatively easy to work with, and you will not need many tools. Here is what you should have on hand:
Phillips Head Screwdriver (#1 or #2): This is the primary tool you will need. The Aurora R12 uses standard Phillips screws for the side panel and for securing M.2 drives. A #1 Phillips is ideal for M.2 screws, while a #2 is better for the case screws. If you only have one, a #2 will work for both, but be careful with the small M.2 screws.
Anti-static wrist strap (recommended): While not strictly required, an anti-static wrist strap protects your components from electrostatic discharge, which can damage sensitive electronics. If you do not have one, make sure to touch a grounded metal surface before handling components, and avoid working on carpet.
Plastic spudger or flat-head screwdriver: Useful for gently prying open clips or moving cables out of the way. The Aurora R12 has several cable clips inside the chassis that may need to be moved to access the M.2 slots.
Cable ties or Velcro straps: If you are adding a 2.5-inch SATA SSD, you will need to route the SATA data and power cables. Cable ties help keep things tidy inside the case.
USB drive or external hard drive (for cloning): If you plan to clone your existing drive to the new SSD, you will need a bootable USB drive with cloning software, or an external drive to temporarily store data during the migration.
Step-by-Step Installation
Step 1: Power Down and Open the Case
Shut down your Aurora R12 completely and unplug the power cord from the back. Press and hold the power button for 10-15 seconds to discharge any residual power in the system. This is an important safety step that protects both you and the components.
The Aurora R12’s side panel is secured with a single thumbscrew at the back of the case. Remove this screw and slide the side panel toward the back of the case to remove it. Set the panel aside in a safe place. You will now have access to the interior of the system.
Step 2: Locate the M.2 Slots
The Aurora R12’s motherboard has two M.2 slots. The primary M.2 slot (M.2_1) is located just below the CPU socket and above the first PCIe x16 slot. This is the slot you should use for your boot drive. The secondary M.2 slot (M.2_2) is located below the first PCIe x16 slot, between the two PCIe x16 slots. Both slots support M.2 2280 form factor drives.
Look for the M.2 heatsink — the Aurora R12 includes a small heatsink covering one or both M.2 slots. If there is a heatsink, you will need to remove it to access the slot. The heatsink is typically secured with one or two small Phillips screws. Remove these screws carefully and set the heatsink aside. You may need to peel off a thermal pad protector if you are installing a new drive.
Step 3: Install the M.2 SSD
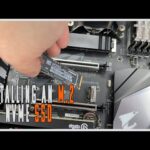
Take your M.2 SSD and align the connector end with the M.2 slot on the motherboard. The SSD should have a small notch on the connector that matches a key in the slot — this ensures correct orientation. Insert the SSD at approximately a 30-degree angle into the slot. The drive should slide in smoothly without excessive force.
Once the SSD is fully inserted into the slot, gently push it down flat against the motherboard. The SSD will have a small semicircular cutout at the opposite end from the connector. This cutout aligns with a standoff on the motherboard. Secure the SSD with the small M.2 screw that came with your motherboard or the SSD. Tighten the screw until it is snug — do not overtighten, as you can crack the SSD’s PCB.
If you removed a heatsink in the previous step, reattach it now. Make sure the thermal pad on the heatsink makes good contact with the top of the SSD. If the thermal pad has a plastic protector, remove it before reattaching the heatsink.
Step 4: Install a 2.5-inch SATA SSD (Optional)
If you are adding a 2.5-inch SATA SSD in addition to or instead of an M.2 drive, you will need to mount it in one of the Aurora R12’s drive bays. The Aurora R12 has a drive cage that can accommodate 2.5-inch drives. Locate the drive cage — it is typically in the lower front portion of the case.
Slide the 2.5-inch SSD into the drive bay and secure it with the mounting screws. Then connect a SATA data cable from the SSD to one of the SATA ports on the motherboard. Finally, connect a SATA power cable from the power supply to the SSD. Route the cables neatly and use cable ties to keep them out of the way of fans and other components.
Step 5: Close the Case and Power On
Double-check all connections and make sure no cables are loose or obstructing fans. Replace the side panel by sliding it forward until it clicks into place, then secure it with the thumbscrew. Reconnect the power cord and any peripherals you disconnected.
Power on the system and immediately press F2 to enter the BIOS setup. If the BIOS does not detect your new SSD, power off and check the physical installation. A properly installed M.2 SSD should appear in the BIOS under the storage configuration section.
BIOS Configuration
After physically installing your SSD, you need to configure the BIOS to recognize and boot from the new drive. Here is how to do it on the Aurora R12:
Entering BIOS
Power on your Aurora R12 and immediately press the F2 key repeatedly until the BIOS setup screen appears. If you miss the window, the system will continue to boot normally — simply restart and try again. You can also access the BIOS from Windows by going to Settings > Update & Security > Recovery > Advanced Startup > Restart Now, then selecting UEFI Firmware Settings.
Verifying the SSD is Detected
Navigate to the System Information or Storage section in the BIOS. You should see your new SSD listed along with any existing drives. The BIOS will display the drive’s model name, capacity, and interface (PCIe or SATA). If the drive is not listed, power off and recheck the physical installation.
Setting the Boot Order
If you installed the SSD as your new boot drive (either as a fresh install or a clone), you need to set it as the primary boot device. Navigate to the Boot Sequence or Boot Order section in the BIOS. Move your new SSD to the top of the boot priority list. If you are cloning your existing drive, you may want to temporarily set the new SSD as the first boot device, then change it back after verifying the clone was successful.
AHCI Mode
Make sure the SATA mode is set to AHCI (Advanced Host Controller Interface) in the BIOS. This is the standard mode for SSDs and enables features like NCQ (Native Command Queuing) that improve performance. The Aurora R12 defaults to AHCI mode, but if someone has changed it to IDE or RAID mode, you should switch it back to AHCI for optimal SSD performance.
To learn more about optimizing your storage setup, see our guide on how to make SSD main drive, which covers the process of migrating your OS to a new SSD in detail.
Cloning Your Operating System
If you want to use your new SSD as your boot drive without reinstalling Windows, you will need to clone your existing drive. Cloning creates an exact copy of your current drive, including the operating system, applications, settings, and files, on the new SSD.
Choosing Cloning Software
Several excellent cloning tools are available in 2026. Macrium Reflect Free (now called Macrium Reflect) is one of the most popular and reliable options. Clonezilla is a free, open-source alternative that is more technical but very powerful. Samsung’s Data Migration tool is excellent if you are cloning to a Samsung SSD. Western Digital’s Acronis True Image is available free for WD and SanDisk SSDs.
Cloning Process
Connect both your old drive and new SSD to the system. If you are cloning to an M.2 drive, it should already be installed in the second M.2 slot. If you are cloning to a 2.5-inch SATA SSD, connect it via a SATA cable before booting.
Boot into Windows and launch your cloning software. Select your current drive as the source and the new SSD as the destination. Most cloning software will give you the option to resize partitions — if your new SSD is larger than the old drive, you can expand the partitions to use the extra space. If the new SSD is smaller, you will need to make sure the used space on the old drive fits on the new one.
Start the cloning process. This can take anywhere from 15 minutes to over an hour, depending on the amount of data and the speed of both drives. Do not interrupt the process or let the system go to sleep during cloning.
Post-Clone Steps
After cloning is complete, shut down the system. If you cloned to a secondary M.2 slot, you can either remove the old drive and move the new drive to the primary slot, or simply change the boot order in the BIOS to boot from the new drive. Boot into Windows from the new SSD and verify that everything is working correctly — check that your files, applications, and settings are all present.
For information about adding a second drive for extra storage, see our guide on can you install 2 SSDs, which covers multi-drive configurations in detail.
Common Mistakes
Here are the most common mistakes people make when installing an SSD in the Aurora R12, and how to avoid them:
Mistake 1: Not Discharging Power. Failing to unplug the power cord and hold the power button before opening the case can leave residual power in the system, which increases the risk of short circuits and component damage. Always discharge before working inside the case.
Mistake 2: Forcing the M.2 SSD. An M.2 SSD should slide into the slot easily at an angle. If you feel significant resistance, the drive is likely not aligned correctly. Pull it out, check the orientation, and try again. Forcing an M.2 SSD can damage both the drive and the slot.
Mistake 3: Not Removing the Thermal Pad Protector. If your M.2 slot has a heatsink with a thermal pad, the pad will have a thin plastic protector on it. Forgetting to remove this protector before installing the heatsink defeats the purpose of the thermal pad and can cause the SSD to overheat.
Mistake 4: Installing the Boot Drive in the Wrong Slot. While both M.2 slots should work for booting, it is best practice to install your boot drive in the primary M.2 slot (M.2_1, closest to the CPU). This ensures the fastest connection and best compatibility. Check your motherboard manual to confirm which slot is primary.
Mistake 5: Forgetting to Change Boot Order. After installing a new SSD and cloning your OS, you need to change the boot order in the BIOS. If you do not, the system may continue to boot from the old drive, and you will not see any improvement in speed. Enter the BIOS and set the new SSD as the first boot device.
Mistake 6: Not Updating the BIOS. Dell periodically releases BIOS updates for the Aurora R12 that improve storage compatibility and fix bugs. If your new SSD is not being detected, check Dell’s support website for the latest BIOS update for your system. BIOS updates are free and can resolve many compatibility issues.
FAQ
How many SSDs can the Aurora R12 hold?
The Alienware Aurora R12 can hold up to four storage drives: two M.2 NVMe SSDs installed directly on the motherboard and two 2.5-inch SATA drives in the drive bays. Some configurations may also support a 3.5-inch hard drive in addition to the 2.5-inch bays, depending on the specific configuration you purchased.
Can I use a PCIe 4.0 NVMe SSD in the Aurora R12?
Yes, PCIe 4.0 NVMe SSDs are physically compatible with the Aurora R12’s M.2 slots. However, the B560 chipset only supports PCIe 3.0 for M.2 drives, so the drive will be limited to PCIe 3.0 speeds (approximately 3,500 MB/s). You can still use a PCIe 4.0 drive — it will work fine — but you will not get the full speed advantage.
Do I need to reinstall Windows after installing a new SSD?
No, you do not need to reinstall Windows. You can clone your existing drive to the new SSD using cloning software like Macrium Reflect or Samsung Data Migration. This creates an exact copy of your Windows installation on the new drive, including all your files, applications, and settings.
What M.2 screw size does the Aurora R12 use?
The Aurora R12 uses standard M.2 mounting screws, typically M2x3mm or M2x4mm. The exact size depends on the standoff height used on the motherboard. If you lost the original screw, any M.2 mounting screw kit will work — they are widely available online for a few dollars.
Can I install an SSD without removing the GPU?
It depends on which M.2 slot you are using. The primary M.2 slot (M.2_1) is accessible without removing the GPU. The secondary M.2 slot (M.2_2) may be partially obscured by the GPU in some configurations. If you have difficulty accessing the secondary slot, you may need to remove the GPU temporarily by unscrewing its mounting bracket and disconnecting the power cables.
How do I know if my SSD is running at full speed?
You can verify your SSD’s speed using benchmark software like CrystalDiskMark. Download and install CrystalDiskMark, run the test, and compare the results to the SSD’s rated speeds. If the speeds are significantly lower than expected, check that the SSD is in the correct slot and that the BIOS is configured for AHCI mode.
Will adding an SSD improve my gaming performance?
Yes, an SSD significantly improves game loading times compared to a hard drive. Games that take 30-60 seconds to load on an HDD will typically load in 5-15 seconds on an NVMe SSD. However, an SSD does not improve in-game frame rates or graphics performance — those are determined by your GPU and CPU.
Is it worth upgrading to NVMe over SATA in the Aurora R12?
If you are upgrading from a hard drive, both SATA and NVMe SSDs will provide a massive improvement. If you are choosing between SATA and NVMe for a new install, NVMe is worth the small additional cost because it offers significantly faster sequential read/write speeds (3,500 MB/s vs 550 MB/s). For gaming and general use, the difference in real-world performance is moderate, but for file transfers and applications that read large files, NVMe is noticeably faster.
Conclusion
Installing an SSD in the Alienware Aurora R12 is a straightforward process that can significantly improve your system’s performance. Whether you are adding a secondary drive for extra game storage or replacing your boot drive with a fast NVMe SSD, the Aurora R12’s internal layout makes the installation relatively painless. The key steps are identifying compatible drives, using the right tools, installing the drive correctly, configuring the BIOS, and optionally cloning your operating system.
The Aurora R12 may be a few years old now, but it remains a capable gaming desktop that benefits greatly from SSD upgrades. With two M.2 slots and two SATA bays, you have plenty of room to expand your storage. Just remember to check compatibility, update your BIOS if needed, and test everything before closing up the case. With a new SSD installed, your Aurora R12 will feel like a brand-new machine.