How to Read M.2 SSD (2026 Complete Guide)
Last updated: July 19, 2026 | Estimated reading time: 15 minutes
M.2 SSD drives have become the standard for fast storage in modern computers, offering incredible read and write speeds in a compact form factor. Whether you have just installed a new M.2 SSD, want to access data from an old M.2 drive, or are trying to read an M.2 SSD from another computer, understanding how to properly read these drives is essential. This comprehensive guide covers every method for reading M.2 SSDs, from installing them in your computer to using external enclosures and adapter cards. We will also cover the different types of M.2 SSDs (SATA vs NVMe), compatibility considerations, and troubleshooting steps when your M.2 drive is not being detected. By the end of this article, you will be able to access data on any M.2 SSD regardless of the situation.
Table of Contents
- Understanding M.2 SSD Technology
- M.2 SATA vs NVMe: Key Differences
- M.2 Form Factors and Keying
- Installing an M.2 SSD in Your Computer
- Reading M.2 SSD in BIOS
- Reading M.2 SSD in Windows
- Using Disk Management for M.2
- Reading M.2 SSD with External Enclosure
- Using M.2 to PCIe Adapter Cards
- Cloning Data to and from M.2 SSDs
- Recovering Data from M.2 SSDs
- Frequently Asked Questions
Understanding M.2 SSD Technology
M.2 is a specification for internally mounted storage devices that was originally known as the Next Generation Form Factor (NGFF). The M.2 standard was designed to replace the older mSATA format and provides a more versatile, compact, and higher-performance interface for solid-state drives. M.2 SSDs connect directly to the motherboard via either the SATA interface or the faster NVMe (Non-Volatile Memory Express) protocol over PCIe lanes.
The key advantage of M.2 SSDs over traditional 2.5-inch SATA SSDs is their connection method. While 2.5-inch SSDs connect via a SATA cable that goes through the motherboard’s SATA controller, M.2 SSDs connect directly to the motherboard’s M.2 slot. This direct connection eliminates the bottleneck of the SATA interface and, in the case of NVMe drives, provides much higher bandwidth through PCIe lanes.
M.2 SSDs are commonly found in laptops and desktops as either the primary storage drive or as additional storage. Many modern motherboards include one or more M.2 slots, and some high-end motherboards support up to four M.2 drives. Understanding how to read and access these drives is essential for data transfer, system upgrades, and troubleshooting.
M.2 SATA vs NVMe: Key Differences
One of the most important distinctions when working with M.2 SSDs is the difference between SATA and NVMe variants. Despite having the same physical form factor, these two types use different interfaces and offer vastly different performance levels.
M.2 SATA SSDs use the SATA III interface, which provides a maximum theoretical speed of 6 Gbps (approximately 600 MB/s). These drives are compatible with any M.2 slot that supports SATA and are typically less expensive than NVMe drives. They are a good choice for users who need faster storage than a traditional hard drive but do not need the extreme speeds of NVMe. Popular models include the Samsung 860 EVO M.2 and the Crucial MX500 M.2.
M.2 NVMe SSDs use the PCIe interface and the NVMe protocol, which was specifically designed for flash storage. NVMe drives can achieve read speeds of 3,500 MB/s on PCIe Gen 3 and up to 7,000 MB/s or more on PCIe Gen 4, with PCIe Gen 5 drives pushing even higher. These drives are ideal for demanding applications like video editing, gaming, and professional workstation use. Popular models include the Samsung 970 EVO Plus, WD Black SN850X, and Crucial P5 Plus.
| Feature | M.2 SATA | M.2 NVMe |
|---|---|---|
| Interface | SATA III | PCIe (Gen 3/4/5) |
| Max Sequential Read | ~550 MB/s | 3,500-12,000 MB/s |
| Max Sequential Write | ~520 MB/s | 3,000-10,000 MB/s |
| Protocol | AHCI | NVMe |
| Typical Price (1TB) | $60-90 | $80-150 |
| Best For | Budget builds, everyday use | Gaming, content creation, pro work |
M.2 Form Factors and Keying
M.2 drives come in several physical sizes and keying configurations. The most common size for consumer SSDs is 2280, which measures 22mm wide and 80mm long. Other sizes include 2230 (22mm x 30mm), 2242 (22mm x 42mm), 2260 (22mm x 60mm), and 22110 (22mm x 110mm). The 2280 size is by far the most widely used and is supported by virtually all modern motherboards.
The “keying” of an M.2 drive refers to the notch pattern on the connector edge, which determines which interface the drive uses. M.2 SATA drives typically have a B+M key (notches on both sides), while NVMe drives have an M key (notch on one side). Some NVMe drives are B+M keyed for backward compatibility, but they will only operate at SATA speeds in a SATA slot.
Understanding keying is important because it determines which M.2 slot on your motherboard will accept which type of drive. A SATA M.2 drive will not work in an NVMe-only slot, and an NVMe drive will not work in a SATA-only M.2 slot. However, many motherboards have M.2 slots that support both SATA and NVMe drives, automatically detecting the drive type and configuring the appropriate interface.
Installing an M.2 SSD in Your Computer
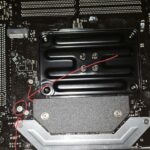
Installing an M.2 SSD in a desktop computer is a straightforward process. First, power off the computer and disconnect the power cable. Open the case by removing the side panel screws. Locate the M.2 slot on the motherboard — it is usually situated between the CPU socket and the first PCIe x16 slot, or near the chipset heatsink. Some motherboards have the M.2 slot covered by a heatsink, which you will need to remove first.
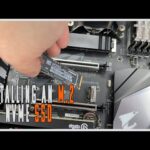
To install the M.2 drive, insert it into the slot at approximately a 30-degree angle. The connector edge should slide firmly into the slot. Once inserted, gently push the drive down flat against the motherboard and secure it with the mounting screw or standoff provided with your motherboard. Some motherboards use tool-less mounting mechanisms that do not require screws.
After installation, close the computer case, reconnect the power cable, and power on the system. Enter the BIOS by pressing F2 or Del during startup to verify that the M.2 drive is detected. If the drive appears in the BIOS, boot into Windows and proceed with initialization as described in the next sections.
For laptops, the installation process varies by model. Some laptops have an accessible M.2 slot under a panel on the bottom, while others require removing the entire bottom case. Consult your laptop’s service manual for specific instructions. Dell laptops typically have detailed service manuals available on the Dell Support website using your laptop’s Service Tag.
Reading M.2 SSD in BIOS
The first step in ensuring your M.2 SSD can be read is to verify that the BIOS detects it. Power on your computer and enter the BIOS setup by pressing the appropriate key during startup. For Dell computers, this is typically F2. For other manufacturers, it may be F2, Del, F12, or Esc — consult your motherboard manual for the correct key.
In the BIOS, navigate to the storage information section. This may be labeled as “Storage,” “SATA Configuration,” “NVMe Configuration,” or similar. Your M.2 drive should appear in the list of detected storage devices, showing its model name, capacity, and interface type. If the drive does not appear, there are several troubleshooting steps you can try.
First, ensure the M.2 drive is properly seated in its slot. Remove the drive, inspect the connector for damage, reinsert it firmly, and secure it. Second, check that the correct M.2 slot is being used — some slots on the motherboard may be disabled by default or may only support SATA or NVMe drives. Consult your motherboard manual to identify which slots support your drive type.
Third, update your BIOS to the latest version. Manufacturers often release BIOS updates that improve M.2 compatibility and add support for newer drive models. Visit your motherboard or laptop manufacturer’s website to download the latest BIOS version for your specific model.
Reading M.2 SSD in Windows
Once your M.2 SSD is detected in the BIOS, Windows should automatically recognize it. However, a new M.2 drive will not appear in File Explorer until it has been initialized and formatted. To set up a new M.2 drive in Windows, open Disk Management by right-clicking the Start button and selecting “Disk Management” from the context menu, or by pressing Windows + R, typing diskmgmt.msc, and pressing Enter.
When you open Disk Management with a new drive installed, Windows will automatically prompt you to initialize the disk. Choose between MBR (Master Boot Record) and GPT (GUID Partition Table) partition styles. For drives larger than 2TB or for use with UEFI booting, GPT is recommended. For smaller drives or legacy BIOS compatibility, MBR is appropriate. Most modern systems should use GPT.
After initialization, the drive will appear as “Unallocated” space in Disk Management. Right-click the unallocated space and select “New Simple Volume.” Follow the wizard to specify the volume size (use the maximum for a single partition), assign a drive letter, choose the file system (NTFS for Windows), and format the partition. Once formatting is complete, the drive will appear in File Explorer and be ready for use.
If your M.2 drive does not appear in Disk Management even though it is detected in the BIOS, there may be a driver issue. Open Device Manager and check for any devices with warning icons. If the NVMe controller shows a warning, try updating the driver. Right-click the device, select “Update driver,” and choose “Search automatically for drivers.” You can also download the latest NVMe driver from your motherboard manufacturer or from the SSD manufacturer’s website.
Using Disk Management for M.2
Windows Disk Management is the primary tool for managing M.2 SSD partitions. Beyond initial setup, Disk Management allows you to create, delete, resize, and format partitions on your M.2 drive. This flexibility is useful when you want to repartition your drive, convert between MBR and GPT, or troubleshoot partition issues.
To resize a partition on your M.2 drive, right-click the partition in Disk Management and select “Extend Volume” or “Shrink Volume.” Note that you can only extend a partition into adjacent unallocated space to the right. If the unallocated space is not adjacent, you may need to delete and recreate the partition, which will erase all data on that partition.
To convert a disk from MBR to GPT (or vice versa), right-click the disk name (not the partition) in Disk Management and select “Convert to GPT Disk” or “Convert to MBR Disk.” Note that this operation requires that the disk has no partitions — you must delete all volumes first, which erases all data. Back up your data before converting partition styles.
Disk Management also provides useful information about your M.2 drive, including the partition layout, file system, capacity, and free space. The status of each partition is displayed, with “Healthy” indicating normal operation and other statuses indicating potential issues that may need attention.
Reading M.2 SSD with External Enclosure
If you need to read an M.2 SSD that is not installed in a computer — for example, if it came from a laptop that no longer works or you want to transfer data from an old drive — an M.2 external enclosure is the most convenient solution. These enclosures allow you to connect an M.2 SSD to any computer via USB, making the drive accessible as an external storage device.
When choosing an M.2 enclosure, ensure it supports the type of M.2 drive you have. Enclosures are available for both SATA and NVMe M.2 drives, and some support both types. The enclosure should also match the physical size of your drive (most are designed for 2280, but 2230 and 2242 enclosures are also available).
Popular M.2 enclosure options include the Sabrent USB 3.2 Gen 2 NVMe enclosure, the UGREEN M.2 enclosure, and the Sabrent EC-NVME. These enclosures typically support USB 3.2 Gen 2 for speeds up to 10 Gbps, which provides sufficient bandwidth for most NVMe drives. Higher-end enclosures support Thunderbolt 3/4 for even faster transfer speeds.
To use an M.2 enclosure, simply insert your M.2 drive into the enclosure following the manufacturer’s instructions, close the enclosure, and connect it to your computer via USB. The drive should appear in File Explorer as an external storage device. If it does not appear, check Disk Management to see if the drive needs to be initialized and formatted.
Using M.2 to PCIe Adapter Cards
For desktop computers that do not have a free M.2 slot, or for users who want to add an additional M.2 drive, a PCIe adapter card is an excellent solution. These cards plug into a standard PCIe slot on your motherboard and provide one or more M.2 slots. They are available in both SATA and NVMe configurations, and some support both types.
NVMe PCIe adapter cards are the most common and typically provide a single M.2 NVMe slot on a PCIe x4 card. These adapters connect directly to the PCIe lanes on your motherboard, providing full NVMe speeds without any performance loss. Popular options include the StarTech.com PEX4M2E2, the Syba M.2 NVMe adapter, and the ASUS Hyper M.2 x16 card (which supports up to four NVMe drives in RAID).
When using a PCIe adapter, ensure your motherboard has a compatible PCIe slot available. Most NVMe adapters require a PCIe x4 or x16 slot, though they will physically fit in any PCIe slot. Some motherboards may require BIOS configuration to enable PCIe slots for NVMe storage, so check your motherboard manual if the drive is not detected after installation.
For converting an M.2 SATA drive to work in a PCIe slot, you will need a SATA M.2 to PCIe adapter. These adapters are less common because M.2 SATA drives can be converted using USB enclosures more easily. However, a PCIe adapter provides a more permanent solution and does not require an available USB port.
Cloning Data to and from M.2 SSDs
Cloning is the process of creating an exact copy of one drive to another. This is commonly done when upgrading from a smaller drive to a larger M.2 SSD, or when creating a backup of an M.2 drive. Several free and paid tools are available for cloning M.2 SSDs.
Macrium Reflect Free (now Macrium Reflect 8 Free) is one of the most popular free cloning tools. It provides a straightforward interface for selecting source and destination drives, configuring clone options, and executing the clone operation. The software supports both SATA and NVMe M.2 drives and can clone to and from drives of different sizes.
Clonezilla is another free option that is particularly useful for creating drive images rather than direct clones. It boots from a USB drive and operates outside of Windows, which can be beneficial when cloning system drives. However, it has a steeper learning curve than Macrium Reflect.
Samsung Data Migration is a free tool specifically for Samsung SSDs. If you are cloning to a Samsung M.2 SSD, this tool provides a simple, one-click cloning process. It supports NVMe drives and is optimized for Samsung’s hardware.
When cloning to an M.2 SSD, ensure the destination drive has sufficient capacity to hold all data from the source drive. If cloning from a larger drive to a smaller M.2 drive, you may need to shrink partitions on the source drive first. Always back up important data before attempting a clone operation, as cloning is an inherently destructive process for the destination drive.
Recovering Data from M.2 SSDs
If you need to recover data from an M.2 SSD that is no longer accessible — perhaps due to a corrupted file system, accidental formatting, or a failed drive — there are several data recovery options available. It is important to act quickly and avoid writing any new data to the drive, as this can overwrite the data you are trying to recover.
Recuva is a free data recovery tool from Piriform that can recover deleted files from M.2 SSDs. It performs a deep scan of the drive to find recoverable files, even those that have been emptied from the Recycle Bin. While effective for simple file recovery, it may not work for formatted or corrupted drives.
TestDisk and PhotoRec are open-source data recovery tools that are more powerful than Recuva. TestDisk can recover lost partitions and fix boot issues, while PhotoRec focuses on recovering individual files by scanning the drive at the file system level. Both tools work with M.2 SSDs and can recover data from formatted or corrupted drives.
For critical data or physically damaged drives, professional data recovery services may be necessary. Companies like DriveSavers, Ontrack, and Gillware specialize in recovering data from failed SSDs. These services can be expensive (often $500-$1500 or more), but they have specialized tools and clean room facilities for dealing with physically damaged drives.
Frequently Asked Questions
How do I know if my M.2 slot supports NVMe?
Check your motherboard or laptop specifications. The manufacturer’s website or your motherboard manual will specify whether each M.2 slot supports SATA, NVMe, or both. In the BIOS, the storage configuration section usually lists the supported protocols for each M.2 slot. As a general rule, M.2 slots on motherboards made after 2017 typically support NVMe, but always verify before purchasing a drive.
Can I put an NVMe SSD in a SATA M.2 slot?
No, an NVMe SSD will not work in a SATA-only M.2 slot. The electrical interface and protocol are completely different. The physical connector may fit (if both are M-keyed or B+M keyed), but the drive will not be detected or will not function. Always match the drive type to the slot type.
Why is my M.2 SSD not showing up in Windows?
If your M.2 SSD is detected in BIOS but not in Windows, the most common cause is that the drive has not been initialized. Open Disk Management and look for an uninitialized disk. If the drive is not detected in BIOS either, check that it is properly seated in the slot, try a different M.2 slot if available, update your BIOS, or test the drive in another computer to rule out a defective drive.
Do M.2 SSDs need special drivers?
Most M.2 SSDs work with the built-in Windows NVMe and SATA drivers. However, installing the manufacturer’s driver (such as Samsung NVMe Driver or Intel RST) can provide better performance and additional features. These drivers are available for download from the manufacturer’s website and can be installed through Device Manager.
Can I use an M.2 SSD as a boot drive?
Yes, M.2 SSDs are excellent boot drives and are used as such in millions of computers. To boot from an M.2 SSD, install the operating system on it (or clone your existing OS to it), then configure the BIOS to boot from the M.2 drive. For NVMe drives, ensure your BIOS supports NVMe boot (most UEFI BIOSes do). For SATA M.2 drives, standard BIOS boot support is usually sufficient.
How do I transfer data from an old laptop M.2 SSD to a new computer?
The easiest method is to use an M.2 external USB enclosure. Remove the M.2 SSD from the old laptop, insert it into the enclosure, connect it to the new computer via USB, and copy the files. If you want to transfer the entire operating system, use cloning software like Macrium Reflect to clone the old drive to the new computer’s primary drive.
Do M.2 SSDs get hot?
Yes, M.2 NVMe SSDs can get quite hot during sustained read/write operations, sometimes reaching temperatures above 70 degrees Celsius. High temperatures can cause thermal throttling, where the drive reduces its speed to prevent damage. Many motherboards include M.2 heatsinks to help dissipate heat. If your motherboard does not have a built-in heatsink, aftermarket M.2 heatsinks are available for a few dollars.
What is the lifespan of an M.2 SSD?
M.2 SSDs have a limited number of write cycles, measured in TBW (Terabytes Written). Consumer M.2 SSDs typically have TBW ratings ranging from 150 TBW for budget drives to 1,200 TBW for high-end models. For most users, an M.2 SSD will last 5-10 years under normal use. The drive’s health can be monitored using tools like CrystalDiskInfo or the manufacturer’s SSD management software.