How to Overclock i7-9700K (2026 Complete Guide)
The Intel Core i7-9700K remains one of the most popular processors for gaming and productivity builds, even in 2026. With its 8 cores, 8 threads, and unlocked multiplier, it offers excellent overclocking potential for users who want to squeeze extra performance from their system without upgrading to a newer platform. Whether you’re trying to extend the life of your current build or you picked up a 9700K at a great price, overclocking this processor can yield meaningful gains in both gaming frame rates and multi-threaded workloads. In this comprehensive guide, we’ll walk you through everything you need to know about overclocking the i7-9700K, from prerequisites and BIOS settings to stability testing and long-term maintenance.
Table of Contents
- Is Overclocking the i7-9700K Worth It in 2026?
- What You Need Before Overclocking
- BIOS Overclocking Guide (Step-by-Step)
- Intel XTU Method
- Stable Settings Reference Table
- Stress Testing and Validation
- Common Mistakes to Avoid
- Frequently Asked Questions
- Conclusion
Is Overclocking the i7-9700K Worth It in 2026?
The short answer is yes — but with caveats. The i7-9700K was designed with a base clock of 3.6 GHz and a turbo boost of 4.9 GHz on a single core. Most well-cooled examples can reach 5.0-5.2 GHz on all cores with reasonable voltage adjustments. That represents a roughly 5-10% improvement in single-threaded performance and a more substantial gain in sustained multi-threaded workloads where the turbo boost wouldn’t normally maintain its peak frequency.
In gaming scenarios, the uplift is noticeable but not dramatic. Many modern games are GPU-limited rather than CPU-limited, so you may see only a 3-8% improvement in frame rates depending on the title and resolution. However, in CPU-intensive tasks like video encoding, 3D rendering, and compilation, the improvement can be 10-15% or more, which saves meaningful time on long-running tasks.
The main reason to overclock in 2026 is value extraction. If you already own a 9700K, overclocking costs nothing beyond electricity and a decent cooler. It’s free performance. However, if you’re considering buying a 9700K specifically for overclocking, you’d likely be better served by a newer platform that offers more cores, threads, and architectural improvements out of the box.
Before diving into the overclock, it’s worth understanding the warranty implications. Overclocking can technically void your processor warranty if Intel determines that damage resulted from operating outside specifications. You should read our detailed guide on does overclocking void warranty to understand exactly what’s covered and what isn’t.
What You Need Before Overclocking
Overclocking the i7-9700K requires adequate cooling and a compatible motherboard. The Z390 chipset is the ideal platform for overclocking this processor, though Z370 boards with updated BIOS can also work. Budget B360 or H310 boards do not support CPU overclocking at all.
Cooling is the most critical factor. The i7-9700K can consume over 200W when overclocked to 5.0 GHz or beyond, and the stock Intel cooler is completely inadequate for this workload. You need at minimum a high-quality air tower cooler or a 240mm all-in-one liquid cooler. For aggressive overclocks targeting 5.1 GHz or higher, a 280mm or 360mm AIO is recommended.
| Cooling Solution | Max TDP Handling | Overclock Potential | Recommended For |
|---|---|---|---|
| Stock Intel Cooler | ~95W | None (not recommended) | Non-overclocked use only |
| Budget Air Tower (e.g., Hyper 212) | ~150W | Modest (4.8-5.0 GHz) | Entry-level overclock |
| Premium Air Tower (e.g., NH-D15) | ~250W | Good (5.0-5.1 GHz) | Mid-range overclock |
| 240mm AIO Liquid Cooler | ~250W | Good (5.0-5.1 GHz) | Mid-range overclock |
| 280mm/360mm AIO Liquid Cooler | ~350W+ | Excellent (5.1-5.3 GHz) | Aggressive overclock |
| Custom Water Cooling Loop | ~500W+ | Maximum (5.2-5.4 GHz) | Extreme overclock |
You’ll also need a PSU with sufficient wattage and stable voltage delivery. A quality 550W unit is the minimum, but 650W or higher is recommended for overclocked systems, especially if you’re running a high-end GPU. High temperatures from overclocking also affect your GPU, so check our guide on how to lower GPU temp for tips on keeping your entire system cool during overclocked operation.
BIOS Overclocking Guide (Step-by-Step)
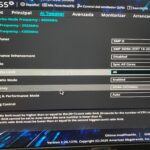
The BIOS method is the most reliable and recommended way to overclock the i7-9700K. It gives you full control over every voltage and frequency setting and persists across reboots without requiring any software to be running.
Step 1: Enter BIOS
Restart your computer and press the Delete key (or F2 on some motherboards) repeatedly during the POST screen to enter BIOS setup. If you’re using an ASUS board, press F2 or Delete. For MSI, press Delete. Gigabyte boards use Delete, and ASRock boards use F2 or Delete. Once in BIOS, switch to Advanced Mode if you’re in EZ Mode — you need access to the full settings.
Step 2: Load Optimized Defaults
Before making any changes, load the optimized default settings. This ensures you’re starting from a known-good configuration. Find the “Load Optimized Defaults” option (usually under the Exit tab or accessible via a keyboard shortcut like F5) and confirm. The system will restart — enter BIOS again.
Step 3: Disable Multi-Core Enhancement (MCE)
Many Z390 motherboards enable Multi-Core Enhancement by default, which forces all cores to run at the maximum turbo frequency regardless of thermal conditions. This can cause instability during overclocking. Find MCE in your CPU settings and disable it. This gives you manual control over the all-core frequency.
Step 4: Set the CPU Ratio
Navigate to the CPU ratio or multiplier setting. For your first overclock, set it to 49 (which gives you 4.9 GHz on all cores). This matches the stock single-core turbo frequency but applies it to all 8 cores simultaneously. Save and exit, then test stability before going higher.
Step 5: Adjust Vcore Voltage
Return to BIOS and find the CPU Vcore or Core Voltage setting. Switch it from Auto to Manual mode. A good starting point for 5.0 GHz is 1.25V, but every chip is different. Some 9700K samples achieve 5.0 GHz at as low as 1.18V, while others need 1.30V or more. Set the voltage conservatively and increase only if the system is unstable.
Step 6: Set Load-Line Calibration (LLC)
Load-Line Calibration compensates for voltage droop under load. On ASUS boards, LLC levels range from 1-7 (where higher means more aggressive compensation). On MSI, it’s a percentage (0-100%). For the 9700K, a medium LLC level (Level 4-5 on ASUS, 50-75% on MSI) provides good voltage stability without overshooting. Too much LLC can cause dangerous voltage spikes.
Step 7: Configure RAM and Other Settings
While overclocking the CPU, it’s also a good time to enable XMP (Extreme Memory Profile) for your RAM to run it at its rated speed. Leave the base clock (BCLK) at 100 MHz — adjusting BCLK affects multiple system components and complicates stability. Set the CPU cache ratio to a conservative value like 45 (4.5 GHz) initially.
Step 8: Save, Test, and Iterate
Save your BIOS settings and boot into Windows. Run a stability test (detailed in the stress testing section below). If the system is stable, return to BIOS and try increasing the multiplier by 1 (to 50 for 5.0 GHz). Repeat the process, testing at each step. If the system crashes, increase the Vcore by 0.01V and test again.
Intel XTU Method
Intel Extreme Tuning Utility (XTU) provides a software-based alternative to BIOS overclocking. This method is less ideal for daily use since settings reset on reboot, but it’s excellent for testing and finding your chip’s limits before committing to BIOS changes.
Download and install Intel XTU from Intel’s official website. Launch the application and you’ll see sliders for CPU Core Ratio, CPU Core Voltage, and other parameters. The interface is intuitive — increase the ratio by 1 multiplier, apply, and run the built-in benchmark to test stability.
XTU has several advantages for beginners. The real-time temperature and voltage monitoring help you understand your chip’s behavior. The benchmark and stress test features let you validate settings immediately. If the system crashes, XTU settings revert to the last stable configuration on the next boot, reducing the risk of being stuck in a boot loop.
The main disadvantage is that XTU overclocking doesn’t persist across reboots. You’d need to reapply settings every time you restart your computer, which is impractical for daily use. Most users use XTU to find stable settings, then transfer those settings to BIOS for permanent application.
For AMD users who might also have Ryzen systems, our guide on how to turn on PBO covers the equivalent automatic overclocking feature for Ryzen processors, which is a useful comparison point.
Stable Settings Reference Table
These are typical stable settings for i7-9700K samples, organized by cooling capability. Your results may vary due to silicon lottery — individual chip quality varies significantly.
| Overclock Profile | All-Core Frequency | Vcore Voltage | LLC Level | Typical Power Draw | Cooling Required |
|---|---|---|---|---|---|
| Conservative | 4.9 GHz | 1.20V – 1.25V | Medium | ~160-180W | Good air tower |
| Moderate | 5.0 GHz | 1.25V – 1.30V | Medium-High | ~190-220W | Premium air or 240mm AIO |
| Aggressive | 5.1 GHz | 1.30V – 1.35V | High | ~220-260W | 280mm+ AIO |
| Extreme | 5.2 GHz+ | 1.35V – 1.40V | High | ~260-300W+ | 360mm AIO or custom loop |
Stress Testing and Validation
Stability testing is non-negotiable when overclocking. A system that crashes during gaming or productivity work is worse than a system running at stock speeds. Use multiple testing tools to validate stability from different angles.
Cinebench R23: Run the multi-core benchmark in a loop for at least 30 minutes. This tests sustained all-core performance and generates significant heat. If your system completes 30 minutes of looping Cinebench without crashing or thermal throttling, it’s a good sign.
Prime95 (Small FFTs): This is the gold standard for CPU stress testing. The Small FFTs test generates maximum heat and stress. Run it for at least 1 hour, monitoring temperatures the entire time. If your CPU stays below 90°C and no workers fail, your overclock is stable under extreme conditions.
AIDA64: The system stability test in AIDA64 stresses CPU, FPU, cache, and memory simultaneously. A 2-hour run without errors provides strong confidence in stability.
Real-world testing: After synthetic benchmarks pass, use your system normally for a few days. Play demanding games, run your typical workloads, and monitor for any instability. Some overclocks pass synthetic tests but fail under specific real-world conditions.
Monitor your temperatures using HWiNFO64, which provides per-core temperature readings, clock speed monitoring, and thermal throttling detection. Keep per-core temperatures below 90°C during stress tests and below 85°C during normal use.
Common Mistakes to Avoid
Ignoring temperatures: High temperatures are the enemy of overclocking. Running your CPU at 95°C+ under load degrades the silicon faster and can cause thermal throttling that negates your overclock. Always monitor temperatures and invest in adequate cooling.
Using too much voltage: More voltage equals more heat and more silicon degradation. The goal is to find the lowest voltage that provides stability at your target frequency. Start low and increase in 0.01V increments rather than starting high and working down.
Skipping stability testing: A system that boots and runs a quick benchmark is not necessarily stable. True stability requires extended stress testing under various workloads. Don’t skip this step.
Not updating BIOS: Motherboard manufacturers release BIOS updates that improve overclocking stability and compatibility. Before overclocking, update to the latest BIOS version for your board.
Forgetting about power delivery: Overclocking the CPU increases power consumption significantly. Ensure your PSU can handle the additional load, especially if you’re also running a high-end GPU. Check our guide on does overclocking void warranty for more context on the risks involved.
Frequently Asked Questions
What is the maximum safe voltage for i7-9700K?
For daily use, keep Vcore below 1.40V. Most experienced overclockers recommend staying under 1.35V for longevity. Voltages above 1.40V are reserved for short benchmark runs and extreme cooling scenarios. The silicon degradation rate increases exponentially with voltage, so lower is always better for long-term use.
Do I need a Z390 motherboard to overclock?
Yes, overclocking the i7-9700K requires a Z390 or Z370 motherboard with an updated BIOS. B360, H370, and H310 chipsets do not support CPU multiplier adjustment. The Z390 chipset is preferred because it natively supports the 9th Gen Intel processors without a BIOS update.
Will overclocking void my Intel warranty?
Intel’s warranty policy is nuanced. The processor has a built-in protection mechanism that should prevent damage from overclocking, but operating outside official specifications technically voids the warranty. Check our detailed article on does overclocking void warranty for the full explanation.
How much performance gain can I expect?
Typically 5-15% depending on the workload. Single-threaded applications see the smallest gains (around 5-8%), while heavily multi-threaded workloads like video rendering can see 10-15% improvements. Gaming performance varies by title and resolution, with CPU-limited scenarios benefiting more than GPU-limited ones.
Can I overclock the i7-9700K on stock cooling?
No. The stock Intel cooler is designed for the processor’s 95W TDP at stock settings. Overclocking increases power consumption well beyond what the stock cooler can handle, leading to thermal throttling and potential damage. A quality aftermarket cooler is mandatory for overclocking.
What if my system crashes after overclocking?
If your system crashes or fails to boot, clear the CMOS by using the jumper on your motherboard or removing the CMOS battery for 30 seconds. This resets all BIOS settings to defaults. Then try again with more conservative settings — lower the multiplier or increase voltage slightly.
Is it better to overclock via BIOS or software?
BIOS is always preferred for permanent overclocking. Software tools like Intel XTU are excellent for testing and finding stable settings, but BIOS overclocking is more reliable since it doesn’t depend on Windows services or background processes. BIOS settings also apply before the operating system loads, ensuring consistent performance.
Should I overclock my cache/Ring ratio too?
Start with the cache at a conservative 4.3-4.5 GHz and leave it there until your core overclock is fully stable. Once stable, you can incrementally increase the cache ratio for a small additional performance boost. The cache is less sensitive to voltage changes than the cores, so it typically requires less tuning.
How long will my CPU last if I overclock?
With conservative voltage settings (under 1.30V) and adequate cooling, a well-overclocked i7-9700K can last 5-10 years or more without issues. Higher voltages and temperatures reduce this timeline. Most users replace their CPU for performance reasons long before overclocking causes hardware failure.
Conclusion
Overclocking the Intel Core i7-9700K in 2026 is a worthwhile endeavor for anyone who already owns the processor and wants to maximize its performance. With proper cooling, careful voltage management, and thorough stability testing, you can achieve a meaningful performance improvement that extends the useful life of your system.
The key principles are straightforward: invest in good cooling, start conservatively, test thoroughly, and don’t chase frequencies that require unsafe voltage levels. The difference between a 5.0 GHz daily driver and a 5.2 GHz benchmark queen is often just 0.05-0.10V, but that small voltage increase can mean the difference between a CPU that lasts a decade and one that degrades in a few years.
For related topics, check our guides on how to lower GPU temperature to keep your entire system cool under overclocked conditions, and how to turn on PBO if you’re also interested in AMD’s automatic overclocking approach.