How to Mount AIO Cooler (2026 Complete Guide)
How to Mount AIO Cooler in 2026: The Complete Step-by-Step Guide
Installing an all-in-one (AIO) liquid cooler is one of the best upgrades you can make for your PC, but mounting it incorrectly can lead to poor cooling performance, excessive noise, or even hardware damage. Whether you are building your first system or switching from air cooling, this guide walks you through everything you need to know about mounting an AIO cooler in 2026 — from choosing the right position in your case to connecting the final fan header. We will cover front mount, top mount, and rear mount configurations, provide a detailed step-by-step installation walkthrough, explain fan orientation, highlight the most common mistakes builders make, and recommend the best AIO coolers available this year.
Table of Contents
- What is an AIO Cooler?
- Front Mount vs Top Mount vs Rear Mount
- Step-by-Step Installation Guide
- Fan Direction Guide
- Common Mistakes to Avoid
- Best AIO Coolers 2026
- Frequently Asked Questions
- Conclusion
What is an AIO Cooler?
An AIO (all-in-one) liquid cooler is a sealed, maintenance-free cooling system that uses liquid to transfer heat away from your CPU. Unlike custom water cooling loops, an AIO comes pre-assembled with a pump, radiator, tubing, and cold plate all integrated into one unit. There is no need to fill, drain, or maintain the coolant — you simply install it and it works.
The way an AIO works is straightforward: the cold plate sits directly on top of your CPU and absorbs heat through a thin layer of thermal paste. The heated liquid then travels through the tubing to the radiator, where fans blow air through the radiator fins to dissipate the heat. The cooled liquid then returns to the cold plate, and the cycle repeats. This continuous loop keeps your CPU temperatures significantly lower than most air coolers, especially under sustained workloads.
In 2026, AIO coolers have become more affordable and reliable than ever. Most major brands now offer 5-year warranties, and the technology has matured to the point where pump failures are rare. Modern AIOs also feature improved cold plate designs with larger contact areas, higher-density radiator fins, and quieter fans with magnetic levitation bearings. If you are running a high-end processor like the Intel Core Ultra 200 series or AMD Ryzen 9000 series, an AIO is often the recommended cooling solution.
Front Mount vs Top Mount vs Rear Mount
One of the first decisions you need to make is where to mount the radiator inside your case. Each position has distinct advantages and trade-offs that affect cooling performance, noise levels, and component clearance. Let us break down all three options.
Front Mount
Mounting the radiator at the front of your case is the most common configuration. The radiator draws cool air from outside the case, passes it through the radiator fins, and exhausts the warmed air into the case interior. This provides excellent CPU cooling because the radiator always gets access to the coolest available air. However, the warmed air from the radiator will slightly increase temperatures for your GPU and other components inside the case.
Front mounting works best for mid-tower and full-tower cases with sufficient front intake space. Most modern cases support 240mm, 280mm, or 360mm radiators in the front position. The main downside is that the tubing length can sometimes make routing difficult, and in some cases the radiator may interfere with long graphics cards.
Top Mount
Top mounting positions the radiator as an exhaust at the top of the case. Since heat rises naturally, this configuration works with the natural convection of warm air. The radiator draws warm air from inside the case and pushes it out through the top panel. This keeps your GPU and other components cooler since the CPU heat is exhausted immediately rather than recirculated.
The trade-off is that the radiator receives pre-warmed air from inside the case rather than cool outside air, which can result in slightly higher CPU temperatures under heavy load. Top mounting also requires sufficient case clearance — you need room between the top of your motherboard and the case’s top panel, especially if you have tall RAM modules or VRM heatsinks.
Rear Mount
Rear mounting is only viable for 120mm or 140mm radiators in most cases, making it suitable for smaller AIOs. The rear fan position typically acts as an exhaust, so the radiator expels hot air directly out the back of the case. This is a clean configuration that keeps the CPU isolated from other heat sources.
However, the smaller radiator size limits cooling capacity. A 120mm rear-mounted AIO may not be sufficient for high-end processors under sustained load. Rear mounting is best suited for compact builds, secondary systems, or CPUs with moderate thermal output.
| Mounting Position | CPU Cooling | GPU Impact | Noise Level | Compatibility | Best For |
|---|---|---|---|---|---|
| Front Mount | Excellent — gets cool outside air | Slightly warmer — warm air enters case | Low to Medium | 240mm, 280mm, 360mm | Most builds, best overall CPU temps |
| Top Mount | Good — uses case air | None — GPU gets cool front intake air | Low to Medium | 240mm, 280mm, 360mm | GPU-heavy builds, gaming rigs |
| Rear Mount | Moderate — limited radiator size | None | Medium | 120mm, 140mm only | Compact builds, lower-TDP CPUs |
Step-by-Step Installation Guide
Before you begin, gather the following tools and materials: a Phillips-head screwdriver (usually #2), thermal paste (if not pre-applied on the AIO), isopropyl alcohol (90% or higher), lint-free cloth, and your AIO cooler with all included mounting hardware. Make sure your system is powered off and unplugged from the wall outlet.
Step 1: Prepare Your Case
Remove both side panels of your case. If you plan to front-mount the radiator, remove the front panel and any pre-installed fans in the mounting positions. For top mounting, remove any top dust filters or fan brackets. Identify the mounting holes that match your radiator size (120mm spacing for 120/240/360mm radiators, 140mm spacing for 140/280mm radiators).
Step 2: Install the Backplate
Most AIO coolers require a backplate to be installed on the rear of the motherboard. Place the backplate against the back of the motherboard, aligning the standoffs with the mounting holes around the CPU socket. Secure it with the provided screws or adhesive pads. For Intel LGA 1700 and AMD AM5 platforms, the backplate design differs, so make sure you are using the correct brackets included with your cooler.
Step 3: Mount the Radiator and Fans
If you are using a push configuration (fans pushing air through the radiator), attach the fans to the radiator first with the long screws provided. The fan’s open side (intake) should face the case exterior, and the side with the fan hub and support struts should face the radiator. Then position the radiator assembly in your chosen mounting location and secure it with the short screws provided.
Step 4: Apply Thermal Paste
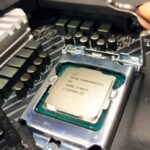
If your AIO cold plate does not come with pre-applied thermal paste, apply a small amount (roughly the size of a pea) to the center of the CPU’s integrated heat spreader (IHS). Do not spread it manually — the mounting pressure of the cold plate will spread it evenly. If your cold plate already has pre-applied paste, skip this step entirely.
Step 5: Mount the Cold Plate
Carefully lower the cold plate onto the CPU, aligning the mounting brackets with the standoffs or screws around the socket. Apply even pressure and tighten the screws in a cross pattern (like tightening lug nuts on a wheel) — do one turn on one side, then the opposite side, alternating until all screws are snug. Do not overtighten, as this can damage the CPU or motherboard.
Step 6: Connect the Pump Header
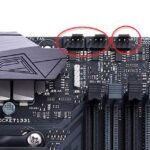
This is a critical step that many builders overlook. The pump needs a constant power supply to operate correctly. Connect the pump power cable to the AIO_PUMP or CPU_OPT header on your motherboard. If your motherboard does not have a dedicated pump header, use the CPU_FAN header. For detailed information on this, see our guide on can you plug an AIO pump into CPU fan header.
Step 7: Connect the Radiator Fans
Connect the radiator fan cables to the CPU_FAN header (if the pump is on a different header) or to a dedicated SYS_FAN header. If your AIO has a built-in fan splitter, you can connect all radiator fans through a single cable. Some premium AIOs in 2026 use a single PWM connector that controls both the pump and fans through one cable.
Step 8: Cable Management
Route all cables behind the motherboard tray where possible. Tuck excess tubing and cables away from fans to prevent any interference. Make sure no cables are resting on the GPU or near any heat-generating components.
Step 9: Test Before Closing
Before putting your side panels back on, plug in the power supply and turn on the system. Enter the BIOS and verify that the pump is running (you should see the pump header reporting speed). Check that all radiator fans are spinning. Monitor CPU temperatures — at idle, you should see temperatures in the 30-40°C range depending on your ambient temperature and CPU model. If the temperatures are abnormally high or the pump is not showing a speed reading, power off and recheck your connections.
Step 10: Close Up and Finalize
Once you have confirmed everything is working, reinstall the side panels. Secure any loose cables with zip ties. Make sure the radiator fans have clear airflow paths and are not obstructed by cables or case panels. Reconnect all peripherals and enjoy your newly cooled system.
Fan Direction Guide
Getting fan direction wrong is one of the most common causes of poor AIO performance. Every fan has an arrow or marking indicating airflow direction — air always flows toward the side with the support struts and motor hub. The open side of the fan frame is the intake side.
Pull Configuration (Recommended for Most Builds)
In a pull configuration, fans are mounted on the interior side of the radiator and pull air through the radiator fins. The fans draw warm case air through the radiator and exhaust it out of the case. This is easier to clean since the dust accumulates on the accessible fan side rather than between the fan and radiator.
Push Configuration
In a push configuration, fans are mounted on the exterior side of the radiator and push outside air through the radiator. This typically provides marginally better cooling (1-3°C difference) because the air going through the radiator is cooler than case air. However, dust accumulation between the fan and radiator makes cleaning more difficult.
Push-Pull Configuration
Some builders mount fans on both sides of the radiator — pushing air in from one side and pulling it out from the other. This maximizes airflow through the radiator but requires additional fans and case clearance. The performance gain over a well-configured push or pull setup is typically small (2-4°C) and may not justify the added cost and complexity for most users.
| Configuration | Fan Position | Airflow Direction | Cooling Performance | Ease of Cleaning |
|---|---|---|---|---|
| Pull | Interior side of radiator | Case air through radiator → out | Very Good | Easy — dust on fan face |
| Push | Exterior side of radiator | Outside air → through radiator → into case | Excellent (+1-3°C) | Harder — dust trapped between |
| Push-Pull | Both sides of radiator | Outside air → through radiator → out | Best (+2-4°C) | Moderate — two fan surfaces |
Common Mistakes to Avoid
Even experienced builders make errors when installing AIO coolers. Here are the most frequent mistakes and how to avoid them:
1. Mounting the Radiator with Tubes at the Bottom (Top Mount)
When you top-mount a radiator and orient the tubes at the bottom, air bubbles accumulate at the pump inlet. This causes the pump to work harder, produces audible gurgling or clicking sounds, and significantly reduces the lifespan of the pump. Always orient the tubes at the top or side when top-mounting.
2. Plugging the Pump into the Wrong Header
If you connect the pump to a chassis fan header that is set to a low-speed curve, the pump may not receive enough power to circulate coolant effectively. This leads to overheating even though the radiator fans are spinning. Always use the AIO_PUMP, CPU_OPT, or CPU_FAN header and set it to run at full speed in the BIOS.
3. Forgetting to Remove the Plastic Protective Film
Many AIO cold plates ship with a clear plastic film protecting the pre-applied thermal paste or the copper contact surface. If you forget to remove this film, it acts as an insulator between the CPU and the cold plate, causing extreme temperatures immediately. Always double-check before mounting.
4. Not Checking Radiator Fan Direction
If you mount all your fans facing the wrong direction, you may end up with fans fighting each other or creating a recirculation loop where hot air is pulled back into the case. Verify fan direction before screwing everything in.
5. Overtightening Mounting Screws
Tightening the cold plate screws too much can crack the CPU’s IHS, bend the motherboard, or damage the cold plate’s micro-fins. Tighten until you feel firm resistance, then stop. The cross-pattern tightening sequence ensures even pressure distribution.
6. Neglecting Case Airflow
An AIO does not replace the need for case airflow. If your case has no intake fans, the radiator has no cool air to work with, and your GPU and VRMs will overheat. Ensure you have a balanced airflow setup with at least one intake and one exhaust fan beyond the AIO radiator fans. For more information, read our article on whether PC cases come with fans.
7. Mounting the AIO Before the Motherboard
In most cases, it is much easier to install the motherboard into the case first, then mount the radiator afterward. Installing the radiator first can block access to motherboard screws, RAM slots, and CPU power connectors.
Best AIO Coolers 2026
The AIO market in 2026 offers excellent options at every price point. Here are our top recommendations based on cooling performance, noise levels, build quality, and value:
| Cooler | Radiator Size | Fan Type | Noise Level | Warranty | Approx. Price |
|---|---|---|---|---|---|
| Arctic Liquid Freezer III 360 | 360mm | 3x P12 PWM (0.3 Sone) | Very Quiet | 6 years | ~$90 |
| NZXT Kraken Elite 360 RGB | 360mm | 3x F120P RGB | Quiet | 6 years | ~$300 |
| Corsair iCUE H150i Elite LCD XT | 360mm | 3x AF120 RGB Elite | Quiet | 5 years | ~$280 |
| DeepCool LS720 SE | 360mm | 3x FK120 | Moderate | 5 years | ~$100 |
| Thermalright Frozen Notte 360 | 360mm | 3x TL-C12C | Quiet | 3 years | ~$55 |
| be quiet! Silent Loop 2 280 | 280mm | 2x Silent Wings 3 | Very Quiet | 3 years | ~$130 |
| Lian Li Galahad II Trinity 240 | 240mm | 2x UNI FAN P28 | Quiet | 5 years | ~$110 |
Frequently Asked Questions
1. Do I need to replace the thermal paste on my AIO?
Most AIO coolers come with pre-applied thermal paste on the cold plate. If you are installing a brand-new AIO, you do not need to add any additional paste. However, if you are remounting an AIO after removing it, you should clean off the old paste with isopropyl alcohol and apply a fresh layer before reinstalling.
2. How long does an AIO cooler last?
Modern AIO coolers are designed to last 5-10 years under normal operating conditions. The most common failure point is the pump, which can degrade over time due to bearing wear. Keep in mind that the liquid inside the sealed unit will very slowly permeate through the tubing over many years, but this is a gradual process that takes longer than the useful life of the cooler for most users.
3. Can I mount an AIO cooler vertically?
Some cases support vertical radiator mounting, typically on the side panel area next to the motherboard. This configuration is less common but can work well in certain layouts. The key consideration is ensuring that the pump is not the highest point in the loop, as air bubbles will collect there. Check your case specifications for side-mounting support before purchasing.
4. Should I worry about coolant evaporation?
AIO coolers are sealed units designed to be maintenance-free. While a minuscule amount of coolant can permeate through the tubing over many years, this is not something you need to worry about within the cooler’s expected lifespan. This is one of the key differences between AIO coolers and custom water cooling loops, which do require periodic coolant top-offs.
5. Is a 240mm AIO enough for an Intel Core i9 or AMD Ryzen 9?
A 240mm AIO can handle a Core i9 or Ryzen 9 for gaming and general use, but for sustained heavy workloads like video rendering, 3D rendering, or compiling large codebases, a 280mm or 360mm radiator is recommended. The larger surface area allows the radiator to dissipate heat more effectively at lower fan speeds, keeping both temperatures and noise levels down.
6. Can I use an AIO cooler in a small form factor (SFF) case?
Yes, many SFF cases support 120mm or 240mm AIO coolers. However, clearance is often tight, so measure your available space carefully before purchasing. Some popular SFF cases like the NR200P Max or the Meshlicious are specifically designed with AIO support in mind. Keep in mind that smaller radiators have less cooling capacity, so pair the AIO with a CPU that fits your thermal needs.
7. Do I need to change any BIOS settings after installing an AIO?
Yes, a couple of BIOS adjustments are recommended. First, set the fan header powering the pump to run at 100% speed or disable the low-speed warning for that header. Second, if your motherboard has a default CPU fan curve, adjust it to work with the radiator fans. Some motherboards have an “AIO mode” or “liquid cooling mode” in the BIOS that automatically configures the correct settings.
8. What is the difference between AIO and custom water cooling?
An AIO is a sealed, pre-assembled unit that you install out of the box with no maintenance required. Custom water cooling uses separate components (pump, reservoir, radiator, tubing, fittings, water block) that you assemble yourself. Custom loops offer better cooling performance, especially for cooling multiple components like both CPU and GPU, but they require significantly more expertise, maintenance, and budget. For most users, an AIO provides the best balance of performance and convenience.
Conclusion
Mounting an AIO cooler in 2026 is more straightforward than ever, thanks to improved mounting systems, universal socket compatibility, and better documentation from manufacturers. The key to a successful installation comes down to three things: choosing the right mounting position for your build, following the correct installation sequence, and connecting the pump to the right motherboard header.
To recap the essentials: front mounting provides the best CPU temperatures since it draws cool outside air; top mounting is ideal for gaming builds where you want to keep GPU temperatures low; and rear mounting works for compact builds with moderate cooling needs. Always ensure your pump is connected to a constant-power header and set to run at full speed in the BIOS. Take your time with the installation, verify everything is working before closing up the case, and you will enjoy years of reliable, quiet cooling.
Whether you choose a budget-friendly option like the Thermalright Frozen Notte 360 or a premium flagship like the NZXT Kraken Elite, properly mounting your AIO is the single most important factor in getting the performance you paid for. Follow the steps in this guide, avoid the common mistakes we covered, and your system will run cool and quiet for years to come.