How to Get Past BIOS Screen (2026 Complete Guide)
Getting stuck at the BIOS screen is one of the most frustrating problems a PC user can encounter. You power on your computer, see the manufacturer logo or BIOS information, and then nothing happens. The system refuses to boot into Windows or any operating system, leaving you staring at a frozen screen with no clear path forward. In 2026, this issue remains one of the most common PC troubleshooting scenarios, and it can be caused by anything from a simple boot order misconfiguration to a failing hard drive or corrupted BIOS settings. This comprehensive guide will walk you through every possible cause and solution for getting past the BIOS screen, whether your PC is stuck in BIOS, loops back to BIOS every time, shows the BIOS screen but will not proceed, or gives you an error message before reaching the operating system. We will cover all major motherboard brands and provide step-by-step solutions that range from basic checks to advanced troubleshooting.
Last updated: July 19, 2026 | Estimated reading time: 14 minutes
Table of Contents
- Common Symptoms and What They Mean
- Fix 1: Check and Correct Your Boot Order
- Fix 2: Disable or Enable Fast Boot
- Fix 3: Check CSM and Secure Boot Settings
- Fix 4: Verify Storage Drive Detection
- Fix 5: Check All Cables and Connections
- Fix 6: Clear CMOS / Reset BIOS to Defaults
- Fix 7: Update or Flash Your BIOS
- Fix 8: Fix Corrupted Operating System
- Fix 9: Diagnose Hardware Failures
- Fix 10: Jumpstart the Motherboard
- Brand-Specific Solutions
- Frequently Asked Questions
Common Symptoms and What They Mean
Before diving into solutions, it helps to understand the different ways a PC can get stuck at the BIOS screen. Each symptom points to a different underlying cause:
PC boots to BIOS automatically every time: This usually indicates that the BIOS cannot find a bootable device. The boot order may be incorrect, the storage drive may have failed, or the operating system may be corrupted. The BIOS drops into its setup screen as a fallback when no bootable device is found.
BIOS screen freezes and does not respond: This could indicate a BIOS corruption, a hardware conflict, or a peripheral device causing issues. Try removing all unnecessary USB devices and see if the BIOS becomes responsive.
PC shows the manufacturer logo but then goes blank: This often indicates a graphics output issue, a display connection problem, or the PC is trying to boot from the wrong device. The system may actually be booting successfully but outputting the display signal to the wrong output.
BIOS shows an error message before proceeding: Common error messages include “No bootable device found,” “Disk boot failure,” “Reboot and select proper boot device,” or “CMOS checksum error.” Each of these has a specific cause and solution that we will cover below.
PC loops between BIOS and a black screen: This cyclical behavior usually indicates a failed or corrupted operating system, a failing storage drive, or a BIOS setting that prevents successful booting.
| Symptom | Most Likely Cause | Difficulty |
|---|---|---|
| Boot to BIOS every time | Boot order or missing OS | Easy |
| BIOS freezes | BIOS corruption or hardware conflict | Medium |
| Blank screen after logo | Display output issue | Easy-Medium |
| Error message in BIOS | Specific configuration issue | Easy-Medium |
| Boot loop | Corrupted OS or failing drive | Medium-Hard |
Fix 1: Check and Correct Your Boot Order
The most common reason a PC gets stuck at the BIOS screen is an incorrect boot order. The boot order tells your PC which device to try booting from first, second, third, and so on. If the first device in the boot order does not contain a bootable operating system, the PC may fall into the BIOS setup screen or display an error message.
Step 1: Enter your BIOS by pressing the appropriate key during startup (Delete, F2, F1, or Escape, depending on your motherboard brand).
Step 2: Navigate to the Boot tab or Boot section in your BIOS.
Step 3: Check the Boot Priority or Boot Order list. Your Windows boot drive (usually labeled as your SSD or HDD model name) should be the first boot device.
Step 4: If your Windows drive is not first in the list, move it to the top position. On most BIOS interfaces, you can drag and drop devices or use +/- keys to reorder them.
Step 5: Also check for a separate “Boot Option Priorities” section. Ensure that “Boot Option #1” is set to your Windows Boot Manager or your primary storage drive.
Step 6: Save changes and exit by pressing F10. Your PC should now attempt to boot from the correct device.
If the boot order was the issue, your PC should boot into Windows normally after this change. If it still goes to BIOS, proceed to the next fix.
Fix 2: Disable or Enable Fast Boot
Fast Boot is a BIOS feature that speeds up the boot process by skipping certain hardware initialization steps. However, Fast Boot can sometimes cause issues, particularly after hardware changes or operating system updates. Toggling Fast Boot can often resolve boot issues.
To disable Fast Boot, enter your BIOS and navigate to the Boot section. Look for options labeled “Fast Boot,” “Ultra Fast Boot,” or “Quick Boot.” Disable this option, save your changes, and restart. If Fast Boot was already disabled, try enabling it instead, as the toggle in either direction can sometimes resolve boot conflicts.
On Windows 10 and 11, Fast Boot (also called Fast Startup) is a separate feature from BIOS Fast Boot. Windows Fast Startup is controlled through Control Panel > Power Options > Choose what the power buttons do. If you are having boot issues, try toggling this setting as well. For detailed instructions, see our guide on how to disable Fast Boot in BIOS on Dell systems, which covers the Dell-specific steps for this feature.
Fix 3: Check CSM and Secure Boot Settings
CSM (Compatibility Support Module) and Secure Boot settings can prevent your PC from booting if they are not configured correctly for your operating system. If your Windows installation was set up in UEFI mode with Secure Boot, disabling CSM is required. If your Windows was installed in Legacy mode, CSM must be enabled.
Step 1: Enter your BIOS and navigate to the Boot or Security section.
Step 2: Find the CSM (Compatibility Support Module) option. If your system was installed with CSM disabled (UEFI mode), ensure CSM is set to Disabled. If it was installed with CSM enabled (Legacy mode), set it to Enabled.
Step 3: If you have recently changed CSM settings, check the Secure Boot setting as well. Secure Boot should generally be enabled for modern Windows installations.
Step 4: If you recently changed from CSM/Legacy to UEFI, you may need to convert your system drive from MBR to GPT using the MBR2GPT tool. If you recently changed from UEFI to CSM/Legacy, you may need to reinstall Windows in Legacy mode.
If you are unsure which mode your Windows installation uses, check in Disk Management. Right-click on your system drive, select Properties, go to the Volumes tab, and look at the Partition style. GPT indicates UEFI mode, while MBR indicates Legacy mode.
Fix 4: Verify Storage Drive Detection
If your BIOS cannot detect your storage drive, it will not find a bootable device and will default to the BIOS setup screen. Here is how to check:
Step 1: Enter your BIOS and navigate to the information or status section (often on the main BIOS page).
Step 2: Look for your storage drives in the list of detected devices. Your SSD or HDD should appear with its model name and capacity.
Step 3: If your drive is not listed, it may be disconnected, failed, or incompatible. Power off your PC, open the case, and check the SATA data cable, SATA power cable, or M.2 mounting to ensure the drive is properly connected.
Step 4: For M.2 NVMe drives, try reseating the drive by removing it from the M.2 slot and inserting it again. Ensure it is firmly seated and secured with the mounting screw.
Step 5: If the drive appears in BIOS but is not booting, try switching SATA ports (for SATA drives) or try a different M.2 slot (for NVMe drives) to rule out a faulty port.
Step 6: If the drive still does not appear, it may have failed. You will need to replace the drive and reinstall your operating system.
Fix 5: Check All Cables and Connections
Power off your PC completely and unplug it from the wall. Open the case and check the following connections:
SATA Data Cables: Ensure both ends of each SATA data cable are firmly connected to the motherboard and the storage drive. Try replacing the cable if you suspect it is damaged.
SATA Power Cables: Verify that the SATA power connector from the PSU is fully seated in the storage drive’s power connector.
M.2 Drives: Check that M.2 drives are properly inserted into their slots and secured with the mounting screw. An improperly seated M.2 drive may be intermittently detected.
24-Pin Motherboard Power: Ensure the large 24-pin ATX power connector is fully inserted into the motherboard. Push firmly until the clip snaps into place.
CPU Power (4/8-Pin): Check the CPU power connector near the top of the motherboard. This connector provides power to the CPU and is essential for booting.
GPU Power: If you have a dedicated graphics card, ensure all required PCIe power connectors are plugged in. Some GPUs require one or two 6+2 pin connectors or a 12VHPWR connector.
Front Panel Connectors: Verify that the front panel power button connector is properly attached to the motherboard. If this connector is loose or misplaced, the power button may not function correctly.
After checking all connections, plug your PC back in and attempt to boot.
Fix 6: Clear CMOS / Reset BIOS to Defaults
If your BIOS settings have become corrupted or misconfigured, clearing the CMOS will reset all BIOS settings to their factory defaults. This can resolve a wide range of boot issues.
Method 1: CMOS Jumper – Power off your PC and unplug it. Locate the CMOS clear jumper on your motherboard (usually labeled CLRTC, CLR_CMOS, or JBAT1). Move the jumper from its normal position (pins 1-2) to the clear position (pins 2-3) for 10-15 seconds, then move it back. Plug in and power on your PC.
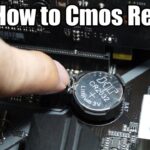
Method 2: CMOS Battery – Power off your PC and unplug it. Remove the coin-cell CMOS battery from the motherboard (usually a CR2032 battery in a small socket). Wait 5-10 minutes for the capacitors to discharge, then reinsert the battery. Plug in and power on.
Method 3: BIOS Reset Button – Some modern motherboards have a dedicated Clear CMOS button on the rear I/O panel. With the PC powered off but still plugged in, press and hold this button for 10-15 seconds. Release the button and power on the PC.
After clearing the CMOS, you will need to re-enter the BIOS and configure your settings, including boot order, date and time, XMP profiles, and any custom settings you previously had.
Fix 7: Update or Flash Your BIOS
An outdated or corrupted BIOS can cause boot issues, especially after hardware changes. Updating your BIOS to the latest version can resolve compatibility problems and bugs.
Step 1: Identify your motherboard model. You can find this in the BIOS itself (usually on the main page), in Windows System Information (msinfo32), or by looking at the motherboard physically.
Step 2: Visit your motherboard manufacturer’s website and navigate to the support page for your specific motherboard model.
Step 3: Download the latest BIOS file and the BIOS update utility if provided. Some manufacturers offer in-BIOS update tools, while others require a USB drive.
Step 4: For USB-based updates, format a USB drive as FAT32, copy the BIOS file to it, and use the BIOS’s built-in flash utility (usually found in the Tool or Advanced section) to update from the USB drive.
Step 5: Follow the on-screen instructions carefully. Do not turn off your PC during the update process, as this can permanently damage the BIOS.
For more information about BIOS settings and motherboard configuration, check out our guide on how to turn on PBO (Precision Boost Overdrive) for AMD motherboard settings.
Fix 8: Fix Corrupted Operating System
If your BIOS is functioning correctly but the operating system is corrupted, your PC may boot to BIOS because it cannot find a valid OS to load. Here is how to diagnose and fix this:
Step 1: Create a Windows bootable USB drive using the Windows Media Creation Tool on another computer. You will need a USB drive with at least 8GB of storage.
Step 2: Insert the bootable USB into your PC and enter the BIOS. Set the USB drive as the first boot device.
Step 3: Boot from the USB drive and select your language and keyboard preferences. Click “Repair your computer” instead of “Install now.”
Step 4: Navigate to Troubleshoot > Advanced Options. From here, you have several repair options:
Startup Repair: This automated tool attempts to fix common boot problems. Run it first as it is the simplest option.
Command Prompt: Use the following commands to repair the boot record and system files:
bootrec /fixmbr
bootrec /fixboot
bootrec /scanos
bootrec /rebuildbcd
sfc /scannow
DISM /Online /Cleanup-Image /RestoreHealth
System Restore: If you have a restore point from before the problem started, you can restore your system to that point without affecting your personal files.
Reset This PC: As a last resort, you can reset Windows while keeping your files or performing a clean install. This will remove all installed applications but preserve your personal data (if you choose the “Keep my files” option).
Fix 9: Diagnose Hardware Failures
If none of the software fixes resolve the issue, you may be dealing with a hardware failure. Here are the most common hardware failures that cause boot issues:
Failing Hard Drive / SSD: If your storage drive has failed, the BIOS will not detect it and will fall through to the setup screen. Check the drive’s health using the manufacturer’s diagnostic tool (Samsung Magician, CrystalDiskInfo, etc.) if you can boot from a USB drive. If the drive has failed, replace it and reinstall the operating system.
Failing RAM: Bad RAM can cause boot failures, freezes, and random crashes. Test your RAM by booting with one stick at a time to identify the faulty module. You can also use Windows Memory Diagnostic or MemTest86 for a thorough test.
Failing Motherboard: Capacitor damage, VRM failure, or trace damage on the motherboard can prevent booting. Visual inspection for swollen capacitors, burnt components, or damaged traces can reveal obvious failures. If the motherboard has failed, it needs to be replaced.
Failing Power Supply: A PSU that cannot deliver stable power can cause boot failures and random shutdowns. If you have access to a multimeter, test the PSU voltages. If you have a spare PSU, try swapping it to see if the issue resolves.
Failing Graphics Card: If your GPU has failed and you do not have integrated graphics, you may not get any display output at all, even though the PC may be booting. Try removing the GPU and using integrated graphics (if your CPU supports it) to see if the system boots.
Fix 10: Jumpstart the Motherboard
If your PC’s power button is not functioning or the front panel connectors are damaged, you can jumpstart the motherboard directly by shorting the power switch pins. This is a useful diagnostic technique that can help determine if the issue is with the power button or the motherboard itself.
Step 1: Power off your PC and open the case.
Step 2: Locate the front panel header on your motherboard (usually a row of small pins near the bottom-right corner). The power switch pins are typically labeled as PWR_SW, POWER, or POWER_SW on the motherboard silk screen.
Step 3: Using a flathead screwdriver or a piece of metal, briefly touch both power switch pins simultaneously for 1-2 seconds. This completes the circuit and starts the PC just like pressing the power button would.
Step 4: If the PC starts when jumpstarted but not with the power button, the front panel power button or its connector is faulty. You can connect the power button to a different set of pins or replace the front panel connector.
Step 5: If the PC does not start even when jumpstarted, the issue lies with the motherboard, PSU, or another internal component rather than the power button.
For a more detailed guide on jumpstarting, check out our article on how to jumpstart a motherboard, which covers the process in depth with diagrams and safety precautions.
Brand-Specific Solutions
Different PC manufacturers have unique BIOS interfaces and common issues. Here are solutions for the most popular brands:
ASUS: ASUS motherboards often have a BIOS Flashback feature that allows BIOS updates via USB without a CPU or RAM installed. If you suspect a BIOS corruption, use BIOS Flashback by placing the BIOS file on a USB drive (renamed as specified by ASUS), inserting it into the BIOS Flashback port, and pressing the BIOS Flashback button for 3 seconds.
MSI: MSI motherboards have a similar feature called M-Flash. If your BIOS is corrupted and you cannot enter the BIOS, you may need to remove the BIOS chip and reprogram it, or use the Clear CMOS button to reset settings.
Gigabyte: Gigabyte motherboards have Q-Flash for in-BIOS updates and Q-Flash Plus for USB-based updates without a CPU. If you are stuck at the BIOS screen, try Clearing CMOS first using the CLR_CMOS jumper or button.
Dell: Dell systems have a built-in hardware diagnostics tool. Press F12 during startup and select Diagnostics to run a comprehensive hardware test. If the diagnostics find errors, they will report specific component failures.
HP: HP systems can be恢复 to factory BIOS settings by pressing F10 during startup and selecting “Load Setup Defaults.” HP also has a BIOS recovery mechanism that can be triggered by pressing Windows + B during startup while the PC is off, which recovers a corrupted BIOS from a backup.
Lenovo: Lenovo ThinkPad systems have a built-in hardware diagnostics tool accessible by pressing F10 during startup. For boot issues, try pressing the Novo button (a small button near the power button) to access the recovery menu.
Frequently Asked Questions
Q1: Why does my PC keep going to BIOS instead of booting Windows?
The most common reasons are an incorrect boot order, a disconnected or failed storage drive, corrupted Windows boot files, or CSM/Secure Boot settings that do not match your operating system installation mode. Start by checking the boot order and verifying that your storage drive is detected in the BIOS.
Q2: How do I get out of BIOS without saving changes?
Press the Escape key to go back to the BIOS main page, or press F10 and select “No” when asked to save changes and exit. On some BIOS interfaces, you can simply press Escape repeatedly to return to the boot process without entering BIOS setup.
Q3: Can a bad CMOS battery cause boot issues?
Yes. A weak or dead CMOS battery can cause BIOS settings to be lost every time the PC is powered off, leading to incorrect boot order or other settings that prevent successful booting. Replacing the CR2032 CMOS battery (a few dollars at any electronics store) often resolves persistent boot issues.
Q4: How do I fix the “No bootable device found” error?
This error means the BIOS cannot find a drive with a bootable operating system. Check that your storage drive is detected in BIOS, verify the boot order is correct, ensure the drive has a valid OS installed, and check that CSM/Legacy settings match your OS installation mode.
Q5: Will clearing CMOS delete my files?
No, clearing CMOS only resets the BIOS settings to their factory defaults. It does not affect any data on your hard drive or SSD. Your files, operating system, and applications remain completely untouched. However, you will need to reconfigure any custom BIOS settings you had, such as XMP profiles, boot order, or fan curves.
Q6: Can overheating cause the PC to get stuck at the BIOS screen?
While overheating typically causes shutdowns or crashes during use rather than at the BIOS screen, a CPU cooler that is not properly mounted can cause immediate overheating during POST (Power-On Self-Test), which may prevent the system from completing the boot process. Check that your CPU cooler is securely mounted and that thermal paste is properly applied.
Q7: Should I update my BIOS if everything is working fine?
If your system is stable and you are not experiencing any issues, there is generally no need to update the BIOS. However, if you are planning to install new hardware (such as a new CPU that requires a BIOS update for compatibility), or if the BIOS update addresses a security vulnerability relevant to you, then updating is recommended. Always follow our guide on BIOS configuration and manufacturer instructions carefully when updating.
Q8: My PC powers on but there is no display. Is this the same as being stuck at BIOS?
Not exactly. A no-display situation where the PC powers on but shows nothing could indicate a GPU issue, display cable problem, or the PC failing POST entirely. If the PC is actually stuck at the BIOS screen with a display, you would see the BIOS interface. For no-display issues, check your display cable, try integrated graphics, and reseat your GPU. You can also try jumpstarting the motherboard as described in our motherboard jumpstart guide.
Getting past the BIOS screen is usually a matter of identifying the specific symptom and applying the corresponding fix. Start with the simplest solutions like checking boot order and cable connections before moving to more advanced troubleshooting like CMOS clearing and BIOS updating. With patience and methodical testing, you can resolve most BIOS-related boot issues without professional help. If you have tried all the solutions in this guide and your PC still will not boot, it may be time to consult a professional repair service for hardware diagnosis.