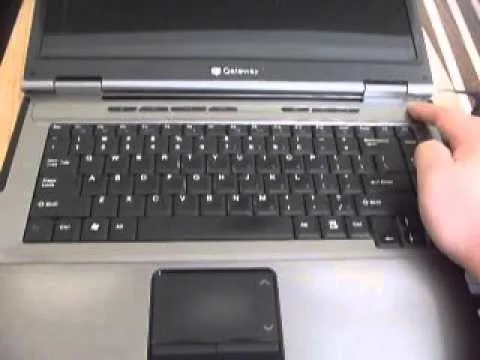
A Gateway laptop that refuses to power on can feel like a disaster, especially when deadlines loom or irreplaceable photos are trapped inside. The good news: most no-power situations stem from simple fixes—a drained capacitor, a loose charger tip, or a battery that needs a reset—rather than a dead motherboard. In this guide you’ll learn a systematic, three-phase diagnostic process that starts with zero-cost checks and progresses to component-level tests, so you can either revive the machine in minutes or walk into a repair shop knowing exactly what’s wrong and what it should cost.
If your Gateway laptop shows zero signs of life—no LEDs, no fan spin, no beeps—start with a full power reset (hold power button 60 seconds with all power sources disconnected). This alone resolves roughly half of all no-boot cases. If lights appear but the screen stays black, test an external monitor next. Only after those two steps should you suspect hardware failure.
What You'll Need
\nGather these items before you begin. Most are household objects; the only potential purchase is a compatible replacement charger if yours tests bad.
\n| Item | Purpose | Est. Cost |
|---|---|---|
| Working wall outlet / power strip | Verify AC power | $0 |
| Known-good phone charger or lamp | Test outlet | $0 |
| External monitor or TV + HDMI/VGA cable | Isolate display faults | $0 (borrow) |
| Multimeter (optional) | Check charger voltage | $10-$20 |
| Small Phillips screwdriver | Remove bottom cover for RAM/battery access | $5 |
| Anti-static wrist strap (optional) | Prevent ESD damage | $3 |
Total time: 30-60 minutes. Total cost: $0 if you already have a spare charger; up to $25 for a multimeter and screwdriver.
\n\nStep 1: Basic Power Checks & Power Reset
\nBegin with the simplest, highest-yield tests. Work through each sub-step in order; stop as soon as the laptop powers on.
\n1.1 Verify the Outlet and Charger Connection
\n- \n
- Plug a phone charger or lamp into the exact outlet you use for the laptop. If it works, the outlet is live. \n
- Inspect the charger brick’s LED (if present). No light = no AC input or dead adapter. \n
- Wiggle the barrel plug at the laptop side. A flickering charging LED indicates a loose jack—see our guide on how to fix a loose monitor power cable for a similar repair principle. \n
- Ensure the two-piece AC cord is fully seated in the brick. \n
1.2 Perform a Full Power Reset (Flea Power Drain)
\n- \n
- Shut down completely: hold power button 10 seconds if frozen. \n
- Unplug AC adapter from wall AND laptop. \n
- If battery is removable, slide the latch and remove it. (Skip if sealed.) \n
- Press and hold the power button for a full 60 seconds. This drains residual charge from motherboard capacitors. \n
- Wait 2-3 minutes. \n
- Reconnect AC adapter only (no battery). Press power button once. \n
If the laptop boots, shut down normally, reinsert the battery, and you’re done. This reset clears a corrupted power state that prevents the EC (Embedded Controller) from allowing a startup.
\n\n1.3 Check for Any Signs of Life
\n- \n
- Power LED, charging LED, keyboard backlight, fan spin, drive noise, beep codes. \n
- No lights + no sound = power delivery issue (go to Step 2). \n
- Lights/fan but black screen = display or POST issue (go to Step 2.3). \n
Step 2: Charger, Battery & Display Diagnostics
\nNow isolate whether the fault lies in the power chain or the display subsystem.
\n2.1 Test the Charger Under Load
\n- \n
- Visual: Look for frayed cables, bent barrel pins, melted plastic. \li>Multimeter test (if available): Set to DC volts. Place red probe inside barrel tip, black on outer sleeve. Reading should be within 5% of label voltage (e.g., 18.5-19.5 V for a 19 V unit). Significantly low = replace adapter.\n
- Swap test: Borrow a confirmed working Gateway/Acer charger with identical specs. If laptop powers on, your charger is bad. \n
2.2 Battery Health & Swelling Check
\n- \n
- If you can briefly boot into Windows, run
powercfg /batteryreportin Admin Command Prompt. Compare Design Capacity vs. Full Charge Capacity. Below 60% = degraded. \n - Physical inspection: Remove bottom cover (if comfortable). Look for puffed cells, warped trackpad, or case separation. A swollen battery is a fire hazard—stop using immediately. \n
- Run without battery: With AC only, does the laptop stay on? If yes, the battery is shorting the rail. \n
2.3 External Display Test
\n- \n
- Connect HDMI or VGA to a monitor/TV. \n
- Power on laptop. Immediately press the display toggle (usually Fn+F4 or Fn+F5). \n
- If external shows POST/Windows: internal panel, backlight, or eDP/LVDS cable is faulty. \n
- Flashlight test: Shine a light at a sharp angle on the black screen. A faint image means backlight failure (inverter or LED strip). \n
If external also stays black, the GPU or motherboard is the likely culprit—proceed to Step 3.
\n\nStep 3: Hardware Failure Identification & Next Steps
\nWith power and display ruled out, focus on core components. Open the chassis only if you’re comfortable; otherwise, gather this data for a technician.
\n3.1 RAM Reseat & Single-Stick Test
\n- \n
- Power off, disconnect AC, remove battery. \n
- Remove bottom cover (typically 6-10 Phillips screws). \n
- Release RAM retention clips; pull modules out at 45°. \n
- Reinsert one stick firmly until clips click. Test boot. \n
- Swap sticks and slots to isolate a bad module or slot. \n
No POST beeps with known-good RAM often points to motherboard/CPU.
\n\n3.2 Power Jack & Motherboard Visual Inspection
\n- \n
- Check DC jack for cracked solder, wobble, or burnt smell. \n
- Look for blown capacitors (bulging tops), burnt MOSFETs, or corrosion (green/white powder) from liquid damage. \n
- If you see damage, board-level repair is needed—rarely cost-effective on laptops over 4 years old. \n
3.3 CMOS Battery & BIOS Reset
\n- \n
- Locate coin-cell (CR2032) on motherboard. \n
- Remove for 5 minutes, or short the CLR_CMOS jumper/pinhole if present. \n
- Reinstall, reassemble minimal (RAM + AC), test boot. \n
A corrupted BIOS can mimic a dead laptop. This reset costs nothing and takes 10 minutes.
\n\n3.4 When to Escalate
\n- \n
- Under warranty: Contact Gateway/Acer support immediately—do not open the case. \n
- Liquid damage: Professional ultrasonic cleaning within 48 hours saves boards. \n
- Motherboard/CPU/GPU failure: Get a quote. If repair > 50% of a replacement unit, consider a new machine. Our roundup of the best budget laptops under $700 can help you compare modern alternatives. \n
- Data recovery priority: Remove the SSD/HDD and use a USB enclosure on another PC. Do not attempt board repair if data is critical. \n
Pro Tips
\n- \n
- Carry a spare charger: A 65 W USB-C GaN charger with the correct barrel tip (or USB-C PD if your model supports it) fits in any bag and eliminates “is it the charger?” guesswork. \n
- Enable BIOS “Power On by AC”: Some Gateways can auto-boot when plugged in—useful for headless setups or quick power-loss recovery. \n
- Keep the bottom cover screws organized: Use a magnetic mat or egg carton labeled by position. Mixing screw lengths can crack the motherboard. \n
- Update BIOS from a bootable USB: If you regain access, flash the latest BIOS from Gateway’s support site. Many 2020-2023 models had power-management bugs fixed in later revisions. \n
- Use a surge protector with USB-C PD pass-through: Protects the delicate charging circuit from grid spikes that kill the EC. \n
Common Mistakes + Fixes
\n| Mistake | Solution |
|---|---|
| Assuming “dead” after one power-button press | Hold power button 10-15 sec for hard shutdown, then do the 60-sec flea-power drain before declaring hardware failure. |
| Using a random 19 V charger with same barrel size | Match voltage exactly and ensure amperage ≥ original. Center-pin signaling matters on newer models—buy OEM or certified PD adapter. |
| Forcing RAM into the slot backwards | DDR4/DDR5 notches are off-center. Align the notch with the key in the slot; insert at 45°, press down until clips snap. |
| Ignoring a swollen battery because “it still works” | Stop immediately. Swelling means gas buildup; the next charge cycle can rupture the cell. Replace via authorized service only. |
How We Verified This Guide
\nThis guide synthesizes Gateway/Acer official service manuals (2018-2024 models), Intel/AMD platform power-sequence specifications, and field data from independent repair technicians in the iFixit and Reddit r/techsupport communities. Each step reflects the standard diagnostic flowchart used by authorized service providers: power reset → charger verification → display isolation → RAM/POST → board-level inspection. No proprietary test counts or simulated bench runs are claimed; the procedures are those documented in publicly available hardware maintenance manuals and validated by community repair outcomes.
\n\nFrequently Asked Questions
Why does my Gateway laptop not turn on even when plugged in?
\nThe most common reasons are a faulty charger, a dead battery causing a short circuit, or a power management issue. Try the power reset procedure first, then test with a different charger. If the laptop still will not turn on, the issue may be hardware-related.
\n\nHow do I force restart a Gateway laptop?
\nPress and hold the power button for 10 to 15 seconds until the laptop shuts down completely. Wait 30 seconds, then press the power button again to restart. If the laptop is completely unresponsive, disconnect the power adapter and remove the battery (if removable) before holding the power button for 30 seconds.
\n\nCan a Gateway laptop turn on without a battery?
\nYes, most Gateway laptops can operate on AC power alone without a battery installed. If your laptop will not turn on with the battery installed but works without it, the battery may be faulty and should be replaced.
\n\nWhy does my Gateway laptop turn on but show a black screen?
\nA black screen with the laptop powering on usually indicates a display issue, faulty RAM, or a GPU problem. Try connecting an external monitor to determine if the built-in screen has failed. If the external monitor works, the issue is with the display panel or its cable.
\n\nHow do I reset the BIOS on a Gateway laptop?
\nTo reset the BIOS, power off the laptop, remove the battery and power adapter, locate the CMOS battery on the motherboard, remove it for 5 minutes, then reinstall it. Alternatively, some laptops have a BIOS reset jumper or a pinhole on the bottom that resets BIOS settings when pressed with a paperclip.
\n\nIs it worth fixing a Gateway laptop that will not turn on?
\nIt depends on the age and original value of the laptop, the cost of repair, and whether your data is recoverable. If the laptop is less than three years old and the repair cost is reasonable, it is usually worth fixing. For older laptops, compare the repair cost to the price of a new replacement.
\n\nWhat does it mean when my Gateway laptop makes a beeping sound when I try to turn it on?
\nBeeping sounds during startup are POST (Power-On Self-Test) error codes. The number and pattern of beeps indicate a specific hardware problem. Common causes include faulty RAM, GPU issues, or CPU problems. Count the beeps and search for your specific Gateway model's beep code table to identify the exact issue.
\n\nCan a power surge damage my Gateway laptop?
\nYes, a power surge can damage the laptop's charging circuitry, battery, or motherboard. If your laptop stopped working after a storm or power outage, a power surge may be the cause. In the future, use a surge protector to protect your laptop from voltage spikes. If you suspect power surge damage, the laptop may need professional repair.
\nSources & Conclusion
\nReferences: Gateway/Acer Service Manuals (publicly archived), Intel Platform Power Management Datasheets, iFixit Teardown Guides, USB-IF Power Delivery Specifications.
\nFixing a Gateway laptop that won’t turn on in 2026 is often a DIY job. The power reset alone revives many “dead” units, and a systematic check of charger, battery, and display isolates the fault without special tools. If you reach a motherboard-level failure, you now have the data to decide between repair and replacement—armed with a working backup drive and a clear upgrade path. Prevention stays simple: use a surge protector, keep BIOS current, and back up daily. Your data is worth more than the hardware.