How to Disable SupportAssist Dell (2026 Complete Guide)
Dell SupportAssist is a pre-installed diagnostic and support tool that comes with most Dell computers. While it can be useful for monitoring system health and providing automated support, many users find it intrusive, resource-heavy, and unnecessary. If you have noticed your Dell computer running slower than usual, experiencing high CPU usage, or displaying frequent pop-up notifications, SupportAssist may be the culprit. In this comprehensive guide, we will explain how to disable SupportAssist on Dell computers using multiple methods, from temporarily turning off notifications to completely uninstalling the software. By the end of this article, you will have full control over SupportAssist on your Dell system.
Last updated: July 19, 2026 | Estimated reading time: 13 minutes
Table of Contents
- What Is Dell SupportAssist?
- Why You Might Want to Disable SupportAssist
- Method 1: Uninstall SupportAssist via Control Panel
- Method 2: Disable SupportAssist from the Application Settings
- Method 3: Disable SupportAssist Startup via Task Manager
- Method 4: Disable SupportAssist Services
- Method 5: Disable Scheduled Tasks
- Method 6: Disable SupportAssist from BIOS
- Method 7: Using PowerShell Commands
- Method Comparison Table
- Frequently Asked Questions
What Is Dell SupportAssist?
Dell SupportAssist is a proprietary software application developed by Dell Technologies for its consumer and business computers. It serves several functions, including hardware diagnostics, driver updates, performance optimization, and proactive support monitoring. The software runs in the background and periodically scans your system for potential issues, hardware failures, and available updates.
SupportAssist consists of several components that work together:
- SupportAssist OS Recovery: A recovery tool that can help restore your Dell computer to its factory state in case of a critical system failure.
- SupportAssist for PCs: The main application that provides diagnostics, driver updates, and system health monitoring.
- Dell SupportAssist Agent: A background service that communicates with Dell’s support servers to provide proactive recommendations.
- SupportAssist Health Check: An automated tool that runs periodic system scans and generates reports.
While these features can be helpful for users who are not comfortable troubleshooting computer issues, many experienced users prefer to manage these tasks manually. The software’s background processes can consume significant system resources, which is the primary reason users seek to disable it.
Why You Might Want to Disable SupportAssist
There are several valid reasons why you might want to disable or uninstall SupportAssist from your Dell computer:
- Frequent Notifications: SupportAssist regularly displays pop-up notifications about system health, driver updates, and special offers from Dell. These notifications can be disruptive and annoying, especially during work or gaming sessions.
- Privacy Concerns: SupportAssist collects system information and sends it to Dell’s servers. Some users are uncomfortable with this data collection, even if Dell claims it is used only for support purposes.
- Startup Delay: SupportAssist adds to your computer’s boot time by loading multiple services and startup items. Disabling it can significantly speed up your Dell computer’s startup process.
- Redundancy: If you are comfortable managing your own driver updates, system diagnostics, and backups, SupportAssist provides functionality that you may not need.
- Battery Life: On Dell laptops, the background processes associated with SupportAssist can drain battery life more quickly than necessary.
According to various user reports and technical analyses, SupportAssist can consume between 5% and 30% of CPU resources during active scans, and its background services can use 200-500 MB of RAM even when idle. For users with Dell computers that have 4GB or 8GB of RAM, this represents a significant portion of available memory.
Method 1: Uninstall SupportAssist via Control Panel
The most straightforward way to remove SupportAssist from your Dell computer is through the Windows Control Panel. This method completely removes the software and all its associated components.
- Press Windows + R to open the Run dialog box.
- Type appwiz.cpl and press Enter. This will open the Programs and Features window.
- Scroll through the list of installed programs to find Dell SupportAssist or SupportAssist for PCs.
- Click on SupportAssist to select it.
- Click the Uninstall button at the top of the list.
- Follow the on-screen prompts to complete the uninstallation process.
- You may also see additional Dell SupportAssist components in the list, such as SupportAssistAgent or Dell SupportAssist OS Recovery Plugin. Uninstall these as well if you want to completely remove all SupportAssist-related software.
After uninstalling SupportAssist, restart your Dell computer to ensure all changes take effect. You should notice an improvement in system performance, particularly during startup and when running resource-intensive applications.
Method 2: Disable SupportAssist from the Application Settings
If you want to keep SupportAssist installed but reduce its impact on your system, you can disable specific features from within the application settings. This is a good option if you want to retain access to Dell diagnostics while eliminating the most resource-heavy features.
- Open Dell SupportAssist from the Start menu or system tray.
- Click on the Settings gear icon in the top-right corner.
- Navigate to the System Settings tab.
- Under “Scheduled Tasks,” disable the following:
- System Scan: Turn off automatic system scans.
- Driver Scan: Turn off automatic driver update scans.
- Hardware Scan: Turn off automatic hardware diagnostics.
- Under “Notifications,” disable:
- System Health Notifications: Turn off alerts about system health.
- Driver Update Notifications: Turn off alerts about available driver updates.
- Special Offers: Turn off promotional notifications from Dell.
- Click Save to apply your changes.
This method significantly reduces SupportAssist’s resource usage while keeping the application available for manual diagnostics when needed. However, it does not eliminate the background services that start with Windows, which we will address in the following methods.
Method 3: Disable SupportAssist Startup via Task Manager
You can prevent SupportAssist from starting automatically when you turn on your Dell computer by disabling it in the Windows Task Manager. This is a quick and reversible method that does not uninstall the software.
- Press Ctrl + Shift + Esc to open the Task Manager.
- Click on the Startup tab at the top of the window.
- Look for entries related to Dell SupportAssist. Common names include:
- Dell SupportAssist
- SupportAssistAgent
- Dell SupportAssist Application
- SupportAssist Remediation
- Right-click on each SupportAssist-related entry and select Disable.
- Close the Task Manager.
- Restart your Dell computer for the changes to take effect.
Disabling SupportAssist startup will prevent the application from loading when you turn on your computer, which can significantly reduce boot time and free up system resources. You can still open SupportAssist manually from the Start menu if you need to run diagnostics or check for updates.
Method 4: Disable SupportAssist Services
SupportAssist installs several Windows services that run in the background. Disabling these services provides a more thorough approach to reducing SupportAssist’s impact on your system.
- Press Windows + R to open the Run dialog box.
- Type services.msc and press Enter to open the Services console.
- Look for services related to Dell SupportAssist. Common service names include:
- SupportAssistAgent: The main SupportAssist background service.
- Dell SupportAssist: The primary SupportAssist service.
- SupportAssist Remediation: Handles automatic repair tasks.
- Right-click on each SupportAssist service and select Properties.
- Change the “Startup type” from “Automatic” to Disabled.
- If the service is currently running, click the Stop button.
- Click Apply and then OK.
- Repeat for all SupportAssist-related services.
By disabling the SupportAssist services, you prevent the application from running any background processes, which frees up both CPU and memory resources. This is one of the most effective methods for reducing SupportAssist’s impact on your Dell computer’s performance.
Method 5: Disable Scheduled Tasks
SupportAssist creates several scheduled tasks in Windows Task Scheduler that run automatically at predetermined intervals. Disabling these tasks prevents SupportAssist from running scans and updates in the background.
- Press Windows + R to open the Run dialog box.
- Type taskschd.msc and press Enter to open the Task Scheduler.
- Navigate to Task Scheduler Library > Dell in the left panel.
- Look for tasks related to SupportAssist. Common task names include:
- Dell SupportAssist – System Scan
- Dell SupportAssist – Driver Scan
- Dell SupportAssist – Health Check
- Dell SupportAssist – Event Monitor
- Right-click on each SupportAssist task and select Disable.
This method complements the previous methods by ensuring that even if SupportAssist services are somehow re-enabled, the scheduled tasks will not execute automatically. Together with disabling the services and startup items, this provides a comprehensive approach to preventing SupportAssist from consuming system resources.
Method 6: Disable SupportAssist from BIOS
On newer Dell computers, SupportAssist has a BIOS-level component called SupportAssist OS Recovery. This component can be disabled through the BIOS settings, which provides the most thorough method of preventing SupportAssist from interfering with your system.
- Shut down your Dell computer completely.
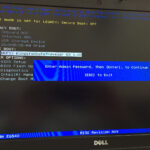
- Turn on your Dell computer and immediately press F2 repeatedly to enter the BIOS setup.
- Navigate to the General > System Configuration section.
- Look for an option called SupportAssist OS Recovery or Dell SupportAssist.
- Change the setting to Disabled.
- Save your changes and exit the BIOS.
If you are not comfortable navigating the BIOS, our guides on how to add boot option in BIOS Dell and how to change boot sequence in Dell provide detailed instructions for Dell BIOS navigation that can help you become more familiar with the BIOS interface.
Method 7: Using PowerShell Commands
For advanced users who prefer command-line tools, PowerShell provides a powerful way to uninstall SupportAssist and remove all its components. This method is particularly useful for IT administrators who need to remove SupportAssist from multiple Dell computers.
- Press Windows + X and select Windows PowerShell (Admin) or Terminal (Admin).
- To find SupportAssist in the list of installed programs, run:
Get-WmiObject -Class Win32_Product | Where-Object {$_.Name -like "*SupportAssist*"} | Select-Object Name, IdentifyingNumber - To uninstall SupportAssist, run the following command (replace the IdentifyingNumber with the one you found in step 2):
msiexec /x {IdentifyingNumber} /qn - To disable SupportAssist services via PowerShell:
Get-Service -Name "*SupportAssist*" | Set-Service -StartupType Disabled; Stop-Service -Name "*SupportAssist*" -Force
The PowerShell method provides the most control over the uninstallation process and allows you to script the removal for multiple computers. This is especially useful in corporate environments where Dell computers are deployed in large numbers.
Method Comparison Table
Here is a comparison of all the methods discussed in this article to help you choose the best approach for your needs:
| Method | Reversible | Thoroughness | Difficulty | Best For |
|---|---|---|---|---|
| Control Panel Uninstall | No (must reinstall) | Complete | Easy | Most users |
| App Settings | Yes | Partial | Easy | Users who want some features |
| Task Manager Startup | Yes | Partial | Easy | Quick fix |
| Services | Yes | Thorough | Medium | Power users |
| Scheduled Tasks | Yes | Thorough | Medium | Comprehensive disabling |
| BIOS | Yes | Most thorough | Medium | Recovery prevention |
| PowerShell | No (must reinstall) | Complete | Advanced | IT administrators |
For most users, we recommend a combination of Methods 1 and 6: uninstall SupportAssist through the Control Panel and disable the OS Recovery component in the BIOS. This provides the most complete removal while giving you full control over your Dell computer.
If you are experiencing high resource usage on your Dell computer, disabling SupportAssist can make a significant difference. For additional tips on optimizing your Dell computer’s performance, check out our guide on how to fix very high power usage, which covers other common causes of performance issues on Dell systems.
Frequently Asked Questions
1. Is it safe to disable Dell SupportAssist?
Yes, it is completely safe to disable or uninstall Dell SupportAssist. The software is optional and is not required for your Dell computer to function properly. Disabling it will not void your warranty or affect Dell’s ability to provide support. You can always reinstall SupportAssist from Dell’s website if you need it in the future.
2. Will disabling SupportAssist affect my Dell warranty?
No, disabling or uninstalling SupportAssist does not affect your Dell warranty. SupportAssist is a software application, not a warranty requirement. Dell’s warranty coverage is based on the hardware and purchase date, not on whether SupportAssist is installed. You can still contact Dell support for warranty claims even without SupportAssist installed.
3. Can I reinstall SupportAssist after disabling it?
Yes, you can always reinstall SupportAssist from Dell’s official support website. Simply visit support.dell.com, enter your Dell computer’s service tag or express service code, and download the SupportAssist application. The reinstallation process is straightforward and takes just a few minutes.
4. Why does SupportAssist use so much CPU?
SupportAssist consumes significant CPU resources primarily during its scheduled diagnostic scans. These scans analyze your hardware, check for driver updates, and generate system health reports. The background services also consume resources even when idle, as they maintain communication with Dell’s servers. Disabling the scheduled tasks and services as described in this guide will eliminate the CPU usage.
5. Can I use Windows Defender or another antivirus instead of SupportAssist?
SupportAssist is not an antivirus program. It is a diagnostic and support tool. For antivirus protection, Windows Defender (built into Windows 10 and 11) provides excellent protection and does not conflict with SupportAssist. If you have disabled SupportAssist for performance reasons, Windows Defender will continue to protect your system without any issues.
6. Does disabling SupportAssist prevent Dell driver updates?
Disabling SupportAssist will prevent automatic Dell driver updates through the SupportAssist application. However, you can still update drivers through Windows Update, which automatically downloads certified Dell drivers. You can also manually download drivers from Dell’s support website. For most users, Windows Update provides adequate driver updates without needing SupportAssist.
7. I disabled SupportAssist but it came back after a Windows update. What should I do?
Some Windows updates may reinstall or re-enable SupportAssist. If this happens, you can repeat the disabling steps outlined in this guide. To prevent this from recurring, you may want to uninstall SupportAssist completely rather than just disabling it, as this makes it less likely to be reinstalled by Windows updates.
8. Is there a way to completely remove all traces of SupportAssist from my Dell computer?
For the most thorough removal, combine the following methods: uninstall via Control Panel (Method 1), disable BIOS component (Method 6), and use PowerShell to remove any remaining registry entries and services (Method 7). After completing these steps, restart your Dell computer. You may also want to run a registry cleaner to remove any orphaned registry entries, though this step is optional.
For more tips on optimizing your Dell computer, check out our related guides on how to disable Dell SupportAssist on startup, how to disable Dell Support Assist, and how to fix very high power usage for comprehensive solutions to common Dell performance issues.