How to Connect RTX 3080 to PSU (2026 Complete Guide)
Last updated: July 19, 2026 | Estimated reading time: 13 minutes
The NVIDIA GeForce RTX 3080 remains one of the most popular and powerful graphics cards available in 2026, delivering excellent performance for gaming, content creation, and professional workloads. However, one area that often confuses builders, especially first-timers, is connecting the RTX 3080 to the power supply unit. The RTX 3080 requires a significant amount of power, and connecting it correctly is essential for stable performance, system longevity, and safety. An incorrect connection can lead to system crashes, black screens, melted connectors, or even damage to your expensive components.
In this detailed guide, we will walk you through everything you need to know about connecting your RTX 3080 to your PSU in 2026. We will cover the PSU requirements for the RTX 3080, explain the different cable types and what each one does, provide a step-by-step connection guide, discuss the important debate between using daisy-chain cables versus separate cables, and highlight common mistakes that can cause serious problems. Whether you are building your first PC or upgrading an existing system, this guide will ensure you make the correct connection safely and confidently.
Table of Contents
- What You Need
- PSU Requirements for RTX 3080
- Cable Types: 8-Pin vs 12-Pin
- Step-by-Step Connection
- Using Daisy-Chain vs Separate Cables
- Common Mistakes to Avoid
- Frequently Asked Questions
- Conclusion
What You Need
Before you begin connecting your RTX 3080 to your PSU, make sure you have all the necessary components and information. Having everything ready beforehand will make the process smooth and prevent you from having to stop mid-installation to search for missing parts.
| Component | Details | Required? |
|---|---|---|
| NVIDIA RTX 3080 GPU | Your graphics card, either Founders Edition or AIB partner model | Yes |
| ATX Power Supply Unit | Minimum 750W recommended, 850W preferred for headroom | Yes |
| PCIe power cables from PSU | Two separate 6+2 pin or 8-pin cables, or one 12-pin cable for Founders Edition | Yes |
| Screwdriver | Phillips head for securing the GPU bracket to the case | Yes |
| Anti-static wrist strap | Prevents static discharge from damaging components | Recommended |
| Cable ties or Velcro straps | For cable management after connection | Optional |
| Flashlight | Helps you see inside the case and identify connector orientation | Optional |
The most critical component to verify before starting is your power supply. The RTX 3080 is a power-hungry card that can draw up to 320 watts under full load. Your PSU must be able to handle this along with the rest of your system. If you are unsure about your PSU wattage or compatibility, we recommend reading our guide on Does PSU Brand Matter? to understand what to look for in a quality power supply.
Also, never mix cables from different PSU brands or models. Each PSU manufacturer uses slightly different wiring pinouts on their modular cables, and using the wrong cable can deliver incorrect voltages to your components, potentially causing catastrophic damage. If you need replacement cables, always order them from the same manufacturer as your PSU.
PSU Requirements for RTX 3080
Understanding the power requirements of the RTX 3080 is essential before making any connections. This card is one of the more power-demanding consumer GPUs, and an underpowered or low-quality PSU can cause instability, crashes, and even permanent hardware damage.
Minimum Wattage
NVIDIA officially recommends a 750-watt PSU for systems using the RTX 3080. This is the absolute minimum, and it assumes you are using a high-quality PSU from a reputable brand with good voltage regulation. For most builds, especially those with power-hungry CPUs like the Intel Core i9 or AMD Ryzen 9 series, an 850-watt PSU provides much-needed headroom and ensures stable operation under all conditions.
Power Connector Requirements
The RTX 3080 Founders Edition uses a unique 12-pin power connector that NVIDIA introduced with the 30-series cards. Most AIB (add-in board) partner models from manufacturers like ASUS, MSI, Gigabyte, and EVGA use two standard 8-pin (6+2 pin) PCIe power connectors instead. Check your specific card to determine which connector type you need.
PCIe Rail Amperage
Beyond total wattage, you need to make sure your PSU can deliver adequate amperage on its +12V PCIe rail. The RTX 3080 can draw up to 320 watts, which translates to approximately 26.7 amps at 12 volts. Your PSU should be able to deliver at least 30 amps on its combined +12V rail, though 40 or more amps provides a comfortable margin.
For more detailed information about PSU specifications and what they mean for your build, check our comprehensive guide on connecting GPUs to power supplies which covers the electrical considerations in greater depth.
Cable Types: 8-Pin vs 12-Pin
The type of power connector your RTX 3080 uses determines which cables you need from your PSU. Understanding the differences between connector types will help you make the right choice and avoid compatibility issues.
| Feature | 8-Pin PCIe (6+2) | 12-Pin (12VHPWR) |
|---|---|---|
| Power delivery per connector | 150W per connector | Up to 600W |
| Used by | Most AIB RTX 3080 models (two connectors) | RTX 3080 Founders Edition (one connector) |
| PSU compatibility | Universal, comes with all ATX PSUs | Requires native support or adapter cable |
| Cable availability | Included with every modular and non-modular PSU | May require separate adapter (often included with FE card) |
| Total power for RTX 3080 | 300W (2 x 150W connectors) | Up to 320W from single connector |
| Reliability | Proven and well-understood | Newer standard, requires proper insertion to avoid issues |
| Physical size | Larger overall (two connectors) | Compact single connector |
8-Pin PCIe Connectors (6+2 Pin)
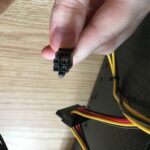
The standard 8-pin PCIe connector is actually a 6+2 pin design, meaning it consists of a 6-pin block with an additional 2-pin block that can be separated or combined. This design provides backward compatibility with older 6-pin connectors while delivering up to 150 watts of power per connector. For most AIB RTX 3080 models, you will need two of these 8-pin connectors to provide adequate power to the card.
The 6+2 design also makes the connector more versatile. If your PSU only has 6-pin PCIe connectors (unlikely in 2026, but possible with very old units), you can still use them, though the power delivery will be limited. For the RTX 3080, always use the full 8-pin configuration.
12-Pin 12VHPWR Connector
The 12-pin connector, formally known as 12VHPWR (12-Volt High Power), was introduced by NVIDIA with the RTX 30-series Founders Edition cards. This connector can deliver up to 600 watts through a single, compact plug, making it much more space-efficient than multiple 8-pin connectors. The RTX 3080 Founders Edition uses this connector and includes an adapter that converts two 8-pin PCIe cables to the 12-pin format.
If you have the Founders Edition card, the included adapter works well, but you need to make sure both 8-pin cables feeding into it come from separate PCIe connectors on your PSU. Using a daisy-chain cable for the adapter is not recommended and can cause instability under heavy load. Alternatively, newer PSUs with native 12VHPWR cables eliminate the need for an adapter entirely. For more information about PSU compatibility and choosing the right power supply for your needs, read our guide on Does PSU Brand Matter?.
Step-by-Step Connection
Follow these steps carefully to connect your RTX 3080 to your PSU. This process assumes your GPU is already seated in the PCIe slot on your motherboard, which is a separate installation step.
Step 1: Power Down and Disconnect
Before connecting any power cables, make sure your computer is completely powered off and unplugged from the wall outlet. Press and hold the power button for 10 seconds after unplugging to discharge any residual power in the system. This protects you and your components from electrical damage during the installation process.
Step 2: Identify the Power Connectors on the GPU
Look at the top edge or side of your RTX 3080 to find the power connector(s). If you have an AIB partner card, you will see two 8-pin connector sockets. If you have the Founders Edition, you will see a single 12-pin connector socket. Make a note of which type you have so you can select the correct cables from your PSU.
Step 3: Select the Correct PCIe Cables
From your PSU’s cable supply, locate the PCIe power cables. These are typically labeled “PCIe” or “VGA” on the connector end. For AIB cards, you need two separate 8-pin cables. For the Founders Edition, you need either a native 12-pin cable (if your PSU supports it) or the included adapter with two 8-pin cables.
If you are using a fully modular PSU, the PCIe cables will be among the loose cables that came in the box. Make sure you are using the cables that came with your specific PSU model. As mentioned earlier, never mix cables between different PSU brands or models.
Step 4: Connect the Cables to the GPU
Take the first 8-pin PCIe cable and align it with one of the power connector sockets on the GPU. The connector is keyed, meaning it can only be inserted in one orientation. Line up the clip on the cable connector with the notch on the GPU socket and push firmly until you hear a click. The click indicates that the connector is fully seated and locked in place.
Repeat the process with the second 8-pin cable for the remaining socket. For the Founders Edition with the 12-pin connector, plug the adapter or native 12-pin cable in the same manner, making sure it clicks into place securely.
Step 5: Route and Manage Cables
Once the cables are connected to the GPU, route them neatly through your case’s cable management features. Use cable ties or Velcro straps to secure them and prevent them from dangling onto fans or other components. Good cable management not only looks cleaner but also improves airflow inside your case, which helps keep your components cool.
Step 6: Secure the GPU and Close the Case
If you have not already done so, secure the GPU’s mounting bracket to the case using the appropriate screws. Make sure the GPU is level and firmly seated in the PCIe slot. Close the case panels and reconnect the power cord to your PSU.
Step 7: Test the Connection
Power on your system and watch for any warning lights on the motherboard, which could indicate a power issue. Once the system boots into your operating system, open a monitoring tool like GPU-Z or MSI Afterburner to verify that the GPU is receiving power correctly and all connectors are detected. Run a GPU stress test or play a demanding game for 15-20 minutes to confirm stability under load.
Using Daisy-Chain vs Separate Cables
One of the most debated topics in PC building regarding GPU power connections is whether to use a daisy-chain cable or two separate cables from the PSU. This decision can have a real impact on your system’s stability, especially under heavy load, so it is important to understand the difference.
What Is a Daisy-Chain Cable?
A daisy-chain PCIe cable is a single cable from the PSU that splits into two 8-pin connectors. This means both GPU power connectors are fed by the same cable and, ultimately, the same connector on the PSU. Many modular PSUs come with daisy-chain cables because they are convenient and reduce cable clutter.
What Are Separate Cables?
Separate cables mean using two individual PCIe cables, each running from its own connector on the PSU to a single connector on the GPU. This provides each GPU power connector with its own dedicated power delivery path from the PSU, effectively doubling the available current.
Power Delivery Comparison
| Scenario | Daisy-Chain (1 Cable) | Separate Cables (2 Cables) |
|---|---|---|
| Max power delivery | ~225W per cable (limited by PSU connector and wire gauge) | ~300W total (150W per connector) |
| Voltage stability under load | More prone to voltage drops during peak demand | More stable voltage delivery |
| Heat generation in cable | Higher, as all current flows through one cable | Lower, as current is split between two cables |
| Risk of instability | Higher, especially during power transients | Lower, more consistent power delivery |
| Cable management | Cleaner, fewer cables | More cables to manage |
| Recommended for RTX 3080 | Acceptable for stock settings | Strongly recommended |
Our Recommendation
For the RTX 3080, we strongly recommend using two separate PCIe cables whenever possible. The RTX 3080 is known for its power transients, which are sudden spikes in power draw that can exceed the card’s rated TDP. These transients are brief but significant, and a daisy-chain cable may not handle them as cleanly as two separate cables. While a daisy-chain cable can technically work at stock settings, two separate cables provide better voltage stability, lower cable temperatures, and a greater safety margin.
If your PSU only has one available PCIe cable with a daisy-chain connector, it will likely work for general use, but you should consider upgrading to a PSU with more PCIe connectors if you experience any stability issues like random crashes, black screens, or driver crashes during gaming. For guidance on choosing a quality PSU, our article on Does PSU Brand Matter? provides helpful insights into what makes a PSU reliable.
Common Mistakes to Avoid
Connecting an RTX 3080 to a PSU is not difficult, but there are several mistakes that can lead to serious problems. Being aware of these issues will help you avoid them and ensure a safe, stable connection.
Mistake 1: Using Cables from a Different PSU
This is the single most dangerous mistake you can make. Modular PSU cables are not universal. Different manufacturers use different pinouts, meaning the same physical connector can deliver completely different voltages and signals depending on which PSU it is connected to. Using the wrong cable can send voltage to the wrong pins, instantly destroying your GPU, PSU, or both. Always use the cables that came with your specific PSU.
Mistake 2: Not Fully Seating the Connectors
A power connector that is not fully pushed in can cause arcing, overheating, and melting. Always push each connector firmly until you hear and feel a click. After connecting, gently tug on each cable to verify it is locked in place. A partially connected power cable is one of the leading causes of GPU power connector failures.
Mistake 3: Ignoring PSU Wattage Requirements
If your PSU does not have enough wattage to handle the RTX 3080 plus the rest of your system, you may experience random shutdowns, crashes, or failure to boot. Always verify that your PSU meets or exceeds NVIDIA’s recommended 750-watt minimum, and consider the total power draw of all your components, not just the GPU.
Mistake 4: Using a Daisy-Chain Cable When Separate Cables Are Needed
While we discussed this in detail above, it bears repeating as a common mistake. If you experience instability with a daisy-chain cable, switching to two separate cables is one of the first troubleshooting steps you should try.
Mistake 5: Forgetting to Check Connector Compatibility
Not all RTX 3080 models use the same power connectors. Before purchasing a PSU or cables, verify whether your specific card uses dual 8-pin connectors or the 12-pin connector. This ensures you have the right cables ready before installation day.
Mistake 6: Poor Cable Management
Loose cables dangling inside your case can get caught in fans, blocking airflow or causing physical damage. Take the time to route and secure your cables properly after making the connections. This small step prevents problems and keeps your build looking professional.
For additional information about power supply considerations and whether higher wattage units consume more electricity at idle, read our guide on Can a Power Supply Be Too Powerful? which addresses common concerns about PSU sizing.
Frequently Asked Questions
Can I use a single daisy-chain cable for the RTX 3080?
Technically, yes. A daisy-chain cable can power the RTX 3080 at stock settings. However, it is not ideal. The RTX 3080 experiences power transients that can cause instability with a single cable. For the best experience, use two separate PCIe cables from your PSU.
What happens if my PSU does not have enough PCIe cables?
If your PSU does not have enough PCIe connectors for two separate cables, you have a few options. You can use a daisy-chain cable as a temporary solution, upgrade to a PSU with more PCIe connectors, or use a third-party cable that is compatible with your specific PSU model. Never use an adapter or cable that is not confirmed to be compatible with your PSU.
Do I need a 12-pin cable for the RTX 3080 Founders Edition?
You do not necessarily need a native 12-pin cable. The Founders Edition RTX 3080 comes with an adapter that converts two standard 8-pin PCIe cables to the 12-pin format. However, if your PSU supports native 12-pin cables, using one provides a cleaner connection and eliminates the adapter.
Can a melted power connector be repaired?
A melted power connector on the GPU side typically cannot be safely repaired. If the plastic housing has melted, the GPU may need to be sent to the manufacturer for repair or replacement. This is why proper connection technique is so important. Always ensure connectors are fully seated before powering on your system.
How do I know if my GPU is getting enough power?
You can monitor your GPU’s power draw using software tools like GPU-Z, HWiNFO, or MSI Afterburner. These tools show the real-time power consumption of your GPU. If the power draw appears lower than expected or fluctuates wildly, there may be an issue with the power connection or your PSU’s capacity.
Is it safe to run the RTX 3080 without power cables connected?
No. The RTX 3080 requires dedicated power from the PSU through its power connectors. The PCIe slot alone provides only 75 watts, which is far below the 320-watt requirement of the RTX 3080. Running the card without power cables will result in the system not booting, the GPU not being detected, or potential damage to the PCIe slot.
Should I plug the power cables into the GPU before or after seating it in the PCIe slot?
It is generally easier and safer to seat the GPU in the PCIe slot first and then connect the power cables. This way, the GPU is supported by the slot and bracket while you apply the force needed to seat the power connectors. Connecting cables before seating can make alignment more difficult.
How tight should the power connectors be?
You should push each connector firmly until it clicks and locks into place. After insertion, gently tug on the cable to confirm it is locked. The connectors should feel secure and should not wiggle or pull out with light force. If a connector feels loose or does not click, remove it, check for obstructions, and try again.
Do I need to disconnect power cables when upgrading my GPU?
Yes. Always power off your system, unplug it from the wall, and disconnect all power cables from the GPU before removing or replacing it. This prevents electrical damage and ensures your safety during the process.
Conclusion
Connecting your RTX 3080 to your PSU correctly is a critical step in building or upgrading your PC. The process is straightforward once you understand the requirements: verify your PSU has sufficient wattage, use the correct cable type for your specific RTX 3080 model, connect the cables firmly until they click, and whenever possible, use two separate PCIe cables instead of a single daisy-chain cable for maximum stability.
The RTX 3080 is a powerful and demanding graphics card that rewards proper setup with exceptional performance. Taking the time to make clean, secure power connections ensures you get the full performance this card is capable of without stability issues, crashes, or safety hazards. If you have any doubts about your PSU’s capability or cable compatibility, consult our guides on PSU brand quality and PSU wattage considerations to make informed decisions.
With the power connections properly made, your RTX 3080 is ready to deliver incredible gaming and creative performance. Enjoy the experience, and remember that a few extra minutes spent on correct installation can save you hours of troubleshooting later.