How to Connect iBuyPower to Monitor (2026 Complete Guide)
Last updated: July 19, 2026 | Estimated reading time: 12 minutes
If you have just unboxed a brand new iBuyPower desktop and you are staring at a monitor wondering how to get everything connected, you are not alone. Thousands of new PC owners each year go through the same confusion when setting up their first custom gaming desktop. Whether you purchased your iBuyPower PC from Best Buy, Amazon, or directly from the iBuyPower website, the process of connecting it to your monitor is surprisingly straightforward once you know where to look. This complete guide will walk you through every step of connecting your iBuyPower desktop to your monitor in 2026, troubleshoot common issues, and help you get the best possible display output from your new machine.
Table of Contents
- What You Need Before Starting
- Identifying the Ports on Your iBuyPower PC
- Identifying the Ports on Your Monitor
- Choosing the Right Cable for Your Setup
- Step-by-Step Connection Guide
- First Boot and Display Settings
- Common Issues and Troubleshooting
- Connecting Multiple Monitors
- Setting the Correct Refresh Rate
- Frequently Asked Questions
What You Need Before Starting
Before you begin connecting your iBuyPower desktop to your monitor, gather all the necessary components. You will need your iBuyPower desktop tower, your monitor, the appropriate display cable, and a stable surface to place both devices on. Most iBuyPower desktops do not come with a monitor cable included in the box, so you may need to purchase one separately. Check the contents of your iBuyPower package to confirm what cables are included with your specific model.
The type of cable you need depends entirely on the ports available on both your graphics card and your monitor. In 2026, the most common display connection types are HDMI, DisplayPort, and USB-C. Older VGA and DVI connections are still found on some monitors but are less common on modern gaming desktops like those sold by iBuyPower. If your monitor came with a specific cable, that is usually the best option to use. If you need to buy a cable, make sure to match the connector type on both ends.
It is also important to make sure your iBuyPower desktop is properly set up on a flat, stable surface with adequate ventilation. Gaming desktops produce significant heat, and poor airflow can lead to thermal throttling or even hardware damage over time. Leave at least six inches of clearance around the back and sides of your tower for proper air circulation. If you are not sure about proper airflow, check out our guide on how to lower GPU temperature for additional tips.
Identifying the Ports on Your iBuyPower PC
The ports on your iBuyPower desktop are located on the back of the tower, typically on the lower half where the motherboard and graphics card are mounted. It is absolutely critical to understand the difference between the motherboard I/O panel and the graphics card output ports, as this is the source of most connection problems for new users.
The motherboard I/O panel is usually located near the top of the rear panel and includes ports like USB, Ethernet, audio jacks, and sometimes a small HDMI or DisplayPort output. These motherboard video outputs are connected to the CPU’s integrated graphics (if your CPU has them) and should NOT be used for your monitor if you have a dedicated graphics card installed.
The dedicated graphics card ports are located lower down on the back of the case, usually in a horizontal row. These are the ports you should use for connecting your monitor. A typical iBuyPower gaming desktop with an NVIDIA RTX graphics card will have three DisplayPort outputs and one HDMI output on the graphics card. Some models may vary, so take a moment to look at the back of your specific machine and count the available ports.
Identifying the Ports on Your Monitor
Most monitors in 2026 come with multiple input options, giving you flexibility in how you connect them. The most common ports found on modern monitors include HDMI, DisplayPort, and USB-C. Some monitors also include legacy VGA and DVI ports, though these are becoming increasingly rare on new displays.
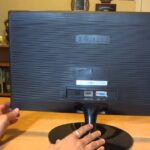
To find the ports on your monitor, look at the back panel or underside of the display. Most monitors have their ports facing downward or backward, making them visible when you tilt or look behind the screen. Take note of which ports are available and their version numbers if visible. For example, an HDMI 2.1 port supports higher resolutions and refresh rates than an HDMI 1.4 port.
If your monitor has multiple input ports, it may also have an input selection button or menu that lets you switch between them. This is important to know because you will need to select the correct input source after connecting your cable. Some monitors automatically detect the active input, while others require manual selection through the on-screen display menu.
Understanding your monitor’s capabilities is also important for getting the best experience. If you are curious about display resolution impacts, our article on whether lower resolution increases FPS provides valuable insights into balancing visual quality and performance.
Choosing the Right Cable for Your Setup
Selecting the right cable is one of the most important decisions in your setup process. The cable you choose directly impacts the maximum resolution, refresh rate, and features available to your display. In 2026, most iBuyPower desktops ship with modern graphics cards that support HDMI 2.1 and DisplayPort 1.4 or newer, giving you excellent flexibility.
For most users, DisplayPort is the recommended connection type for desktop PC setups. DisplayPort 1.4 can handle 4K resolution at 120Hz or 1440p at 165Hz without compression, making it ideal for gaming monitors. DisplayPort also supports features like G-Sync variable refresh rate, which helps eliminate screen tearing during gameplay. If your monitor and graphics card both support DisplayPort, this is generally the best choice.
HDMI is the second most popular option and is especially convenient if you want to use your monitor with multiple devices like a gaming console and your PC. HDMI 2.1 supports 4K at 120Hz and 8K at 60Hz, making it capable of handling virtually any modern display. However, some monitors only have HDMI 2.0 ports, which limits you to 4K at 60Hz or 1440p at 144Hz. Check your monitor specifications to understand its limitations.
USB-C connections are becoming more common on both laptops and monitors, though they are less typical on desktop gaming PCs. If your iBuyPower desktop and monitor both have USB-C with DisplayPort Alt Mode, this can be a convenient single-cable solution that may also carry power and data.
Step-by-Step Connection Guide
Now that you understand the ports and cables involved, let us walk through the actual connection process. Follow these steps carefully to ensure a successful setup.
Step 1: Power off both your iBuyPower desktop and your monitor completely. Make sure both devices are unplugged from the wall outlet or that the power switches are turned off. This prevents any potential electrical issues during the connection process.
Step 2: Position your monitor on your desk or monitor stand at a comfortable viewing height. The top of the screen should be at or slightly below eye level for optimal ergonomics. Make sure the monitor is stable and will not wobble or fall.
Step 3: Connect one end of your display cable (HDMI, DisplayPort, or USB-C) to the appropriate port on the back of your monitor. Push the connector in firmly until it seats completely. A loose connection is one of the most common causes of display issues.
Step 4: Route the cable from your monitor to the back of your iBuyPower desktop. Take care to route it behind your desk or through cable management channels to keep your setup clean and organized.
Step 5: Connect the other end of the display cable to the graphics card port on the back of your iBuyPower desktop. Remember to use the graphics card ports, not the motherboard ports. Look for the horizontal row of video outputs on the lower portion of the rear panel.
Step 6: Once the display cable is securely connected to both devices, plug in your iBuyPower desktop and monitor to power outlets. Make sure all power cables are firmly connected.
Step 7: Turn on your monitor first using the power button on the display. Wait a few seconds for the monitor to initialize and display its brand logo or input detection screen.
Step 8: Turn on your iBuyPower desktop by pressing the power button on the front of the tower. Wait for the system to boot up and you should see the POST screen or Windows loading screen appear on your monitor.
If you do not see a display signal after completing these steps, do not panic. The troubleshooting section below covers the most common issues and their solutions.
First Boot and Display Settings
Once your iBuyPower desktop is connected to your monitor and you see the Windows desktop, there are a few important settings you should configure to get the best possible experience. The default settings may not take advantage of your monitor’s full capabilities, especially if it is a high-refresh-rate gaming monitor.
The first thing you should do is right-click on your desktop and select Display Settings. In the display settings window, verify that Windows recognizes your monitor and is displaying at the correct resolution. Your monitor will have a native resolution, which is the optimal setting for sharp, clear visuals. For most modern monitors, this will be 1920×1080 (1080p), 2560×1440 (1440p), or 3840×2160 (4K).
After confirming the resolution, scroll down to the refresh rate setting. Many gaming monitors support refresh rates higher than 60Hz, such as 144Hz, 165Hz, or even 240Hz. Windows may default to 60Hz, so you need to manually select the highest refresh rate your monitor supports. A higher refresh rate makes motion appear smoother and more responsive, which is particularly noticeable in gaming and fast-paced content.
If you have an NVIDIA graphics card, you should also open the NVIDIA Control Panel to configure additional settings. In the NVIDIA Control Panel, you can enable G-Sync (if your monitor supports it), adjust color settings, and configure 3D settings for optimal gaming performance. Taking a few minutes to configure these settings will make a significant difference in your day-to-day experience.
Understanding how your display configuration affects performance is valuable. Our article on how much VRAM you need for 1440p gaming explains the relationship between resolution, VRAM usage, and overall system performance.
Common Issues and Troubleshooting
Even with careful setup, you may encounter issues when connecting your iBuyPower desktop to your monitor. Here are the most common problems and their solutions.
No Display Signal: If your monitor shows “No Signal” or remains black after turning on your PC, the most likely cause is that the cable is connected to the motherboard instead of the graphics card. Double-check the cable connection and make sure it is plugged into the graphics card ports on the lower portion of the rear panel. If the cable is in the correct port, try unplugging and reconnecting both ends of the cable firmly.
Display Works but at Low Resolution: If your display appears but looks stretched, blurry, or is at a lower resolution than expected, Windows may not have detected your monitor correctly. Go to Display Settings and manually select the correct resolution. You may also need to install or update your graphics card drivers from the NVIDIA or AMD website.
Monitor Displays but No Signal After BIOS: Sometimes the BIOS screen and Windows loading screen appear fine, but the display goes black once Windows loads. This is typically a driver issue. Boot into Safe Mode (hold Shift while clicking Restart) and update or reinstall your graphics drivers.
Flickering or Artifacts: If your display flickers or shows graphical artifacts, try using a different cable or a different port on your graphics card. A damaged or low-quality cable can cause intermittent signal issues. Also check that the cable is not pinched or bent sharply behind your desk.
Wrong Input Selected: Your monitor may be set to a different input source than the one your PC is connected to. Use the buttons on your monitor to open the input selection menu and switch to the correct source (HDMI 1, HDMI 2, DisplayPort 1, etc.).
Cable Not Supporting Desired Resolution or Refresh Rate: If you have a 4K 144Hz monitor but the display only works at 4K 60Hz, your cable may not support the higher bandwidth. Make sure you are using a DisplayPort 1.4 cable or HDMI 2.1 cable rated for the resolution and refresh rate you want. Older cables may not be capable of handling modern high-bandwidth signals.
For WiFi-related connectivity issues that might affect driver downloads, check out our guide on whether WiFi adapters go bad for troubleshooting network problems.
Connecting Multiple Monitors
iBuyPower desktops with dedicated graphics cards typically support multiple monitors, making it easy to expand your workspace or create an immersive gaming setup. Most modern NVIDIA and AMD graphics cards can drive two to four monitors simultaneously, depending on the specific card model and available ports.
To set up multiple monitors, simply connect each monitor to a separate video output on your graphics card using the appropriate cables. Once connected, Windows should automatically detect the additional displays. You can then configure how the monitors work together in Display Settings by choosing between extending the desktop across all screens, duplicating the same image on each screen, or showing the desktop on only one monitor.
Extended display mode is the most popular configuration for productivity users, as it gives you additional screen real estate for multitasking. Gaming users may prefer a single ultrawide monitor or a multi-monitor racing/simulation setup for maximum immersion.
Keep in mind that driving multiple high-resolution monitors requires more GPU power. If you notice performance degradation when using multiple displays, especially during gaming, you may need to reduce the resolution or refresh rate on secondary monitors. For more information about multi-monitor performance impacts, read our article on whether having three monitors affects performance.
Setting the Correct Refresh Rate
One of the most overlooked steps in setting up a new monitor is configuring the correct refresh rate. Refresh rate, measured in Hertz (Hz), determines how many times per second your monitor updates the displayed image. A higher refresh rate results in smoother motion and a more responsive feel, which is especially important for gaming.
Most monitors ship with a default refresh rate of 60Hz, even if they are capable of much higher rates. If you purchased a 144Hz gaming monitor and left the settings at default, you are only experiencing 60Hz and missing out on a significantly smoother visual experience.
To change your refresh rate in Windows 10 or 11, right-click on your desktop and select Display Settings. Scroll down and click on Advanced Display Settings. Under the Refresh Rate dropdown menu, select the highest available option. If the highest option matches your monitor’s advertised refresh rate, the setting is correct.
If the high refresh rate option does not appear, verify that you are using a cable that supports the required bandwidth. For example, a 1440p 165Hz display requires DisplayPort 1.2 or HDMI 2.0 at minimum. Using an older cable may limit the available refresh rates. You should also make sure your graphics drivers are up to date, as outdated drivers can prevent high refresh rates from appearing in the settings.
Frequently Asked Questions
Do I need to install drivers before connecting my monitor?
No, you do not need to install any drivers before connecting your monitor. Windows will detect your monitor and display an image using basic generic drivers. However, you should install the latest NVIDIA or AMD graphics drivers after your system is up and running to enable full functionality, optimal performance, and access to advanced features like G-Sync or FreeSync.
Can I use any HDMI cable for my iBuyPower PC?
While any HDMI cable will physically fit, not all HDMI cables support the same bandwidth. If you have a 4K 120Hz monitor, you need an HDMI 2.1 certified cable to achieve those specifications. An older HDMI 1.4 cable will limit you to 4K at 30Hz or 1080p at 60Hz. Always check the HDMI version rating of your cable to ensure it matches your display requirements.
Why is my monitor only showing 60Hz when it is a 144Hz monitor?
The most common reason is that Windows defaults to 60Hz even on high-refresh-rate monitors. You need to manually change the refresh rate in Display Settings. Other causes include using a cable that does not support the higher refresh rate, having outdated graphics drivers, or the monitor not being connected to the correct port on the graphics card. Some monitors also have a setting in their on-screen menu that must be enabled to unlock higher refresh rates over certain connection types.
What should I do if my iBuyPower PC does not detect my monitor at all?
First, verify all cable connections are secure at both ends. Try a different cable and a different port on your graphics card. If possible, test your monitor with another device to rule out a monitor failure. Make sure your monitor is set to the correct input source. If none of these steps work, try resetting your graphics card by powering off the PC, unplugging it, holding the power button for 30 seconds, and then reconnecting and powering on.
Is it okay to use the motherboard HDMI port on my iBuyPower PC?
You should only use the motherboard video output if your iBuyPower desktop does not have a dedicated graphics card, or if you are troubleshooting a graphics card issue. If you have a dedicated GPU installed, always use the GPU’s video outputs. Using the motherboard port with a GPU installed will either result in no display (if the BIOS is configured to disable integrated graphics when a GPU is present) or drastically reduced gaming performance.
Can I connect my iBuyPower PC to a TV instead of a monitor?
Yes, you can connect your iBuyPower PC to any TV that has an HDMI input. Simply use an HDMI cable to connect your graphics card’s HDMI output to one of the TV’s HDMI inputs. Keep in mind that most TVs have a 60Hz refresh rate and higher input lag compared to dedicated computer monitors, making them less ideal for competitive gaming. However, they work great for casual gaming, media consumption, and living room setups.
How do I know if my cable supports 4K at 120Hz?
Check the cable packaging or specifications for the supported HDMI or DisplayPort version. For 4K at 120Hz, you need HDMI 2.1 or DisplayPort 1.4 or newer. Many cables sold as “4K” only support 4K at 30Hz or 60Hz. Look for cables specifically labeled as “Ultra High Speed” for HDMI 2.1 or “HBR3” for DisplayPort 1.4 compatibility.
Should I use DisplayPort or HDMI for my iBuyPower gaming PC?
For most gaming setups, DisplayPort is the preferred choice because it supports higher refresh rates at high resolutions and is required for NVIDIA G-Sync compatibility on most monitors. HDMI is a great alternative if your monitor only has HDMI ports or if you want to connect to both a PC and a gaming console using the same display. Both options provide excellent image quality when using the correct cable version.