Do I Remove Sticker from M.2? (2026 Complete Guide)
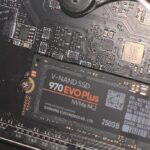
If you have recently purchased an M.2 NVMe SSD, you may have noticed a sticker or label on the drive’s surface and wondered whether you should remove it before installation. This seemingly simple question has generated considerable debate among PC builders, with opinions ranging from “always remove it” to “never touch it.” The answer, like many things in PC building, depends on your specific situation and the type of sticker in question. This comprehensive guide explores everything you need to know about M.2 stickers in 2026, including their purpose, when to remove them, and how they affect your drive’s performance and warranty.
Last updated: July 19, 2026 | Estimated reading time: 11 minutes
Table of Contents
- The Purpose of M.2 Stickers
- Types of M.2 Stickers
- Thermal Impact of M.2 Stickers
- When Should You Remove the Sticker
- When Should You Keep the Sticker
- M.2 Stickers and Heatsink Installation
- Warranty Considerations
- Proper M.2 Installation Guide
- Frequently Asked Questions
The Purpose of M.2 Stickers
M.2 SSD stickers serve several important functions that go beyond simple branding or aesthetics. Understanding these purposes helps you make an informed decision about whether to remove the sticker or leave it in place.
Product Identification
The most obvious purpose of M.2 stickers is product identification. The sticker typically displays the manufacturer’s name, model number, capacity, serial number, and other important information that helps identify the specific drive. This information is crucial for warranty claims, technical support, and system identification. Without the sticker, you may have difficulty determining the exact specifications of your drive, particularly if you have multiple M.2 drives installed.
Some stickers also include QR codes or URLs that link to the manufacturer’s support pages, firmware updates, or warranty registration forms. Removing the sticker may make it more difficult to access these resources when you need them, though this information is usually available on the manufacturer’s website as well.
Regulatory Compliance
M.2 stickers often include regulatory compliance markings required by law in various regions. These markings indicate that the drive meets safety, electromagnetic compatibility, and environmental standards for the markets where it is sold. While these markings are not critical for the drive’s operation, they are important for regulatory compliance and may be required for certain business or institutional applications.
Removing these compliance markings could technically violate regulations in some jurisdictions, though enforcement is rare for individual users. However, if you are building systems for a business or institution, maintaining these markings may be necessary for compliance with procurement or regulatory requirements.
Protection
Some M.2 stickers provide a thin layer of protection for the drive’s surface, particularly the NAND flash chips and controller. While this protection is minimal, it can help prevent minor scratches or damage during handling and installation. The sticker may also provide some protection against static electricity, though this benefit is debatable and depends on the sticker’s material and construction.
| Sticker Purpose | Description | Impact of Removal |
|---|---|---|
| Product ID | Displays model, capacity, serial number | May complicate warranty claims |
| Regulatory | Shows compliance markings | Potential compliance issues |
| Protection | Guards against minor damage | Slightly increased risk of scratches |
| Thermal | Some stickers aid heat dissipation | May slightly affect cooling |
Types of M.2 Stickers
Not all M.2 stickers are created equal, and the type of sticker on your drive can influence whether you should remove it. Understanding the different types helps you make the right decision for your specific situation.
Paper or Vinyl Labels
The most common type of M.2 sticker is a simple paper or vinyl label that displays product information. These stickers are typically easy to remove and do not provide significant thermal benefits. They are primarily intended for identification purposes and can be safely removed if desired, though there is usually little reason to do so.
Paper labels may leave adhesive residue when removed, which can be cleaned with isopropyl alcohol or other mild solvents. Vinyl labels are generally cleaner to remove and leave less residue. In either case, removing these stickers has minimal impact on the drive’s performance or cooling.
Thermal Interface Stickers
Some M.2 drives, particularly high-performance NVMe models, include stickers made from thermal interface materials (TIM) that help transfer heat from the drive’s components to the drive’s metal casing or to a heatsink. These stickers are specifically designed to aid heat dissipation and should generally not be removed unless you are installing a heatsink that requires bare contact with the drive’s components.
Thermal interface stickers are typically thicker and more substantial than regular labels, and they may have a slightly different texture or appearance. If your drive’s sticker feels thicker or more substantial than a typical label, it may be a thermal interface material that serves an important cooling function.
Protective Films
Some M.2 drives come with a thin protective film that covers the entire surface of the drive. This film is intended to be removed before installation, as it can interfere with heat transfer and may not be designed for long-term use. If your drive has a clear film covering the components, this should be removed before installing the drive in your system.
Protective films are usually easy to identify, as they are often clear or translucent and may have a tab or edge that makes them easy to peel off. Unlike other stickers, these films are explicitly intended for temporary protection during shipping and handling and should always be removed before installation.
Thermal Impact of M.2 Stickers
One of the primary concerns about M.2 stickers is their potential impact on thermal performance. NVMe SSDs can generate significant heat during sustained operations, and anything that affects heat dissipation could potentially impact performance and longevity.
Heat Generation in NVMe SSDs
NVMe SSDs generate heat primarily from two components: the controller chip and the NAND flash memory cells. The controller, which manages data transfer between the drive and the system, is typically the hottest component, reaching temperatures of 70-80°C during sustained operations. The NAND cells generate less heat but can still reach temperatures of 50-60°C under heavy load.
Thermal throttling occurs when an SSD reaches its maximum safe operating temperature, typically around 70-80°C for the controller. When throttling occurs, the drive reduces its performance to prevent damage, resulting in slower read and write speeds. Proper cooling is essential for maintaining peak performance during sustained workloads.
Sticker Impact on Cooling
The impact of stickers on M.2 SSD cooling is generally minimal for most users. Regular paper or vinyl stickers provide some insulation, but the effect is negligible in systems with adequate case airflow. Studies and testing have shown that the temperature difference between a drive with and without a sticker is typically only 1-3°C, which is within the margin of error for most temperature monitoring tools.
However, in systems with poor airflow or in compact cases where M.2 drives are positioned near heat-generating components like GPUs, every degree matters. In these situations, removing a non-essential sticker may provide a small but meaningful improvement in cooling performance. For most builds, though, the sticker’s impact on temperatures is not significant enough to warrant removal.
When Should You Remove the Sticker
While the general recommendation is to leave M.2 stickers in place, there are specific situations where removal may be beneficial or necessary. Understanding these scenarios helps you make the right decision for your build.
Installing a M.2 Heatsink
The most common reason to remove an M.2 sticker is when installing an aftermarket heatsink. Many M.2 heatsinks require direct contact between the heatsink and the drive’s components for optimal thermal transfer. A sticker between the heatsink and the drive can create an air gap that reduces cooling efficiency, negating much of the heatsink’s benefit.
Before removing a sticker for heatsink installation, check the heatsink manufacturer’s recommendations. Some heatsinks are designed to work with stickers in place, while others explicitly recommend removal. If the heatsink includes its own thermal pads, these are typically designed for direct contact with the drive’s components.
Stacking Multiple M.2 Drives
When installing multiple M.2 drives in close proximity, particularly on motherboards with stacked M.2 slots, removing stickers can help reduce the total thermal mass between drives. This can improve heat dissipation by allowing drives to radiate heat more effectively to each other and to the surrounding air. However, this benefit is minor and should only be considered if you are experiencing thermal throttling with multiple drives.
Using Motherboard M.2 Heatsinks
Many modern motherboards include built-in M.2 heatsinks that cover the drive’s surface. When using these integrated heatsinks, you may need to remove the drive’s sticker to ensure proper contact between the heatsink and the drive. Consult your motherboard’s manual for specific instructions regarding sticker removal when using its M.2 heatsinks.
When Should You Keep the Sticker
In most situations, keeping the M.2 sticker in place is the recommended approach. Understanding when to leave the sticker helps you avoid unnecessary work and potential issues.
No Heatsink Installation
If you are not installing an aftermarket heatsink and your motherboard’s M.2 slot does not include a heatsink, there is generally no reason to remove the sticker. The minimal thermal impact does not justify the effort or potential warranty implications of removal. Leave the sticker in place and focus on other aspects of your build’s cooling.
Warranty Concerns
Removing the sticker may void your warranty in some cases, particularly if the removal damages the drive or if the manufacturer requires the sticker for warranty verification. While many manufacturers do not explicitly void warranties for sticker removal, the process of removing the sticker could potentially damage the drive’s components or leave adhesive residue that causes issues. When in doubt, leave the sticker in place to preserve your warranty coverage.
Thermal Interface Stickers
If your drive’s sticker is made from thermal interface material, removing it could actually harm cooling performance rather than improve it. These stickers are designed to aid heat transfer, and removing them may create an air gap between the drive’s components and whatever cooling solution is in place. If you are unsure whether your drive’s sticker is a thermal interface material, consult the manufacturer’s documentation before removing it.
M.2 Stickers and Heatsink Installation
For builders who want to maximize their M.2 SSD’s cooling performance, installing a heatsink is far more effective than removing the sticker alone. This section covers the proper process for installing M.2 heatsinks and how to handle stickers during the process.
Choosing the Right Heatsink
M.2 heatsinks come in various designs, from simple metal plates to elaborate heatpipe-based solutions. When choosing a heatsink, consider your drive’s thermal requirements, the available space in your case, and your motherboard’s M.2 slot configuration. For most users, a simple aluminum heatsink with thermal pads provides adequate cooling improvement without excessive cost or complexity.
High-performance NVMe SSDs that regularly reach temperatures above 70°C may benefit from more elaborate cooling solutions, including heatsinks with heatpipes or active cooling fans. However, for most builds, a basic heatsink provides sufficient cooling improvement to prevent thermal throttling during normal workloads.
Heatsink Installation Process
Installing an M.2 heatsink typically involves removing the drive’s sticker (if required by the heatsink manufacturer), applying thermal pads to the drive’s components, and securing the heatsink in place. Follow the heatsink manufacturer’s instructions carefully, as the specific process varies between products.
Before installing the heatsink, ensure the thermal pads are properly positioned to make contact with the drive’s hottest components: the controller and NAND flash chips. Misaligned thermal pads can reduce cooling effectiveness or create uneven pressure that could damage the drive. Take care to position the pads accurately and ensure they are firmly pressed against the components.
For a detailed guide on M.2 heatsink necessity, see our article on does SSD need heatsink. If you are unsure about M.2 slot compatibility, read our guide on does it matter which M.2 slot you use. For Samsung SSD owners, our how to install Samsung SSD 970 Evo Plus guide covers installation specifics.
Warranty Considerations
Understanding the warranty implications of removing your M.2 SSD’s sticker is important for protecting your investment. While policies vary between manufacturers, this section provides general guidance on what to expect.
Manufacturer Policies
Most SSD manufacturers do not explicitly void warranties for removing product labels, but policies vary significantly. Some manufacturers, like Samsung and Western Digital, generally do not require labels for warranty validation and focus instead on the drive’s serial number, which is often printed on the PCB rather than the label. Others may require the label for warranty claims, making its removal problematic.
Before removing any labels, check your drive manufacturer’s warranty terms and conditions. These are typically available on the manufacturer’s website or in the documentation included with the drive. If you are unsure, contact the manufacturer’s support team directly for clarification on their specific policy.
Documentation Best Practices
If you decide to remove the sticker, take a photo of it before removal to preserve the information it contains. Store this photo along with your other PC build documentation, including receipts, warranty information, and system specifications. This ensures you have the information available if you need to make a warranty claim in the future.
Additionally, consider recording the drive’s serial number in a separate location, such as a spreadsheet or note-taking app. The serial number is typically the most important piece of information for warranty claims, and having it recorded separately ensures you can access it even if the sticker is lost or damaged.
Proper M.2 Installation Guide
Regardless of whether you remove the sticker, proper M.2 SSD installation is essential for optimal performance and longevity. This section covers the correct installation process for M.2 drives in 2026.
Preparing for Installation
Before installing your M.2 SSD, ensure you have identified the correct M.2 slot on your motherboard. Modern motherboards typically include multiple M.2 slots with different capabilities, including different supported speeds and form factors. Consult your motherboard’s manual to determine which slot is best suited for your drive.
Power off your computer and unplug it from the wall before beginning installation. Ground yourself by touching a metal surface to discharge any static electricity, which could damage the sensitive components on the M.2 drive. If you have an anti-static wrist strap, use it for additional protection.
Installation Steps
To install an M.2 SSD, first locate the M.2 slot on your motherboard. Remove any existing M.2 heatsink or mounting hardware if necessary. Insert the drive into the slot at a 30-degree angle, ensuring the connector is fully seated. Then gently press the drive down flat against the motherboard and secure it with the mounting screw or tool-less mounting mechanism provided with your motherboard.
Do not overtighten the mounting screw, as this can damage the drive or the motherboard. The screw should be snug but not overly tight. If your motherboard uses a tool-less mounting mechanism, follow the manufacturer’s instructions for securing the drive properly.
Frequently Asked Questions
Will removing the sticker void my warranty?
It depends on the manufacturer’s specific warranty policy. Most manufacturers do not explicitly void warranties for label removal, but some may require the label for warranty claims. Check your manufacturer’s warranty terms before removing any stickers, and consider photographing the label for your records.
Does the sticker affect SSD performance?
The sticker’s impact on performance is negligible for most users. Regular paper or vinyl stickers may insulate the drive slightly, but the temperature difference is typically only 1-3°C, which does not affect performance in systems with adequate airflow. The sticker will not impact read or write speeds directly.
What if my sticker leaves residue when removed?
Adhesive residue can typically be cleaned with isopropyl alcohol (90% or higher concentration) and a lint-free cloth. Apply the alcohol to the cloth, not directly to the drive, and gently rub the residue until it dissolves. Avoid using excessive force or harsh chemicals that could damage the drive’s components.
Do all M.2 drives have stickers?
Most M.2 drives include some form of label or sticker, though the type and size vary between manufacturers. Some high-end drives may have minimal labeling, while others have larger stickers that cover more of the drive’s surface. Some drives may also come with a protective film that should be removed before installation.
Can I transfer the sticker information to another location?
Yes, you can photograph the sticker before removal to preserve all the information it contains. For the serial number, you can also record it in a text file or note-taking application. Some manufacturers also provide warranty registration tools that allow you to store this information digitally.
Is there a thermal difference between SSD brands’ stickers?
Yes, some manufacturers use thermal interface materials for their stickers, while others use standard paper or vinyl. Thermal interface stickers may provide a small cooling benefit, while standard stickers may insulate slightly. If you are concerned about thermal performance, check the manufacturer’s specifications for information about the sticker’s material.
Should I remove the sticker if my motherboard has an M.2 heatsink?
Check your motherboard manufacturer’s recommendations. Some heatsinks are designed to work with stickers in place, while others recommend removal for optimal thermal contact. In general, if the heatsink includes thermal pads, they are designed for direct contact with the drive’s components, and removing the sticker may be necessary for the best cooling performance.
Can I reattach the sticker after removing it?
Most stickers can be reattached, though the adhesive may not hold as well as the original application. If you need to reattach a sticker, ensure the drive’s surface is clean and free of debris before pressing the sticker back into place. However, reattached stickers may not look as clean as the original installation.