How to Check PSU Compatibility (2026 Complete Guide)
Last updated: July 19, 2026 | Estimated reading time: 14 minutes
Upgrading your PC or building a new system in 2026? One of the most overlooked yet critical components is the power supply unit (PSU). A mismatched PSU can prevent your system from booting, cause random shutdowns under load, or even damage your hardware. Whether you are pairing a next-generation GPU with your existing build or starting completely from scratch, knowing how to verify PSU compatibility saves you time, money, and frustration. This guide walks you through every aspect of PSU compatibility, from connector types and wattage calculations to form factors and the exact steps to confirm your PSU works flawlessly with your components.
Table of Contents
- What PSU Compatibility Means
- Connector Types: 24-Pin, EPS, and PCIe Explained
- Wattage Requirements for Different Builds
- Form Factor: ATX, SFX, and TFX
- How to Use PCPartPicker to Check Compatibility
- Step-by-Step Compatibility Check
- Common Mistakes to Avoid
- Frequently Asked Questions
- Conclusion
What PSU Compatibility Means
PSU compatibility is the measure of whether a power supply unit can physically and electrically work with your specific set of PC components. It is not simply about having enough wattage. A PSU may have more than enough total wattage but lack the right connectors for your motherboard or GPU. It may physically not fit inside your case. It may fail to deliver stable voltage to sensitive components under load. True compatibility covers four main areas: connector availability, wattage sufficiency, physical form factor, and electrical quality.
In 2026, the compatibility landscape has shifted significantly. The ATX 3.1 and ATX 3.0 specifications are now mainstream across mid-range and high-end power supplies. PCIe 5.0 12VHPWR and the revised 12V-2×6 connectors are standard on current-generation GPUs from both NVIDIA and AMD. Intel’s latest LGA 1851 platform and AMD’s AM5 platform both have specific EPS power delivery requirements that differ from their predecessors. Older PSUs from even two or three years ago may not ship with the cables needed for modern hardware. This makes compatibility checking more important and more nuanced than ever before.
There is also a meaningful distinction between a PSU being technically compatible and being a genuinely good match for your build. A unit can technically power your system but operate at 90 percent of its rated capacity constantly, leaving no headroom for transient spikes, running its fan at maximum speed, and running hot enough to shorten its lifespan. True compatibility means the PSU fits your case perfectly, has every connector your components require, delivers sufficient wattage with comfortable headroom for spikes and future upgrades, and meets quality standards that protect your entire investment.
Connector Types: 24-Pin, EPS, and PCIe Explained
Connectors are the most common source of PSU incompatibility that builders encounter. If your PSU does not have the right plug, your component simply will not receive power. There is no workaround other than using the correct cable. Here is a comprehensive breakdown of every connector type you will encounter in 2026 builds.
24-Pin ATX Motherboard Connector
The 24-pin connector is the primary power delivery cable for your motherboard. It supplies power to the chipset, RAM slots, PCIe expansion slots, front panel headers, and various onboard controllers. This connector has been the ATX standard for over two decades, and virtually every ATX and SFX PSU includes one. If you are using a standard ATX motherboard, this connector is not a compatibility concern. However, some small form factor and embedded boards use alternative power delivery methods such as DC-DC input jacks or direct SATA power, so always verify before assuming compatibility.
8-Pin (4+4) EPS CPU Connector
The EPS connector supplies dedicated power directly to the CPU voltage regulator module (VRM). Most modern motherboards require one 8-pin EPS connector, but high-end boards designed for workstation CPUs or extreme overclocking platforms may require two 8-pin connectors for stable power delivery under heavy sustained loads. The 4+4 pin split design allows the connector to work with motherboards that only need a 4-pin CPU power input, which is common on budget and older boards.
In 2026, AMD’s AM5 platform and Intel’s LGA 1851 platform both benefit from clean, dedicated EPS power delivery. Some motherboard manufacturers now explicitly recommend or even require dual EPS connections for their flagship Z890, X870E, and X670E boards, particularly when running high-core-count processors at stock boost clocks or above. Always check your motherboard manual to confirm exactly how many EPS connectors it requires before selecting a PSU.
PCIe Power Connectors
GPU power delivery has evolved significantly over the past few generations. Understanding the current connector landscape is essential for compatibility in 2026:
| Connector | Power Delivery | Common Use | Found On |
|---|---|---|---|
| 6-pin PCIe | 75W | Older mid-range GPUs | Legacy PSUs |
| 8-pin (6+2) PCIe | 150W | Most current GPUs | All modern PSUs |
| 12VHPWR (12V-2×6) | Up to 600W | RTX 40/50 series, high-end AMD Radeon | ATX 3.0/3.1 PSUs |
| Dual 8-pin PCIe | 300W | High-end GPUs without 12VHPWR | Most 750W+ PSUs |
| SATA Power | Up to 54W per chain | SSDs, HDDs, fan controllers | All PSUs |
| Molex (4-pin peripheral) | Varies by load | Legacy fans, pump adapters, accessories | Most PSUs (declining availability) |
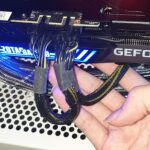
The 12VHPWR connector, formally revised as the 12V-2×6 in the ATX 3.1 specification, is the single most important connector to verify in 2026. If your GPU requires it and your PSU does not include a native 12VHPWR cable, you will need to rely on an adapter — which adds an additional failure point and is not recommended for long-term use, especially in high-wattage builds. Always verify that your PSU includes the correct native cable for your specific GPU model before purchasing.
Wattage Requirements for Different Builds
Wattage is the most straightforward compatibility metric to evaluate, but it is also the most commonly miscalculated. The total wattage capacity of your PSU must exceed the combined power draw of all your components, ideally by a margin of 20 to 30 percent for efficiency optimization, heat management, transient spike headroom, and future upgrade flexibility.
Here is a practical guide to wattage requirements based on the most common build types you will encounter in 2026:
| Build Type | Typical Components | Estimated Draw | Recommended PSU |
|---|---|---|---|
| Office / Basic Use | Integrated GPU, 65W CPU, 1 drive | ~150W | 350-450W |
| 1080p Gaming | Mid-range GPU (RTX 4060/5060), 65W CPU | ~300W | 550-650W |
| 1440p Gaming | Upper-mid GPU (RTX 4070/5070), 105W CPU | ~400W | 650-750W |
| 4K Gaming | High-end GPU (RTX 4080/5080), 125W CPU | ~550W | 850-1000W |
| Enthusiast / Workstation | Flagship GPU (RTX 4090/5090), 170W+ CPU, multiple drives | ~750W | 1000-1200W |
| Dual-GPU / Custom Loop | Multiple GPUs, custom water cooling, many drives and fans | ~900W+ | 1200-1600W |
These figures represent typical load scenarios under gaming or productivity workloads. Actual power draw depends on the specific component models you choose, your overclocking or undervolting settings, ambient temperature, and the number of peripherals connected. Always use a PSU calculator for precise numbers specific to your exact hardware list.
A common question that comes up repeatedly is whether a higher wattage PSU causes higher electricity bills. The answer is no — a PSU only draws the power your components actually demand, not its full rated capacity. A 1000W PSU powering a 300W system draws approximately 300W plus conversion losses, which is identical to what a 650W PSU would draw doing the same job. Read our detailed explanation on whether higher wattage PSUs use more electricity for the complete breakdown including the efficiency curve analysis.
Similarly, many builders wonder whether a PSU can be too powerful for their system. A PSU that is significantly oversized for your build will operate at lower efficiency when idling or under light loads because it falls below its optimal efficiency range, but it will absolutely not damage your components. It simply costs more upfront and wastes a small amount of extra energy at idle. Our guide on whether a power supply can be too powerful covers the efficiency curve and cost-benefit analysis in detail.
Form Factor: ATX, SFX, and TFX
Form factor determines whether a PSU physically fits inside your case. Using the wrong form factor means the PSU will not mount correctly, may obstruct airflow paths, or may simply not fit at all. The three primary form factors you will encounter when shopping for a PSU in 2026 are ATX, SFX, and TFX.
ATX (Advanced Technology Extended)
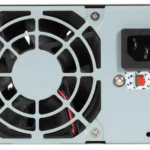
ATX is the standard full-size PSU form factor, measuring 150mm wide, 86mm tall, and typically ranging from 140mm to 200mm in depth depending on the wattage and model. It fits the vast majority of mid-tower and full-tower PC cases on the market. ATX PSUs offer the widest range of wattage options from 300W to 1600W, the most diverse cable configurations, and generally the best value per watt of any form factor. If you are building in a standard tower case, ATX is almost certainly the form factor you need.
SFX (Small Form Factor)
SFX PSUs are significantly smaller than ATX, measuring 125mm wide, 63.5mm tall, and 100mm deep. They are designed specifically for compact cases, mini-ITX builds, and small form factor (SFF) systems where space is at a premium. SFX PSUs have improved dramatically over the past several years, with premium units now available up to 1000W. However, they are typically more expensive per watt than their ATX counterparts and may run louder under load due to their smaller fan sizes.
The SFX-L variant extends the depth to 130mm to accommodate larger, quieter 120mm fans instead of the standard 80mm or 92mm fans found in regular SFX units. SFX-L PSUs fit cases designed for standard SFX mounting, but they may be too long for the most compact mini-ITX enclosures. Always check your case manufacturer’s maximum PSU length specification before committing to an SFX-L unit.
TFX (Thin Form Factor)
TFX is a narrow, elongated form factor measuring 85mm wide, 65mm tall, and 175mm deep. It is primarily found in slim desktop cases, office PCs, and certain pre-built systems from manufacturers like Dell and HP. TFX PSUs are limited in wattage, typically maxing out around 300 to 400W, and are generally not suitable for gaming or workstation builds that demand higher power delivery. If you are upgrading a slim desktop system, carefully verify that your case accepts TFX before purchasing an ATX replacement that will not fit.
How to Use PCPartPicker to Check Compatibility
PCPartPicker is the single most reliable free tool available for checking PSU compatibility before you make a purchase. It automatically cross-references connector requirements, wattage needs, and physical constraints across your entire selected component list. Here is exactly how to use it effectively in 2026:
Step 1: Navigate to pcpartpicker.com and start a new build. Select your country or region for accurate pricing, local availability, and retailer options. The tool pulls data from dozens of retailers worldwide.
Step 2: Add every component you plan to purchase first — CPU, motherboard, GPU, RAM, storage drives, case, and any other hardware including fans, coolers, and adapters. The tool needs your complete component list to calculate accurate total power requirements and verify connector compatibility across the entire system.
Step 3: Navigate to the Power Supply section of the build page. PCPartPicker will display a real-time wattage estimate based on all the components you have already selected. It shows a running calculation of estimated power draw, giving you a reliable baseline for selecting a PSU with adequate wattage headroom.
Step 4: Filter PSUs by the specific connectors you need based on your build. PCPartPicker highlights compatibility issues in real time as you browse. If your selected GPU requires a 12VHPWR connector and the PSU does not include one, the tool flags this as a compatibility issue directly in the product listing.
Step 5: Review the compatibility notes section at the bottom of your build page. PCPartPicker aggregates all potential issues — including form factor conflicts, missing connector warnings, and estimated wattage concerns — into a single, organized warnings list that is easy to review before you commit to purchasing.
While PCPartPicker is an excellent starting point, it is not infallible. It may not catch every edge case, particularly with very new hardware released after its most recent database update cycle. Always verify critical details — especially specific connector types, cable compatibility, and dual EPS requirements — against the official specifications published by your motherboard, GPU, and PSU manufacturers directly.
Step-by-Step Compatibility Check
Follow this systematic, methodical process to verify PSU compatibility for any build. Each step eliminates a potential point of failure and ensures nothing is overlooked.
Step 1: List Every Component That Draws Power
Write down every single component that draws power from the PSU: CPU, GPU, motherboard, RAM modules, storage drives (both SSD and HDD), case fans, RGB lighting controllers, USB devices connected to internal headers, water cooling pumps and radiators, and any other peripherals or accessories. Each component contributes to the total system power draw, and missing even one can result in an inadequate PSU selection.
Step 2: Calculate Total Power Draw
Use an online PSU calculator like the one built into PCPartPicker, or manually reference the TDP (Thermal Design Power) of your CPU and GPU and add estimated system overhead of 100 to 150W. A general rule of thumb is to add 100 to 150W to the combined TDP of your CPU and GPU to account for the motherboard, RAM, drives, fans, and other components. For example, an RTX 5080 (rated around 360W) paired with a Ryzen 7 9800X3D (rated at 120W) would suggest approximately 480W for just those two components, plus 100 to 150W for everything else, landing your total system draw somewhere around 580 to 630W.
Step 3: Add Headroom for Spikes and Efficiency
Take your calculated total power draw and add 20 to 30 percent. This additional headroom accounts for transient power spikes (which modern GPUs are notorious for), aging PSU efficiency degradation over time, and potential future component upgrades. If your system draws 600W under full load, target a PSU rated for 750 to 850W to ensure comfortable operation.
Step 4: Verify Connector Requirements for Each Component
Check each component’s specific power connector needs methodically:
- How many EPS connectors does your motherboard require? Check the motherboard manual, specifically the power delivery section.
- What PCIe power connector does your GPU need? Check the GPU specification sheet or the manufacturer’s PSU recommendation page.
- How many SATA power connectors do your storage drives need? Count each SSD and HDD.
- Do any accessories or peripherals require Molex or other legacy connectors?
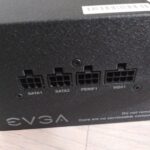
Step 5: Match Your Connector Requirements Against the PSU’s Included Cables
Compare your full list of connector requirements against the PSU’s complete cable inventory. Check the PSU manufacturer’s official website for a detailed cable list — do not rely solely on the product listing on retail sites like Amazon or Newegg, which may be incomplete or inaccurate in their specifications.
Step 6: Verify Form Factor Compatibility
Confirm that your case supports the PSU form factor you are considering (ATX, SFX, SFX-L, or TFX) and check the maximum PSU length clearance. Measure the physical space inside your case if you have any doubt about whether a particular unit will fit.
Step 7: Check the Rail Configuration
For high-end builds drawing significant power, verify the PSU’s +12V rail amperage. A single-rail design is simpler to configure and sufficient for the vast majority of builds. Multi-rail designs offer per-rail overcurrent protection but require careful distribution of cables across rails. For builds with a single high-power GPU, either configuration works fine. For dual-GPU or extreme multi-component builds, single-rail is generally recommended for simplicity.
Step 8: Confirm the Efficiency Rating
Look for an 80 PLUS certification at minimum. 80 PLUS Gold is the sweet spot for most builds in 2026, offering good efficiency at a reasonable price point. Platinum and Titanium certifications offer marginal efficiency gains at significant price premiums that rarely justify the extra cost for typical consumer builds. Efficiency matters most for systems that run 24/7 or draw very high wattages consistently.
Common Mistakes to Avoid
These are the most frequent PSU compatibility errors that builders make, even experienced ones in 2026. Avoiding these mistakes will save you significant time, money, and potential hardware damage.
Mistake 1: Assuming Wattage Is the Only Factor
A 1000W PSU with only one 8-pin EPS connector will not work with a motherboard that requires two. Wattage does not determine connector count, cable length, or cable type. Always verify both wattage and connector compatibility independently.
Mistake 2: Relying on Adapters for GPU Power
Adapter cables such as dual 8-pin PCIe to 12VHPWR adapters are a temporary convenience, not a permanent solution for a daily-use build. They add electrical resistance, create additional heat at the connection points, and have been linked to connector melting incidents with high-power GPUs drawing 400W or more. If your GPU requires a 12VHPWR connector, invest in a PSU that includes one natively.
Mistake 3: Mixing Modular Cables Between PSUs
This point bears repeating because the consequences are severe and irreversible. Modular PSU cables are pinout-specific to the manufacturer and often to the specific model line within that brand. A Corsair cable will not work with a Seasonic PSU even if the physical connector appears to fit perfectly. Using the wrong cable can send 12V to a 5V rail or ground a live pin, destroying components instantly. Always use the cables that came with your PSU, and if you need replacements or extensions, purchase them directly from the PSU manufacturer or a verified compatible third party like CableMod with the exact PSU model specified.
Mistake 4: Ignoring Case Compatibility
An ATX PSU simply will not fit in a case designed exclusively for SFX. Some cases support multiple form factors with included mounting brackets, but many do not. Always check your case specifications before purchasing a PSU to confirm which form factors are supported.
Mistake 5: Underestimating Transient Power Spikes
Modern GPUs like the RTX 4090 and RTX 5090 can spike well above their rated TDP for milliseconds at a time during intense gaming or rendering workloads. These transient loads can trip overcurrent protection on PSUs that are technically rated for the GPU’s sustained draw. This is precisely why 20 to 30 percent headroom matters, and why ATX 3.0 and 3.1 PSUs with enhanced transient handling capabilities are worth the investment for any build running a high-end current-generation GPU.
Mistake 6: Not Planning for Future Upgrades
If there is any chance you might upgrade your GPU to a higher tier in the next year or two, buy a PSU with adequate headroom now. Replacing a PSU later means re-cabling an entire modular system (especially if you change brands), and the cost difference between a 650W and 850W unit is often less than the hassle and expense of a mid-build PSU swap down the line.
Mistake 7: Overlooking the SATA and Molex Connector Count
If you are running multiple SSDs, HDDs, fan hubs, RGB controllers, and other SATA-powered accessories, you may need more SATA connectors than your PSU provides on a single cable chain. Some PSUs limit the number of SATA connectors per cable to three or four for power distribution reasons. Check both the total connector count and the number of connectors per individual cable to ensure you have enough for your complete drive and accessory setup.
Frequently Asked Questions
Can I use a PSU from a different brand than my motherboard?
Absolutely. PSU compatibility is based on connector standards and wattage, not brand matching. An EVGA PSU works perfectly with an ASUS motherboard, a Corsair PSU works with an MSI motherboard, and so on. The ATX specification was specifically designed to ensure cross-brand interoperability. The only brand-specific concern is with modular cables — those must always match the PSU manufacturer and model, not the motherboard brand.
Do I need an ATX 3.0 or ATX 3.1 PSU for a 2026 build?
If your GPU uses a 12VHPWR connector — which most mid-range and above NVIDIA and AMD GPUs from 2024 onward do — an ATX 3.0 or 3.1 PSU is strongly recommended. These PSUs include native 12VHPWR cables and are specifically designed to handle the transient power spikes characteristic of modern high-end GPUs. ATX 3.1, released in 2024, further refined the 12VHPWR connector into the improved 12V-2×6 design with better latch reliability and clearer insertion feedback. For builds using older 8-pin PCIe GPUs, a quality ATX 2.x PSU remains perfectly fine.
How do I know if my PSU can handle GPU power spikes?
ATX 3.0 and 3.1 PSUs are tested and certified to handle transient loads up to 200 percent of their rated power output for 100 microseconds and up to 120 percent for 10 milliseconds. Older ATX 2.x PSUs have no such certification and rely on their overcurrent protection circuits, which may or may not be fast enough to handle extreme transient events. If you are running a high-end GPU like the RTX 4070 Ti or above on an older ATX 2.x PSU, ensure you have at least 30 percent headroom above the GPU’s rated TDP to account for transient spikes. Alternatively, upgrading to an ATX 3.0 or 3.1 unit provides guaranteed transient handling.
Is 80 PLUS Gold worth the extra cost over Bronze?
For most builds, yes. 80 PLUS Gold PSUs typically achieve 87 to 90 percent efficiency at 50 percent load, compared to 82 to 85 percent for Bronze-rated units. Over a system’s operational lifetime, especially one running eight or more hours daily, the cumulative electricity savings often offset the initial price difference. Gold-rated PSUs also tend to use higher-quality internal components such as Japanese capacitors, resulting in cleaner voltage regulation, lower ripple, and longer operational lifespan. For strictly budget builds or systems used very infrequently, Bronze is acceptable.
Can a PSU cause system instability even if it has enough wattage?
Absolutely, and this is more common than many builders realize. Insufficient wattage is only one potential cause of PSU-related system instability. Poor voltage regulation, excessive ripple on the power rails, inadequate transient response to sudden load changes, and overheating can all cause random crashes, unexpected reboots, blue screens of death, and data corruption — even when the PSU has wattage to spare on paper. This is precisely why choosing a reputable brand with proper safety certifications (80 PLUS, OCP, OVP, UVP protections) matters as much as hitting the right wattage target. A cheap, poorly regulated 850W PSU may deliver worse power quality than a quality 650W unit from a trusted manufacturer.
How long do power supplies typically last?
A quality PSU from a reputable manufacturer typically lasts 7 to 10 years under normal operating conditions. Most units come with manufacturer warranties ranging from 5 to 12 years, which serves as a reasonable proxy for expected operational lifespan. Factors that can significantly reduce PSU lifespan include excessive ambient heat, dust buildup on internal components and the fan, running at near-maximum rated load continuously for extended periods, and poor power grid quality with frequent voltage surges or brownouts. Investing in a unit with a longer warranty period generally correlates with better internal component quality and longer real-world service life.
Should I buy a fully modular, semi-modular, or non-modular PSU?
Fully modular PSUs, where every cable detaches completely from the unit, offer the best cable management experience. They improve airflow inside your case and result in a cleaner-looking build, which matters if you have a windowed side panel. Semi-modular PSUs, where the essential 24-pin motherboard and EPS CPU cables are permanently attached but peripheral cables are detachable, offer a good balance of convenience and value for most builds. Non-modular PSUs have all cables permanently attached to the unit, which is the cheapest option but creates excess cable clutter inside the case that can impede airflow. For most builds in 2026, a semi-modular or fully modular PSU is recommended for easier installation and better thermal performance.
Does a higher wattage power supply use more electricity from my wall outlet?
No, it does not. A PSU draws only what your components actually demand from it at any given moment, regardless of its maximum rated capacity. A 1000W PSU powering a 400W system draws approximately 400W from the wall plus conversion losses, which is essentially identical to what a 650W PSU would draw doing the same job. The rated wattage number represents the maximum output capacity, not the idle power draw. However, PSUs are most efficient when operating at 40 to 60 percent of their rated load, so a heavily overloaded PSU running at 90 percent capacity actually wastes more energy as heat than a larger unit operating comfortably within its optimal efficiency range. Our detailed guide on whether higher wattage PSUs use more electricity explains the efficiency curve in full depth.
Conclusion
Checking PSU compatibility in 2026 is a multi-step process that goes far beyond simply matching a wattage number to your estimated power draw. You need to verify that the PSU provides every single connector your components require, physically fits inside your case with adequate clearance for cables, delivers clean and stable power with comfortable headroom for transient spikes, and meets modern specifications like ATX 3.0 or 3.1 if you are running current-generation high-power GPUs.
The good news is that tools like PCPartPicker make the compatibility checking process significantly easier than it used to be, and the ongoing standardization under the ATX 3.0 and 3.1 specifications is gradually reducing the connector confusion that plagued earlier hardware generations. Take the time to methodically work through the eight-step compatibility checklist outlined in this guide before you make a purchase, and you will avoid the most common pitfalls that trip up even experienced builders.
A compatible, high-quality PSU is the invisible foundation of a reliable PC system. It is the one component that touches everything else electrically, and getting it right means your system will deliver years of stable, trouble-free performance. Invest the time to do it properly, and the rest of your build will thank you.