Can You Install 2 SSDs? (2026 Complete Guide)
Last updated: July 19, 2026 | Estimated reading time: 13 minutes
Adding a second SSD to your PC is one of the most popular and practical upgrades you can make. Whether you want to separate your operating system from your games, add more storage for media files, or set up a dedicated drive for video editing, installing two SSDs is a straightforward process that most builders can handle. However, the exact method depends on your motherboard’s available slots, the types of SSDs you’re using, and how your system handles multiple storage devices. In this comprehensive guide, we’ll walk you through everything you need to know about installing two SSDs, from checking compatibility to BIOS configuration and troubleshooting common issues.
Table of Contents
- Short Answer
- How to Check If Your Board Supports 2 SSDs
- M.2 + SATA Combo
- Two M.2 Slots
- SSD + HDD Combo
- Installing 2 SSDs Step-by-Step
- BIOS Configuration
- Common Mistakes
- FAQ
- Conclusion
Short Answer
Yes, you can install 2 SSDs in most modern PCs. The method depends on your motherboard’s available connections. Most modern motherboards support multiple storage devices through various combinations: M.2 NVMe slots, SATA ports, or a mix of both. The most common configurations are two M.2 NVMe drives, one M.2 NVMe plus one 2.5″ SATA SSD, or one SSD plus one traditional hard drive. Before purchasing a second SSD, check your motherboard’s specifications to confirm how many M.2 slots and SATA ports are available and whether any share bandwidth with other components.
How to Check If Your Board Supports 2 SSDs
Before purchasing a second SSD, you need to verify that your motherboard has the available connections and bandwidth to support it. Here’s how to check.
Method 1: Check Your Motherboard Manual
Your motherboard’s manual is the most authoritative source. It lists every M.2 slot and SATA port, their specifications (PCIe generation, supported protocols), and any bandwidth sharing limitations. If you don’t have the physical manual, most manufacturers provide digital versions on their websites. Search for your motherboard model number (printed on the board itself) followed by “manual” or “specifications.”
Method 2: Use CPU-Z or Similar Software
Tools like CPU-Z, Speccy, or HWiNFO64 can identify your motherboard model and provide basic specifications. Once you know your exact motherboard model, you can look up its specifications online to determine available storage connections. While these tools don’t directly show available M.2 slots, they help identify your hardware for further research.
Method 3: Physical Inspection
Open your case and physically count the available M.2 slots and SATA ports on your motherboard. M.2 slots are typically located between the CPU socket and the primary PCIe x16 slot, or below the secondary PCIe slots. SATA ports are usually grouped together near the right edge of the motherboard. Count both available and occupied slots to determine how many you can use.
Method 4: Check Manufacturer’s Website
Visit your motherboard manufacturer’s website and search for your model’s specifications page. This will list all M.2 slots, SATA ports, and their specifications. Pay attention to notes about bandwidth sharing, as some M.2 slots may disable certain SATA ports when populated. For a comprehensive guide on M.2 slot compatibility, see our article on does it matter which M.2 slot I use.
Understanding Bandwidth Sharing
Many motherboards share bandwidth between M.2 slots and SATA ports. For example, populating a specific M.2 slot might disable SATA ports 5 and 6, or using both M.2 slots might reduce the primary PCIe x16 slot from x16 to x8 mode. These limitations are always documented in the motherboard manual and specifications. Always check for bandwidth sharing before purchasing additional storage, as it can affect both storage performance and GPU performance.
M.2 + SATA Combo
The most common two-SSD configuration combines an M.2 NVMe drive with a 2.5″ SATA SSD. This setup provides the best of both worlds: ultra-fast NVMe storage for your operating system and frequently used applications, plus affordable SATA storage for games, media, and less frequently accessed files.
Why This Configuration Works Well
M.2 NVMe drives connect directly to the CPU via PCIe lanes, providing maximum speed for boot drives and applications that benefit from fast storage access. SATA SSDs, while slower than NVMe, still offer dramatically faster performance than traditional hard drives and are available in larger capacities at lower prices. Combining both types lets you optimize performance where it matters most while having ample storage for everything else.
Compatibility Considerations
Virtually all modern motherboards support this configuration. Even budget motherboards typically have at least one M.2 slot and multiple SATA ports. The key consideration is ensuring your M.2 slot supports NVMe (not just SATA) if you want maximum speed. M.2 slots can support either NVMe, SATA, or both – check your motherboard specifications to confirm what your specific slot supports. For more on NVMe heatsink requirements, see our guide on does SSD need heatsink.
Cable Management
SATA SSDs require a SATA data cable (connecting to the motherboard) and a SATA power cable (from the PSU). These cables add to your cable management workload. Route SATA cables behind the motherboard tray when possible, and use the shorter cables that come with your SSD to minimize clutter. Some cases have dedicated SSD mounting points that help with clean cable routing.
Two M.2 Slots
Many mid-range and high-end motherboards include two or more M.2 slots, allowing you to install two NVMe SSDs without any SATA cables. This is becoming increasingly common as NVMe drives have dropped in price and M.2 has become the preferred form factor for storage.
Slot Specifications
When using two M.2 slots, pay attention to the specifications of each slot. Typically, the primary M.2 slot (located closest to the CPU) connects directly to the CPU via PCIe 4.0 or 5.0, providing maximum bandwidth. The secondary M.2 slot may connect through the chipset, which can limit bandwidth or share lanes with other components. This doesn’t mean the secondary slot is bad – it’s still vastly faster than SATA – but it may have lower peak speeds or bandwidth limitations when other devices are active.
PCIe Generation Matters
M.2 NVMe drives come in different PCIe generations: PCIe 3.0, 4.0, and 5.0. Each generation roughly doubles the bandwidth of the previous one. A PCIe 4.0 x4 NVMe drive can achieve sequential read speeds of approximately 7,000 MB/s, while PCIe 3.0 maxes out around 3,500 MB/s. Ensure your motherboard’s M.2 slots support the PCIe generation your SSDs are designed for. Installing a PCIe 4.0 SSD in a PCIe 3.0 slot will work but at reduced speeds.
Thermal Considerations
NVMe SSDs can generate significant heat during sustained workloads, potentially leading to thermal throttling. When installing two NVMe drives, ensure both have adequate cooling. Many motherboards include M.2 heatsinks – use them. If your motherboard doesn’t include heatsinks, consider aftermarket M.2 heatsinks, especially for drives that will handle heavy workloads like video editing or large file transfers. For detailed information about thermal management for NVMe drives, see our guide on does SSD need heatsink.
Boot Drive Selection
When you have two NVMe drives, you’ll need to select which one is the boot drive. This is configured in BIOS/UEFI settings. Generally, use the primary M.2 slot (connected directly to the CPU) for your boot drive to ensure maximum performance for your operating system and applications. The secondary drive can then be used for games, media, or other storage needs.
SSD + HDD Combo
While the question specifically asks about two SSDs, many builders combine one SSD with a traditional hard disk drive (HDD). This remains a popular configuration for users who need large storage capacity at affordable prices.
Why This Configuration Still Works
HDDs offer massive storage capacities (4TB, 8TB, even 16TB+) at prices per terabyte that SSDs can’t match. For storing large media libraries, game collections, backups, and archives, HDDs remain practical. Using an SSD as your boot drive and primary application storage while keeping an HDD for bulk storage is a cost-effective approach that many users prefer.
Performance Expectations
Understand the performance difference between SSD and HDD storage. NVMe SSDs can achieve sequential read speeds of 3,500-14,000 MB/s, SATA SSDs reach 500-560 MB/s, while HDDs typically max out at 150-200 MB/s. For boot times, application loading, and game loading, the difference is dramatic. HDDs are perfectly adequate for sequential media playback and file archival where speed isn’t critical.
Mounting and Connections
3.5″ HDDs mount in dedicated drive bays in your case, typically behind the motherboard tray or in a drive cage at the front. They require both a SATA data cable and a SATA power cable. Ensure your case has adequate 3.5″ bays and that your PSU has enough SATA power connectors for all your drives. Some cases have tool-less HDD mounting systems that make installation quick and easy.
Installing 2 SSDs Step-by-Step
Here’s a detailed walkthrough for installing two SSDs in your PC.
Step 1: Preparation
Before starting, gather the necessary tools and components:
- Both SSDs (M.2, SATA, or combination)
- Screwdriver (Phillips #1 or #2, depending on your case and motherboard screws)
- M.2 mounting screw (usually included with your motherboard)
- SATA data cables (for SATA SSDs – usually included with the motherboard)
- Anti-static wrist strap (optional but recommended)
Power off your PC, unplug the power cable, and press the power button once to discharge any residual power. Ground yourself by touching a metal part of the case before handling components.
Step 2: Install M.2 SSD (If Applicable)
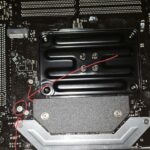
If you’re installing an M.2 drive, locate the M.2 slot on your motherboard. Remove the mounting screw and heatsink (if present). Hold the M.2 drive at approximately a 30-degree angle and insert it into the slot at the appropriate angle. The connector is keyed and only fits one way. Once inserted, gently press the drive down flat and secure it with the mounting screw. Replace the heatsink if your motherboard includes one.
Step 3: Install SATA SSD (If Applicable)
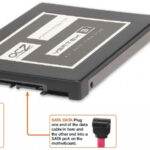
For 2.5″ SATA SSDs, locate a suitable mounting position in your case. Many cases have dedicated SSD mounting points behind the motherboard tray, on the PSU shroud, or in drive cages. Secure the SSD using the provided screws or mounting mechanism. Connect the SATA data cable from the SSD to an available SATA port on the motherboard, then connect the SATA power cable from the PSU to the SSD.
Step 4: Cable Management
Route cables behind the motherboard tray whenever possible to maintain clean airflow. Ensure SATA cables aren’t blocking other components or interfering with GPU installation. If using multiple SATA drives, consider using right-angle SATA connectors for cleaner routing in tight spaces. Zip ties or Velcro straps help keep cables organized.
Step 5: Close the Case and Power On
After installing all drives and connecting cables, double-check all connections. Close the case panel, reconnect the power cable, and power on your system. Enter BIOS/UEFI to verify that both drives are detected before proceeding to operating system installation or configuration.
BIOS Configuration
After installing your SSDs, you need to configure them in BIOS/UEFI to ensure they’re properly detected and set up for use.
Entering BIOS/UEFI
Restart your computer and press the appropriate key during boot to enter BIOS/UEFI setup. Common keys include Delete, F2, F10, or F12, depending on your motherboard manufacturer. The boot screen typically displays the correct key. Once in BIOS, navigate to the storage or boot configuration section.
Verifying Drive Detection
In the BIOS storage section, you should see both SSDs listed with their model numbers and capacities. If a drive isn’t detected, power off and recheck all connections. For M.2 drives, ensure the drive is properly seated in the slot and the mounting screw is secure. For SATA drives, verify both the data and power cables are firmly connected.
Setting Boot Order
If you’re installing a new operating system or want to boot from a specific drive, set the boot order in BIOS. Navigate to the Boot section and arrange the drives in your preferred order. Typically, you’ll want your OS drive (usually the NVMe drive) as the first boot device. If you’re cloning an existing OS to a new drive, ensure the new drive is set as the primary boot device after the cloning process.
AHCI vs RAID Mode
Ensure your SATA mode is set to AHCI (Advanced Host Controller Interface) rather than RAID unless you’re specifically setting up a RAID array. AHCI is the standard mode for individual drives and provides the best performance and compatibility for most users. RAID mode is only necessary if you’re combining drives in a RAID configuration for redundancy or performance. Most modern motherboards default to AHCI, but it’s worth verifying.
Enabling Resizable BAR
For NVMe SSDs that support it, consider enabling Resizable BAR (Base Address Register) in BIOS. This feature allows the CPU to access the entire SSD’s memory at once rather than in small chunks, potentially improving performance for certain workloads. Check your motherboard documentation for how to enable this feature, as the location and naming vary by manufacturer.
For comprehensive guidance on M.2 slot selection and configuration, see our article on does it matter which M.2 slot I use. If you’re wondering about the total number of SSDs your motherboard supports, check our guide on how many SSDs can a motherboard have.
Common Mistakes
Mistake 1: Not Checking Bandwidth Sharing
Failing to check bandwidth sharing between M.2 slots and SATA ports is the most common mistake. Some motherboards disable certain SATA ports when specific M.2 slots are populated, and some reduce PCIe bandwidth to the GPU when both M.2 slots are used. Always consult your motherboard manual before purchasing additional storage to understand these limitations.
Mistake 2: Installing NVMe in a SATA-Only M.2 Slot
Not all M.2 slots support NVMe. Some only support SATA M.2 drives. Installing an NVMe drive in a SATA-only slot won’t work – the drive won’t be detected. Check your motherboard specifications to confirm that your M.2 slot supports NVMe (PCIe) protocol. M.2 slots that support both NVMe and SATA are typically labeled as supporting both protocols.
Mistake 3: Forgetting to Secure M.2 Drives
M.2 drives are small and can be easy to forget after insertion. Always secure the drive with the mounting screw. An unsecured M.2 drive can shift during transport or operation, potentially losing contact with the slot and causing data corruption or drive failure. The mounting screw is small and easy to lose – keep it in a safe place during installation.
Mistake 4: Using the Wrong SATA Cables
Ensure you’re using SATA III (6 Gbps) data cables, not older SATA II (3 Gbps) cables. While SATA cables are physically compatible across generations, using an older cable will limit your SSD’s performance to SATA II speeds. Most modern motherboards include SATA III cables, but if you’re reusing cables from an older build, verify their specifications.
Mistake 5: Not Updating BIOS
Some motherboards require BIOS updates to properly support newer NVMe drives or to enable features like Resizable BAR. If your drives aren’t being detected or you’re experiencing unexpected performance issues, check your motherboard manufacturer’s website for BIOS updates. Updating BIOS is a straightforward process but should be done carefully following the manufacturer’s instructions.
Mistake 6: Overlooking Thermal Management
NVMe SSDs can throttle under sustained load without adequate cooling. If your motherboard includes M.2 heatsinks, use them. If not, consider aftermarket heatsinks, especially for drives that will handle heavy workloads. Thermal throttling can reduce NVMe performance by 50% or more, negating much of the speed advantage over SATA SSDs.
Frequently Asked Questions
Can I install 2 M.2 SSDs on any motherboard?
No, not all motherboards have two M.2 slots. Budget motherboards may only have one M.2 slot, while mid-range and high-end boards typically have two or more. Check your motherboard’s specifications to confirm how many M.2 slots are available. If your motherboard only has one M.2 slot, you can still add a second SSD using a SATA connection. For details on M.2 slot compatibility, see our guide on does it matter which M.2 slot I use.
Do I need to reinstall Windows when adding a second SSD?
No, you don’t need to reinstall Windows to add a second SSD. The new drive will appear as a separate volume in Windows once it’s properly installed and formatted. You can use Windows Disk Management to initialize, partition, and format the new drive. If you want to move your existing Windows installation to the new SSD, you’ll need to clone it using software like Macrium Reflect or Samsung Data Migration, which is a different process entirely.
Will a second SSD slow down my PC?
A properly installed second SSD should not slow down your PC. In fact, it may improve performance by reducing load on your primary drive. The only scenario where a second drive might affect performance is if it shares bandwidth with your GPU via the PCIe bus, which some motherboards do when both M.2 slots are populated. Check your motherboard specifications to understand any bandwidth sharing implications. For most users, adding a second SSD is purely beneficial.
How do I format a new SSD in Windows?
After installing a new SSD, open Windows Disk Management (right-click Start button, select “Disk Management”). The new drive will appear as an unallocated disk. Right-click it and select “New Simple Volume,” then follow the wizard to create a partition and format the drive. Choose NTFS for Windows use, and assign a drive letter. The process takes only a few minutes, and the drive will be ready for use immediately after formatting.
Can I use an M.2 and SATA SSD at the same time?
Yes, absolutely. M.2 NVMe and SATA SSDs use completely different interfaces and can coexist without any issues. This is one of the most common two-SSD configurations. The M.2 drive connects via PCIe, while the SATA drive uses the SATA interface. They operate independently and can be accessed simultaneously without performance penalties (assuming no bandwidth sharing between M.2 and SATA ports on your specific motherboard).
What’s the difference between M.2 SATA and M.2 NVMe?
Both use the M.2 form factor but use different protocols. M.2 SATA drives use the SATA interface and max out around 560 MB/s sequential read speed. M.2 NVMe drives use the PCIe interface and can achieve 3,500-14,000 MB/s depending on the PCIe generation. NVMe is significantly faster but also more expensive. Both fit in M.2 slots, but you must ensure your motherboard’s M.2 slot supports the protocol your drive uses. M.2 slots that support only SATA won’t work with NVMe drives.
How many SSDs can a motherboard support?
This varies by motherboard. Most modern motherboards support 2-4 M.2 NVMe drives plus 4-8 SATA devices. Some high-end workstation motherboards support even more. The total number depends on the motherboard’s chipset, available PCIe lanes, and physical slot count. Check your motherboard specifications for the exact number of supported storage devices. For a detailed breakdown, see our guide on how many SSDs can a motherboard have.
Should I put games on the second SSD?
Games benefit significantly from SSD storage, so putting them on a fast second SSD is a great idea. Modern games like those requiring direct storage can see reduced loading times on NVMe drives compared to SATA. If you have a fast NVMe second drive, install demanding games there for the best loading times. Less demanding games or those you rarely play can go on a SATA SSD or even an HDD if you’re tight on NVMe space.
Can I use a second SSD as a boot drive?
Yes, you can install Windows on either SSD and set it as the boot drive in BIOS. If you’re doing a fresh Windows installation, simply boot from the Windows installation media and select the target drive during setup. If you want to move your existing Windows installation to the new SSD, you’ll need to clone it using migration software. After cloning, enter BIOS and set the new SSD as the primary boot device.
Do I need a heatsink for my NVMe SSD?
Whether you need a heatsink depends on your workload and the specific SSD model. For basic use (OS, browsing, light gaming), the SSD may not generate enough heat to throttle without a heatsink. For sustained workloads like video editing, large file transfers, or heavy gaming, a heatsink is recommended to prevent thermal throttling. Many motherboards include M.2 heatsinks – if yours does, use them. If not, aftermarket heatsinks are inexpensive and effective. For more details, see our article on does SSD need heatsink.
Conclusion
Installing two SSDs in your PC is a practical and rewarding upgrade that provides more storage, better organization, and potentially improved performance. Whether you choose two M.2 NVMe drives for maximum speed, an M.2 plus SATA combination for balanced performance and capacity, or any other configuration, the process is well within reach for most builders.
The key to a successful two-SSD installation is preparation: check your motherboard’s specifications, understand any bandwidth limitations, gather the right tools and cables, and follow proper installation and configuration procedures. Take your time during the physical installation, ensure all connections are secure, and configure the drives properly in BIOS before proceeding to operating system setup.
With your new SSD configuration, you’ll enjoy faster load times, more storage capacity, and better system organization. Whether you’re a gamer looking to install more titles, a content creator needing fast scratch storage, or simply someone who wants a clutter-free digital life, two SSDs provide the flexibility and performance to meet your needs. Follow the steps in this guide, avoid the common mistakes we’ve outlined, and you’ll have your dual-SSD setup running smoothly in no time.