How to Install Old SSD in New PC (2026 Complete Guide)
Last updated: July 19, 2026 | Estimated reading time: 14 minutes
Upgrading to a new PC is exciting, but what happens to all the data on your old SSD? Whether you want to transfer files, use it as extra storage, or even boot from it, installing an old SSD in a new computer is a common task that many people face. The good news is that in most cases, your old SSD will work perfectly fine in a new system. However, there are several important factors to consider before you simply pop your old drive into the new machine.
In this comprehensive guide, we will walk you through everything you need to know about installing an old SSD in a new PC in 2026. We will cover compatibility concerns, step-by-step installation instructions, potential Windows activation issues, and whether you should clone your existing setup or do a fresh install. By the end of this article, you will have all the information you need to successfully add your old SSD to your new computer.
Table of Contents
Short Answer
Yes, you can install an old SSD in a new PC. Most modern motherboards support both SATA and NVMe M.2 SSDs, and if your old drive uses either of these interfaces, it should work without any major issues. However, you may encounter Windows activation problems if you try to boot from the old drive, and you should be aware that NVMe SSDs may require specific heatsinks for optimal performance. The installation process typically takes less than 30 minutes for a secondary drive, though migrating your operating system will require additional steps.
Will Old SSD Work in New PC
The short answer is yes, but compatibility depends on the type of SSD you have and the interfaces available on your new motherboard. Let us break down the two main types of SSDs and their compatibility with modern systems.
SATA SSDs
SATA SSDs use the same 2.5-inch form factor and SATA III interface that has been standard for over a decade. These drives are highly compatible and will work in virtually any modern PC that has available SATA ports. The SATA III interface supports speeds up to 600 MB/s, which is significantly faster than a traditional hard drive but slower than NVMe alternatives. If you have an older SATA SSD, you can easily transfer it to your new system and use it as additional storage.
NVMe M.2 SSDs
NVMe M.2 SSDs are the newer, faster option that connects directly to the PCIe bus. These drives can reach speeds of 3,500 MB/s or higher with PCIe Gen 3, and up to 12,000 MB/s with PCIe Gen 5 on the latest motherboards. If your old NVMe SSD is a PCIe Gen 3 drive and your new motherboard has Gen 4 or Gen 5 M.2 slots, it will still work but may not reach maximum speeds. Most modern motherboards include backward compatibility for older NVMe drives.
| Feature | SATA SSD | NVMe M.2 SSD |
|---|---|---|
| Max Speed | 600 MB/s | 12,000 MB/s (Gen 5) |
| Interface | SATA III | PCIe (Gen 3/4/5) |
| Form Factor | 2.5-inch | M.2 2280 (most common) |
| Backward Compatibility | Excellent | Good (Gen 3 works in Gen 4/5 slots) |
| Typical Lifespan | 5-7 years | 5-10 years |
| Needs Heatsink? | No | Recommended for Gen 4+ |
It is worth noting that NVMe SSDs can generate significant heat during heavy workloads, especially PCIe Gen 4 and Gen 5 models. If you plan to use your old NVMe SSD as your primary drive in a new system, consider whether you need to install an SSD heatsink to prevent thermal throttling.
Step-by-Step Installation
Installing an old SSD in a new PC is straightforward. Follow these steps for a smooth installation process.
Step 1: Power Down and Unplug
Before opening your PC case, completely power down the system and unplug the power cable from the wall outlet. Press the power button once to discharge any residual electricity in the capacitors. This is an important safety step that protects both you and your components.
Step 2: Ground Yourself
Static electricity can damage sensitive computer components. To prevent this, ground yourself by touching a metal part of the case or wearing an anti-static wrist strap. Even a small static discharge can corrupt data on an SSD or damage the drive controller.
Step 3: Open the Case
Remove the side panel of your PC case. Most modern cases use thumbscrews that can be removed by hand, though some may require a screwdriver. Lay the case on its side for easier access to the motherboard.
Step 4: Locate Available Slots
Identify where you will install the SSD. For SATA drives, look for available SATA ports on the motherboard and mounting locations in the case. For M.2 NVMe drives, look for the M.2 slot on the motherboard, which is typically located near the CPU socket or between the PCIe slots.
Step 5: Install the SSD
For SATA SSDs: Mount the drive in a 2.5-inch drive bay or use an adapter bracket if your case only has 3.5-inch bays. Connect the SATA data cable to the drive and then to an available SATA port on the motherboard. Connect the SATA power cable from the power supply to the drive.
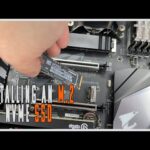
For M.2 NVMe SSDs: Remove the M.2 slot screw (if present), insert the drive into the slot at a 30-degree angle, and gently press it down until it clicks into place. Secure it with the mounting screw. Some motherboards have tool-less M.2 installation with a clip mechanism.
Step 6: Close the Case
Replace the side panel and secure it with the thumbscrews. Make sure no cables are pinched or blocking airflow paths.
Step 7: Power On and Enter BIOS
Plug in the power cable and turn on your computer. Immediately press the BIOS key (usually Delete, F2, or F12) to enter the BIOS setup. Check if the new SSD appears in the storage device list. If it does, your installation was successful.
Step 8: Initialize the Drive in Windows
Boot into Windows and open Disk Management (right-click the Start button and select Disk Management). Your new SSD should appear as an uninitialized disk. Right-click it and select Initialize Disk, then choose GPT (for drives larger than 2TB) or MBR. After initialization, create a new volume and format the drive to make it usable.
Windows Activation Issues
One of the most common problems people face when installing an old SSD in a new PC is Windows activation issues. If you try to boot from your old SSD in the new computer, Windows may become deactivated because the hardware fingerprint has changed significantly.
Microsoft ties Windows licenses to specific hardware configurations. When you replace major components like the motherboard, CPU, or RAM, Windows may consider this a “new device” and require reactivation. This is especially true for OEM licenses that came pre-installed on your old computer.
To minimize activation issues, consider using your old SSD as a secondary data drive rather than a boot drive. This way, you can do a fresh Windows install on your new primary drive and simply access the files on your old SSD without any activation problems.
Cloning vs Fresh Install
When moving to a new PC, you have two main options for getting your operating system and data onto the new system: cloning your existing drive or doing a fresh install. Each approach has its advantages and disadvantages.
| Aspect | Cloning | Fresh Install |
|---|---|---|
| Time Required | 30-90 minutes | 2-4 hours (including setup) |
| Data Preservation | All files and programs preserved | Clean slate, must reinstall programs |
| System Stability | May carry over old issues | Clean, optimized system |
| Driver Conflicts | Possible conflicts with new hardware | No conflicts (fresh drivers) |
| Recommended For | Quick migration, same hardware family | Different hardware, optimal performance |
| Tools Needed | Cloning software (Macrium, Acronis) | Windows installation USB |
If your old and new PCs use similar hardware (same CPU brand, same chipset), cloning is usually the faster option. However, if you are switching from Intel to AMD or vice versa, a fresh install is strongly recommended to avoid driver conflicts and system instability.
BIOS Settings
After physically installing your old SSD, you may need to adjust some BIOS settings to ensure everything works correctly. Here are the key settings to check:
SATA Mode
Modern motherboards typically default to AHCI mode for SATA drives, which is correct for SSDs. If your BIOS is set to IDE mode, change it to AHCI for optimal SSD performance. Note that changing this setting after Windows is installed can cause boot issues, so only change it if you are doing a fresh install.
Secure Boot
Windows 11 requires Secure Boot to be enabled. If you are trying to boot from your old SSD and Windows 11 is installed, make sure Secure Boot is enabled in the BIOS. If you are using Windows 10 or earlier, this setting is optional but recommended for security.
Boot Order
If you want to boot from your old SSD, you need to set it as the first boot device in the BIOS. Navigate to the Boot section and arrange the boot order so that your old SSD appears before other storage devices. If your old SSD contains a valid Windows installation, the system should boot from it successfully.
CSM (Compatibility Support Module)
Some motherboards have CSM enabled by default, which provides legacy BIOS compatibility. If your old SSD uses UEFI boot (most modern drives do), you may need to disable CSM and enable UEFI boot mode for the best experience.
Common Mistakes to Avoid
Even though installing an SSD is relatively simple, there are several common mistakes that can cause problems:
1. Forgetting to initialize the drive: After installing a new SSD, you must initialize and format it before Windows can use it. Many people skip this step and wonder why their drive does not appear in File Explorer.
2. Using the wrong cables: SATA data cables and SATA power cables look different but can be confused. Always use the correct cable that came with your motherboard or power supply. Do not mix SATA data cables with power cables.
3. Not updating BIOS: Some motherboards require a BIOS update to properly support newer NVMe SSDs. Check your motherboard manufacturer’s website for the latest BIOS version before installing your drive.
4. Installing M.2 SSD under the GPU: Some motherboards have M.2 slots located between the PCIe x16 slot and the CPU. If you install a large graphics card, it may block access to the M.2 slot or cause thermal issues. Check your motherboard layout before installation.
5. Ignoring thermal management: NVMe SSDs can reach temperatures above 70 degrees Celsius under heavy loads. Without proper cooling, thermal throttling will reduce performance. Consider adding a heatsink if your drive runs hot.
6. Not backing up data: While installing an old SSD is generally safe, always back up important data before making any hardware changes. A power surge during installation could potentially damage the drive.
7. Forgetting to check SATA ports: Some SATA ports on modern motherboards may be disabled when certain M.2 slots are populated. Consult your motherboard manual to see which ports remain available after M.2 installation.
Frequently Asked Questions
Q: Can I use my old SATA SSD as a boot drive in a new PC?
A: Yes, you can boot from an old SATA SSD in a new PC. However, you may experience Windows activation issues if your license is tied to the old hardware. A fresh Windows install on a new drive is often the better option for performance and stability.
Q: Will my old NVMe SSD work in a Gen 4 or Gen 5 M.2 slot?
A: Yes, NVMe SSDs are backward compatible. A PCIe Gen 3 NVMe drive will work in a Gen 4 or Gen 5 slot, but it will operate at Gen 3 speeds. Check out our guide on which M.2 slot to use for more details.
Q: Do I need to reinstall Windows when moving an SSD to a new PC?
A: While Windows may boot from the old SSD, it is highly recommended to do a fresh install. Drivers from the old hardware can conflict with new components, causing instability and reduced performance.
Q: Can I install two SSDs in my new PC?
A: Most modern motherboards support multiple SSDs. You can typically install two or more M.2 NVMe drives and several SATA drives simultaneously. Check your motherboard specifications for the exact number of supported drives.
Q: How do I know if my SSD is still healthy?
A: Use free tools like CrystalDiskInfo to check the SMART data of your SSD. Look at the wear level indicator, total bytes written, and power-on hours. If the drive shows no errors and has less than 80% wear, it should be safe to use.
Q: Should I use my old SSD or buy a new one?
A: If your old SSD is less than five years old and shows healthy SMART data, it should work fine in a new PC. However, if the drive is older than seven years or shows signs of wear, consider purchasing a new SSD for reliability and better performance.
Q: Will an SSD heatsink fit in my new PC?
A: Most aftermarket SSD heatsinks are designed to be universally compatible with M.2 drives. However, large heatsinks may interfere with graphics cards or other components. Measure the available space before purchasing. Learn more in our article about whether SSDs need heatsinks.
Q: Can I transfer my Windows license when moving an SSD?
A: Retail Windows licenses can be transferred to new hardware, but OEM licenses (those that came pre-installed on a PC) typically cannot. Check your license type in Windows Settings under Update & Security > Activation.
Conclusion
Installing an old SSD in a new PC in 2026 is a straightforward process that can save you money while giving you extra storage or a quick way to access your old files. Whether you have a SATA SSD or an NVMe M.2 drive, modern motherboards offer excellent compatibility with older drives.
The key to a successful installation is understanding your hardware, following proper installation procedures, and being prepared for potential Windows activation issues. If you plan to use your old SSD as a boot drive, a fresh Windows install is recommended for optimal stability. If you simply need extra storage, the installation process is quick and requires minimal configuration.
Remember to check your motherboard’s available ports, ensure proper thermal management for NVMe drives, and always back up your data before making hardware changes. With these guidelines in mind, you should have no trouble breathing new life into your old SSD in your brand-new PC.