How to Get Sound From Laptop to TV (2026 Complete Guide)
Last updated: July 19, 2026 | Estimated reading time: 14 minutes
How to Get Sound From Laptop to TV in 2026
There are many reasons you might want to get sound from your laptop to your TV. Perhaps you are streaming a movie and want better audio, giving a presentation and need the audience to hear, or simply want to enjoy music through your TV’s superior speakers. Regardless of the reason, connecting your laptop’s audio output to your TV can seem complicated at first, especially if you are not familiar with the various connection methods available. The good news is that there are multiple ways to route audio from your laptop to your TV, and most of them are simpler than you might think. In this guide, we will cover every method available in 2026, from wired connections to wireless solutions, so you can choose the approach that works best for your setup.
Before we dive into the specific methods, it is important to understand the different types of connections your laptop and TV might support. This knowledge will help you choose the best method for your particular situation and avoid compatibility issues.
Table of Contents
- Understanding Connection Types
- Method 1: HDMI Connection
- Method 2: 3.5mm Audio Cable
- Method 3: Optical Audio Cable (TOSLINK)
- Method 4: Bluetooth Connection
- Method 5: Wireless Display (Miracast/Chromecast)
- Method 6: HDMI Audio Extractors
- Method 7: Connecting Through a Soundbar
- Connection Methods Comparison Table
- Troubleshooting Audio Issues
- Frequently Asked Questions
Understanding Connection Types
Your laptop and TV likely support several different types of audio and video connections. Understanding which connections are available on both devices is the first step to choosing the right method. The most common connections found on modern laptops include HDMI, USB-C (with DisplayPort Alt Mode), 3.5mm headphone jack, and Bluetooth. TVs typically have HDMI ports, optical audio outputs, 3.5mm audio inputs, and increasingly, Bluetooth support.
HDMI is by far the most common and convenient connection type, as it can carry both high-definition video and multi-channel audio through a single cable. However, not all laptops have HDMI ports (many ultrabooks only have USB-C), and not all TVs are positioned close enough to the laptop for a cable connection. In these cases, wireless solutions or adapters become necessary.
For users who are specifically looking for HDMI-based audio solutions, we have a detailed guide on how to get sound from laptop to TV with HDMI that covers the HDMI-specific steps in greater depth.
Method 1: HDMI Connection
HDMI (High-Definition Multimedia Interface) is the gold standard for connecting laptops to TVs. A single HDMI cable carries both video and audio signals, making it the simplest and most reliable method for getting sound from your laptop to your TV. HDMI supports various audio formats, including stereo, 5.1 surround sound, and even 7.1 surround sound on newer versions.
To use HDMI for audio output:
- Connect the HDMI cable from your laptop’s HDMI port to an available HDMI input on your TV
- Turn on your TV and select the corresponding HDMI input using your TV remote
- On your laptop, right-click the speaker icon in the system tray and select “Open Sound settings”
- Under “Output,” select your TV or HDMI output device from the dropdown menu
- Test the audio by playing a video or music file
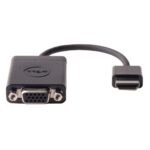
If your laptop does not have a full-size HDMI port, you may need an adapter. USB-C to HDMI adapters are widely available and affordable. DisplayPort to HDMI adapters are also common on business laptops. Make sure to use an adapter that supports audio passthrough, as some budget adapters are video-only.
HDMI also supports a feature called CEC (Consumer Electronics Control), which allows devices connected via HDMI to control each other. When CEC is enabled on both your laptop and TV, you may be able to control the TV volume using your laptop keyboard. This feature is particularly convenient for media consumption.
Method 2: 3.5mm Audio Cable
If your TV has a 3.5mm audio input (sometimes labeled “Audio In” or marked with a headphone icon), you can use a standard 3.5mm audio cable to connect your laptop’s headphone jack directly to the TV. This method only carries audio, not video, so you will need to use a separate connection for video (such as HDMI or wireless display).
Steps to connect using a 3.5mm audio cable:
- Connect one end of the 3.5mm cable to your laptop’s headphone jack
- Connect the other end to the TV’s audio input port
- On your TV, select the audio input source that corresponds to the 3.5mm input
- On your laptop, set the headphone jack as the default audio output device
This method is useful when your TV does not have HDMI audio input or when you want to keep your HDMI port free for video only. However, the audio quality through a 3.5mm connection is typically limited to stereo (two-channel) sound, so it is not ideal for surround sound setups.
Keep in mind that the 3.5mm audio cable is an analog connection, which means it can be susceptible to interference and signal degradation over longer distances. For best results, keep the cable as short as possible and avoid running it near power cables or other sources of electromagnetic interference.
Method 3: Optical Audio Cable (TOSLINK)
Optical audio cables, also known as TOSLINK cables, use light to transmit digital audio signals. Many TVs have an optical audio output that can be connected to external speakers, soundbars, or AV receivers. While most laptops do not have optical audio outputs, you can use a USB to optical audio adapter to connect your laptop to a TV’s optical input.
Optical audio supports several digital audio formats, including:
- Stereo PCM: Standard two-channel audio
- Dolby Digital: 5.1 surround sound
- DTS: 5.1 surround sound
The main advantage of optical audio is that it provides a clean, interference-free digital signal. However, it has some limitations compared to HDMI: it cannot carry video signals, and it does not support newer audio formats like Dolby Atmos or DTS:X. For most users, HDMI is a better choice if both devices support it.
Method 4: Bluetooth Connection
Bluetooth is a popular wireless audio solution that allows you to send audio from your laptop to your TV without any cables. Many modern smart TVs come with built-in Bluetooth, making this a convenient option. However, Bluetooth audio has some limitations, including potential latency (audio delay) and reduced audio quality compared to wired connections.
To connect your laptop to your TV via Bluetooth:
- Enable Bluetooth on both your laptop and TV
- Put your TV in pairing mode (usually found in the TV’s Settings > Bluetooth or Sound menu)
- On your laptop, open Bluetooth settings and search for available devices
- Select your TV from the list of available devices
- Accept the pairing request on your TV if prompted
- Set the TV as your default audio output device in your laptop’s sound settings
For the best Bluetooth audio experience, look for TVs and laptops that support Bluetooth 5.0 or later, as these versions offer lower latency and better range. Additionally, some devices support advanced Bluetooth codecs like aptX Low Latency or LDAC, which can significantly reduce audio delay and improve sound quality.
If you are connecting your laptop to a monitor instead of a TV via Bluetooth, you might encounter different challenges. For monitor-specific audio solutions, check out our guide on how to get sound on AOC monitor.
Method 5: Wireless Display (Miracast/Chromecast)
Wireless display technologies like Miracast (built into Windows) and Chromecast (Google’s casting protocol) can stream both video and audio from your laptop to your TV wirelessly. These solutions are convenient for presentations, streaming media, and sharing content from your laptop on the big screen.
Miracast (Windows)
- Make sure your TV supports Miracast or you have a Miracast adapter (like Microsoft Wireless Display Adapter)
- On your laptop, press Windows + K to open the Connect panel
- Select your TV from the list of available devices
- Once connected, both video and audio will be streamed to your TV
Chromecast
- Make sure your Chromecast device is set up and connected to the same network as your laptop
- Open Chrome browser on your laptop
- Click the three-dot menu in the top-right corner
- Select “Cast” and choose your Chromecast device
- Choose to cast a tab or your entire desktop
Wireless display technologies are convenient but can introduce latency and may not support the highest audio quality. They are best suited for casual viewing, presentations, and situations where running cables is impractical.
Method 6: HDMI Audio Extractors
An HDMI audio extractor is a device that splits the HDMI signal into separate video and audio outputs. This is useful when you want to send video to your TV through HDMI but route the audio to external speakers or a different audio system. HDMI audio extractors typically have one HDMI input and multiple outputs, including HDMI (video only), optical audio, and 3.5mm audio.
To use an HDMI audio extractor:
- Connect your laptop to the extractor’s HDMI input
- Connect the extractor’s HDMI output to your TV’s HDMI input
- Connect your speakers or soundbar to the extractor’s audio output (optical or 3.5mm)
- Configure your audio output on your laptop to use the HDMI device
HDMI audio extractors are affordable and widely available, making them a practical solution for users who need to split audio and video signals. They are particularly useful in home theater setups where the audio system is separate from the display.
Method 7: Connecting Through a Soundbar
If you have a soundbar connected to your TV, you can route your laptop’s audio through the soundbar for improved sound quality. Most soundbars connect to the TV via HDMI ARC (Audio Return Channel), optical audio, or Bluetooth. Once the soundbar is connected to your TV, any audio sent to the TV from your laptop will automatically play through the soundbar.
Alternatively, some soundbars have their own Bluetooth or auxiliary inputs that allow you to connect your laptop directly to the soundbar, bypassing the TV entirely. This can be useful if you want to listen to audio from your laptop through the soundbar without turning on the TV.
Connection Methods Comparison Table
| Method | Audio Quality | Latency | Cable Required | Video Support | Surround Sound |
|---|---|---|---|---|---|
| HDMI | Excellent | None | Yes | Yes | Yes (5.1/7.1) |
| 3.5mm Audio | Good (Stereo) | Minimal | Yes | No | No |
| Optical (TOSLINK) | Excellent | None | Yes | No | Yes (5.1) |
| Bluetooth | Good to Excellent | 100-300ms | No | No | Limited |
| Miracast | Good | 50-200ms | No | Yes | Stereo |
| Chromecast | Good to Excellent | Minimal | No | Yes | Yes (varies) |
| HDMI Extractor | Excellent | None | Yes | Yes (separate) | Yes |
Troubleshooting Audio Issues
Even with the right connection method, you may encounter audio issues. Here are some common problems and their solutions:
No Sound After Connection
If you have connected your laptop to your TV but hear no sound, check that the correct audio output device is selected in your laptop’s sound settings. The operating system may not automatically switch to the new audio output. Right-click the speaker icon, open sound settings, and select the TV or external device as the output.
Audio Lag or Delay
Audio lag is common with wireless connections like Bluetooth and Miracast. To minimize delay, use a wired connection whenever possible. If you must use wireless, look for devices that support low-latency codecs like aptX Low Latency. Some TVs also have an “audio delay” or “lip sync” setting that can help compensate for latency.
Poor Audio Quality
Poor audio quality can be caused by low-quality cables, interference, or incorrect audio settings. Ensure you are using a high-quality HDMI cable rated for audio, check that your audio output is set to the highest quality format available, and make sure there are no physical obstructions between Bluetooth devices.
TV Not Showing as Audio Device
If your TV does not appear in the list of available audio devices, try reconnecting the cable, restarting both devices, and updating your audio and graphics drivers. Some TVs also need to have their HDMI-CEC feature enabled to be recognized as an audio device by connected computers.
Frequently Asked Questions
What is the best way to get sound from my laptop to my TV?
The best method depends on your specific setup. HDMI is the most reliable and highest quality option for most users, as it carries both video and audio in a single cable with no latency. If you need a wireless solution, Bluetooth is convenient but may introduce some audio delay. For home theater setups with separate audio systems, an HDMI audio extractor provides the most flexibility.
Can I get surround sound from my laptop to my TV?
Yes, HDMI supports surround sound audio formats including Dolby Digital 5.1, DTS 5.1, and on newer HDMI versions, Dolby Atmos and DTS:X. To get surround sound, make sure your HDMI cable, TV, and laptop all support the desired audio format, and select the appropriate audio output format in your laptop’s sound settings.
Why is there a delay between the video and audio?
Audio delay is most common with wireless connections like Bluetooth and Miracast. The delay is caused by the time it takes to compress, transmit, and decompress the audio signal wirelessly. To eliminate delay, use a wired connection. If you must use wireless, look for devices that support low-latency audio codecs.
Do I need any special software to send audio to my TV?
In most cases, no special software is required. Your operating system (Windows, macOS, or Linux) has built-in support for HDMI, Bluetooth, and other audio output methods. Simply connect the devices and select the appropriate audio output in your system settings. Some wireless solutions like Chromecast may require the Chrome browser or a dedicated app.
Can I send audio to my TV and laptop speakers at the same time?
Yes, it is possible to output audio to multiple devices simultaneously. On Windows, you can use the “Stereo Mix” feature or third-party software like VoiceMeeter to split audio between your TV and laptop speakers. On macOS, the Audio MIDI Setup utility allows you to create a multi-output device. However, this configuration adds complexity and may introduce latency.
Will the audio quality be the same as connecting directly to speakers?
The audio quality depends on the connection method and your TV’s audio capabilities. HDMI and optical connections provide excellent digital audio quality comparable to direct speaker connections. Bluetooth audio quality depends on the codec used (SBC is lower quality, while aptX and LDAC offer better quality). TV speakers are generally not as good as dedicated external speakers, so consider connecting external speakers to your TV for the best audio experience.
My TV does not have Bluetooth. How can I connect wirelessly?
If your TV does not have built-in Bluetooth, you can purchase a Bluetooth audio adapter/receiver that plugs into your TV’s 3.5mm audio jack, optical audio output, or RCA audio output. These adapters receive Bluetooth audio from your laptop and output it through the TV’s speakers. They are affordable and widely available online.
Can I use USB to connect audio from my laptop to my TV?
Most TVs do not support USB audio input directly. However, you can use USB to connect audio interfaces or external DACs (Digital-to-Analog Converters) that then connect to your TV via 3.5mm or optical audio. This setup is more complex but can provide excellent audio quality for audiophile setups.
How do I get sound from my laptop to my TV without HDMI?
If your laptop or TV does not have HDMI, you have several alternatives: use a 3.5mm audio cable for analog stereo audio, use an optical audio cable with a USB to optical adapter, connect via Bluetooth wirelessly, or use a wireless display technology like Miracast or Chromecast. Each method has its own advantages and limitations in terms of audio quality, latency, and convenience. For more HDMI-specific solutions, see our HDMI audio guide.
For more tips on laptop connectivity, audio troubleshooting, and PC optimization, explore our other guides and articles.