How Should I Mount My AIO (2026 Complete Guide)
Last updated: July 19, 2026 | Estimated reading time: 13 minutes
Installing an all-in-one (AIO) liquid cooler is one of the most effective ways to keep your CPU temperatures low while maintaining a clean, aesthetic build. However, the mounting process involves several critical decisions that can affect cooling performance, noise levels, and long-term reliability. One of the most important questions builders face is: how should I mount my AIO? The answer depends on your case layout, radiator size, fan configuration, and personal preferences for aesthetics and performance. This comprehensive guide covers every aspect of AIO mounting, from basic orientation principles to advanced configurations, helping you make the right choices for your specific build.
Table of Contents
- AIO Cooler Overview
- Available Mounting Positions
- Front Mount Configuration
- Top Mount Configuration
- Rear Mount Configuration
- Radiator and Fan Orientation
- Push vs Pull vs Push-Pull
- Tubing Length and Routing
- Clearance and Compatibility
- Step-by-Step Installation
- Frequently Asked Questions
AIO Cooler Overview
An all-in-one liquid cooler consists of three main components: a pump block that mounts directly to the CPU, a radiator that dissipates heat, and fans that blow air through the radiator. The pump block contains a small water block and pump assembly that circulates coolant through the system. The radiator provides a large surface area for heat exchange, and the fans ensure adequate airflow to carry heat away from the radiator.
AIO coolers are available in various radiator sizes, including 120mm, 240mm, 280mm, and 360mm. The radiator size determines how many fans can be mounted and how much cooling capacity the AIO provides. Larger radiators offer more cooling potential but require more case space for installation.
Understanding the relationship between the pump block, radiator, and fans is essential for proper mounting. The pump must be positioned to maintain coolant flow, the radiator must have adequate airflow, and the tubing must be routed without kinks or excessive tension. Each mounting position handles these requirements differently.
| Radiator Size | Fan Count | Cooling Capacity | Typical Use |
|---|---|---|---|
| 120mm | 1 | Moderate | Compact builds, mild OC |
| 240mm | 2 | Good | Mainstream builds |
| 280mm | 2 | Very Good | Enthusiast builds |
| 360mm | 3 | Excellent | High-end OC, workstations |
Available Mounting Positions
Most ATX and micro-ATX cases support AIO radiators in three primary positions: front, top, and rear. Each position has distinct advantages and disadvantages that affect cooling performance, noise levels, aesthetics, and compatibility with other components.
Front Mount: The front of the case is the most popular AIO mounting position. Front-mounted radiators receive cool external air directly, providing the best cooling for the CPU. However, the warmed air from the radiator is exhausted into the case, potentially raising GPU and other component temperatures.
Top Mount: Top-mounted radiators exhaust warm air directly out of the case, providing excellent overall system cooling. The CPU may run slightly warmer than with front mounting because the radiator receives pre-warmed internal air, but the GPU and other components benefit from cooler ambient temperatures inside the case.
Rear Mount: Rear-mounted radiators are typically limited to 120mm or 140mm sizes due to space constraints. This position provides moderate CPU cooling and exhausts warm air directly out of the case. Rear mounting is popular for compact builds or as a secondary radiator position in custom configurations.
Front Mount Configuration
Front mounting is the most common AIO installation position, and for good reason — it provides direct access to cool external air, which maximizes the radiator’s heat dissipation capacity. However, front mounting requires careful consideration of airflow direction and component compatibility.
Airflow Direction: When front-mounting, the radiator fans should be configured as intake, pulling cool external air through the radiator and into the case. This ensures the radiator receives the coolest possible air for maximum heat transfer. The warmed air from the radiator is then exhausted through the rear and top case fans.
Cooling Performance: Front-mounted AIOs typically provide the best CPU temperatures because the radiator receives air at ambient room temperature. This is particularly beneficial for high-wattage CPUs or aggressive overclocking scenarios where every degree of cooling matters.
Considerations: The warmed air exhausted from a front-mounted radiator raises the internal case temperature, which can affect GPU and other component temperatures. In builds with high-power GPUs, this temperature increase may be noticeable. Additionally, front-mounted radiators may interfere with long graphics cards or front panel connections, depending on your case layout.
Tubing Routing: Front-mounted radiators usually have the shortest tubing run to the CPU socket, which reduces the risk of tubing kinks and provides a clean, aesthetic appearance. The tubing typically routes from the bottom or side of the radiator up to the CPU pump block.
For detailed instructions on mounting AIO coolers, see our comprehensive guide on how to mount AIO cooler.
Top Mount Configuration
Top mounting positions the radiator at the top of the case, where it can exhaust warm air directly out of the chassis. This configuration provides an excellent balance between CPU cooling and overall system temperature management.
Airflow Direction: Top-mounted radiators should be configured as exhaust, pushing warm air up and out of the case. This prevents warm air from recirculating and helps maintain lower internal case temperatures. The intake fans at the front and bottom of the case bring in cool external air to replace the exhausted warm air.
Cooling Performance: Top-mounted AIOs may result in slightly higher CPU temperatures compared to front mounting because the radiator receives air that has already been warmed by other components. However, the overall system temperature is typically lower because warm air is being exhausted rather than recirculated. This often results in better GPU cooling, which can improve overall system performance.
Considerations: Top mounting requires adequate clearance between the radiator and the motherboard’s VRM heatsinks, RAM modules, and other components. Some large radiators (especially 280mm and 360mm) may not fit at the top of smaller cases or may require low-profile RAM to provide clearance. Always measure available space before purchasing an AIO for top mounting.
Gravity Considerations: Some builders express concern about pump longevity with top-mounted radiators because the pump is positioned below the highest point of the radiator. In practice, modern AIO pumps are designed to handle any orientation, and top mounting does not significantly impact pump lifespan. However, ensuring the highest point of the loop is the radiator (not the pump) helps prevent air bubble accumulation in the pump.
Rear Mount Configuration
Rear mounting positions the radiator at the rear of the case, typically replacing the rear exhaust fan. This configuration is primarily used with 120mm or 140mm AIO coolers and is popular in compact builds where front and top positions are occupied or unavailable.
Airflow Direction: Rear-mounted radiators should be configured as exhaust, pulling warm air from inside the case through the radiator and exhausting it out the back. This configuration helps remove warm air from the case while providing direct CPU cooling.
Cooling Performance: Rear-mounted 120mm AIOs provide moderate cooling that is suitable for mainstream CPUs but may not be sufficient for high-end processors or aggressive overclocking. The smaller radiator size limits heat dissipation capacity compared to 240mm or 360mm front or top-mounted configurations.
Considerations: Rear mounting is limited by space constraints. Most cases only have room for a single 120mm or 140mm fan at the rear, limiting radiator size options. Additionally, rear-mounted radiators may interfere with tall CPU coolers, motherboard VRM heatsinks, or expansion cards, depending on the case layout.
Dual-Radiator Configurations: In some builds, a rear-mounted 120mm AIO is used in combination with a front or top-mounted larger AIO for additional cooling. This dual-radiator approach provides exceptional cooling capacity for enthusiast builds but adds complexity and cost.
Radiator and Fan Orientation
Beyond choosing where to mount the radiator, you must also determine the correct orientation for the radiator and fans. The orientation determines the direction of airflow and significantly impacts cooling performance.
Push Configuration (Fans Push Air Through Radiator): In a push configuration, the fans are mounted on the intake side of the radiator and push air through the radiator fins. This is the most common configuration and provides good cooling performance with relatively straightforward installation. The fans are visible from inside the case, which may be preferred for aesthetic builds with RGB fans.
Pull Configuration (Fans Pull Air Through Radiator): In a pull configuration, the fans are mounted on the exhaust side of the radiator and pull air through the fins. This configuration provides similar cooling performance to push and may be slightly quieter because the fans are not directly exposed. Pull configuration is less common but can be preferable in tight spaces where push mounting would interfere with other components.
Radiator Orientation (Inlet/Outlet Position): The radiator’s inlet and outlet ports should be positioned to minimize tubing tension and kinks. For front-mounted radiators, the ports are typically at the bottom or top of the radiator. For top-mounted radiators, the ports are usually on one end. Choose the orientation that provides the cleanest tubing route to the CPU pump block.
| Configuration | Fan Position | Performance | Noise Level |
|---|---|---|---|
| Push | Fans before radiator | Good | Moderate |
| Pull | Fans after radiator | Good | Slightly quieter |
| Push-Pull | Fans on both sides | Best | Moderate to louder |
Push vs Pull vs Push-Pull
The choice between push, pull, and push-pull fan configurations affects cooling performance, noise levels, and the physical space required for the radiator assembly.
Push Configuration: Push is the most common and recommended configuration for most builds. The fans push air through the radiator, providing good cooling performance with straightforward installation. Push configuration works well with both thin and thick radiators and is compatible with most case designs.
Pull Configuration: Pull provides similar performance to push but reverses the fan position. Some tests show pull performing slightly better with thick radiators (40mm+) because the airflow pattern interacts differently with the fin density. Pull is also slightly quieter because the fan motor noise is partially shielded by the radiator.
Push-Pull Configuration: Push-pull uses fans on both sides of the radiator, with one set pushing air in and the other pulling air through. This configuration provides the best cooling performance, typically 2-5°C better than push or pull alone. However, push-pull doubles the fan count, increases noise, requires more case space, and adds cost. Push-pull is most beneficial with thick radiators (40mm+) where the additional airflow significantly improves heat dissipation.
For most builders, push configuration provides the best balance of performance, noise, and simplicity. Push-pull is recommended only for enthusiast builds where maximum cooling performance is the primary goal and the additional cost and complexity are acceptable.
Tubing Length and Routing
AIO cooler tubing length and routing significantly impact both the ease of installation and the aesthetic appearance of your build. Understanding tubing considerations helps you choose the right AIO for your case and plan the installation.
Tube Length: AIO coolers come with various tube lengths, typically ranging from 300mm to 400mm. Longer tubes provide more flexibility for routing and are necessary for larger cases or unusual mounting positions. Shorter tubes reduce clutter but may not reach certain mounting positions. Always verify tube length compatibility with your case and mounting position before purchasing.
Tube Material: Most AIO coolers use flexible rubber or FEP (fluorinated ethylene propylene) tubing. Rubber tubing is more flexible and easier to route but may be less durable over long periods. FEP tubing is stiffer but more resistant to permeation (coolant evaporation through the tube walls) and maintains its appearance longer.
Routing Best Practices: Route tubing to avoid kinks, sharp bends, and contact with other components. Kinks restrict coolant flow and reduce cooling performance. Sharp bends stress the tubing and may cause leaks over time. Maintain at least a 1-inch (25mm) bend radius for flexible tubing and follow the natural curve of the tubes when planning your routing path.
Tubing and Component Clearance: Ensure tubing does not contact fans, expansion cards, or other moving components. Contact with spinning fans can damage tubing and create noise. Contact with hot components like GPU backplates can accelerate tubing degradation. Plan your routing to keep tubing clear of all potential interference points.
Clearance and Compatibility
Before mounting your AIO, verify that your case, motherboard, and other components provide adequate clearance for the radiator, fans, and tubing. Clearance issues are one of the most common problems in AIO installation.
Radiator Thickness: AIO radiators come in various thicknesses, typically 25mm to 30mm for standard radiators and 40mm+ for thick radiators. Add the fan thickness (typically 25mm) to determine the total clearance needed. A 25mm radiator with 25mm fans requires 50mm of clearance.
RAM Clearance: Top-mounted radiators may interfere with tall RAM modules. Measure the distance from the top of the case to the top of your RAM modules and compare it to the radiator-plus-fan thickness. Low-profile RAM (under 35mm height) is recommended for top-mounted AIO configurations.
VRM Heatsink Clearance: Some motherboards have large VRM heatsinks that may interfere with radiator mounting, particularly in top-mount configurations. Check the clearance between the top of the case and the VRM heatsinks to ensure the radiator will fit without contact.
GPU Clearance: Front-mounted radiators may interfere with long graphics cards. Measure the distance from the front fan mounts to the motherboard’s PCIe slots and compare it to your GPU’s length. Some cases provide removable drive cages to create additional clearance for front-mounted radiators.
For detailed clearance information and installation guidance, see our guide on how to mount AIO cooler and check whether your AIO includes thermal paste with our article on does the Corsair iCUE H100i come with thermal paste.
Step-by-Step Installation
Follow these steps for a successful AIO cooler installation:
Step 1: Prepare the Case. Remove the side panels and any components that may obstruct radiator installation (drive cages, fans, cables). Plan your mounting position and verify clearance before proceeding.
Step 2: Mount the Radiator. Attach the radiator to the case using the provided screws. Start with one screw to hold the radiator in position, then add the remaining screws. Tighten screws in a cross pattern to ensure even mounting pressure.
Step 3: Install the Fans. Mount the fans to the radiator in your chosen configuration (push, pull, or push-pull). Ensure the fans are oriented correctly for the desired airflow direction. Connect fan cables to the radiator fan headers or a fan hub.
Step 4: Install the Backplate. If your AIO uses a backplate, install it on the rear of the motherboard through the case’s CPU cutout. Secure the backplate according to the manufacturer’s instructions, using screws, standoffs, or adhesive strips as provided.
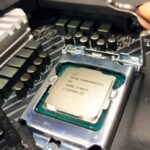
Step 5: Apply Thermal Paste. Apply a small amount of thermal paste to the center of the CPU heat spreader. Use approximately a pea-sized dot for mainstream CPUs. Do not spread the paste manually — the mounting pressure will distribute it evenly.
Step 6: Mount the Pump Block. Carefully lower the pump block onto the CPU, aligning the mounting brackets with the backplate mounting points. Secure the pump block using the provided screws, tightening in a cross pattern to ensure even pressure. Do not over-tighten, as this can damage the CPU or motherboard.
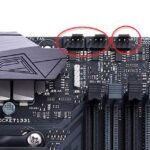
Step 7: Connect Cables. Connect the pump power cable to the AIO_PUMP or CPU_FAN header on the motherboard. Connect the fan cables to the appropriate headers or a fan hub. Ensure all connections are secure and cables are routed cleanly.
Step 8: Test and Monitor. Power on the system and verify that the pump and fans are operating. Check CPU temperatures using hardware monitoring software. Idle temperatures should be within 5-10°C of ambient, and load temperatures should remain below the CPU’s thermal throttling threshold.
Frequently Asked Questions
How should I mount my AIO radiator?
The best mounting position depends on your priorities: front-mount provides the best CPU cooling, top-mount offers the best overall system cooling balance, and rear-mount is suitable for compact builds. For most users, front-mount or top-mount with fans configured as push provides excellent cooling performance. Consider your case layout, component clearance, and cooling needs when choosing a position.
Should AIO fans be push or pull?
Push configuration (fans pushing air through the radiator) is the most common and recommended setup for most builds. It provides good cooling performance with straightforward installation. Pull performs similarly and may be slightly quieter. Push-pull provides the best performance but adds cost, noise, and requires more space. Start with push and upgrade later if needed.
Can I mount my AIO with the pump at the top?
It is generally recommended to position the pump below the highest point of the radiator to prevent air bubbles from accumulating in the pump. Top-mounted radiators naturally satisfy this requirement because the pump (on the CPU) is below the radiator. Front-mounted radiators with the inlet/outlet at the top also work well. Avoid configurations where the pump is the highest point in the loop.
Does AIO mounting direction affect cooling?
Yes, mounting direction affects airflow and cooling performance. The radiator should be mounted so that fans blow air in the correct direction (intake for front, exhaust for top and rear). Incorrect airflow direction reduces cooling performance and can raise system temperatures. Always verify fan orientation before finalizing installation.
Do I need to apply thermal paste when installing an AIO?
Some AIO coolers come with pre-applied thermal paste on the pump block’s contact surface. If your AIO has pre-applied paste, you do not need to add more. If the contact surface is bare, apply a pea-sized dot of thermal paste to the CPU heat spreader before mounting. For more information, see our article on does the Corsair iCUE H100i come with thermal paste.
How tight should I tighten AIO mounting screws?
Tighten screws until they are snug, then give them an additional quarter turn. Do not over-tighten, as this can damage the CPU, crack the heat spreader, or strip the mounting threads. Tighten in a cross pattern to ensure even pressure distribution across the CPU surface. The mounting pressure should be firm but not excessive.
What if my AIO tubes are too short for my chosen position?
If the AIO tubing is too short for your preferred mounting position, consider these alternatives: choose a different mounting position that provides a shorter tubing route, reposition the radiator to a location closer to the CPU, or select an AIO with longer tubes. Always verify tube length compatibility before purchasing an AIO for a specific mounting position.
Can I add more fans to my AIO radiator later?
Yes, most AIO radiators support adding additional fans for a push-pull configuration. Purchase fans that match the radiator’s size (120mm or 140mm) and install them on the opposite side of the existing fans. Ensure your case has enough clearance for the additional fan thickness (typically 25mm) and that the fans are oriented correctly for push-pull airflow.
Is it normal for AIO pump to make noise?
Some pump noise is normal, especially at higher speeds. A quiet hum or轻微 vibration is expected. However, loud grinding, clicking, or gurgling sounds may indicate air bubbles in the pump, a failing pump, or improper mounting. If you hear unusual noises, check the pump orientation, ensure the pump is properly seated, and verify that all air bubbles have been bled from the system.