Do You Have to Remove Motherboard to Install CPU Cooler (2026 Complete Guide)
Last updated: July 19, 2026 | Estimated reading time: 11 minutes
Installing a new CPU cooler is one of the most common PC building and maintenance tasks, but it often raises a critical question for builders: do you need to remove the motherboard from the case to install the cooler? The answer depends on several factors, including the type of cooler you are installing, your case design, and whether your motherboard has a cutout in the tray behind the CPU socket. In this comprehensive guide, we will explore every scenario, from simple air cooler installations to complex all-in-one liquid cooler setups, and help you determine exactly when motherboard removal is necessary and when it can be avoided.
Table of Contents
- Overview of CPU Cooler Installation
- The Motherboard Tray Cutout
- Installing Air Coolers
- Installing AIO Liquid Coolers
- Backplate-Based Cooler Installation
- When You MUST Remove the Motherboard
- When You Can Keep the Motherboard Installed
- Step-by-Step Installation Guide
- Applying Thermal Paste Correctly
- Common Mistakes to Avoid
- Frequently Asked Questions
Overview of CPU Cooler Installation
CPU coolers come in two main categories: air coolers and liquid coolers (including all-in-one or AIO units). Each type has different mounting requirements that determine whether the motherboard needs to be removed from the case during installation. Understanding these requirements before you begin will save you time and frustration.
Air coolers typically mount directly to the motherboard using a bracket or mounting system that attaches around the CPU socket. Some air coolers use a simple push-pin design similar to Intel’s stock coolers, while others use a more robust backplate system that provides better contact pressure and stability. The mounting method significantly impacts whether motherboard removal is necessary.
Liquid coolers, particularly AIO units, have a pump block that mounts to the CPU and radiators that mount to the case. The installation complexity varies depending on whether the AIO uses a backplate system, how the radiator is mounted, and the specific layout of your case and motherboard. Some AIO installations are straightforward, while others may require significant disassembly.
| Cooler Type | Typically Requires Motherboard Removal? | Difficulty Level |
|---|---|---|
| Intel Stock Cooler (Push-Pin) | No | Easy |
| AMD Stock Cooler (Clip-On) | No | Easy |
| Aftermarket Air Cooler (No Backplate) | No | Easy to Moderate |
| Aftermarket Air Cooler (Backplate) | Sometimes | Moderate |
| AIO Liquid Cooler | Sometimes | Moderate to Hard |
| Custom Loop | Usually Yes | Hard |
The Motherboard Tray Cutout
One of the most important features to check before installing a CPU cooler is whether your PC case has a cutout in the motherboard tray directly behind the CPU socket area. This cutout allows access to the back of the motherboard without removing it from the case, making cooler installation significantly easier.
Most modern PC cases, especially mid-tower and full-tower designs manufactured after 2010, include this cutout. It was specifically designed to accommodate aftermarket CPU coolers with backplates, as the backplate must be installed on the rear side of the motherboard. If your case has this cutout, you can typically install any cooler without removing the motherboard.
To check if your case has a cutout, remove the side panel on the opposite side of the motherboard (the right side if the motherboard is mounted on the left). Look for a large opening in the metal tray behind where the CPU socket would be located. If you see an opening large enough to access the backplate mounting area, you can proceed with installation without removing the motherboard.
Installing Air Coolers
Air coolers are the most common type of CPU cooler and generally the easiest to install without removing the motherboard. The installation method depends on the specific mounting system used by the cooler manufacturer.
Push-Pin Mounting: Intel’s stock coolers and some aftermarket coolers use a push-pin system where plastic pins are pushed through holes in the motherboard and twisted to lock in place. This system requires no access to the back of the motherboard and can be installed entirely from the front. No motherboard removal is necessary.
Clip-On Mounting: AMD’s stock coolers use a clip-on system that hooks onto brackets pre-installed on the motherboard. Like push-pin coolers, this system is entirely accessible from the front and requires no motherboard removal. The clip provides adequate pressure for the stock cooler but may not be suitable for high-performance aftermarket coolers.
Backplate Mounting: Many high-performance air coolers, such as the Noctua NH-D15 or be quiet! Dark Rock Pro, use a backplate system for improved mounting pressure and stability. The backplate is installed on the rear of the motherboard, and the cooler is then mounted from the front using screws or brackets that thread into the backplate. If your case has a motherboard tray cutout, you can install the backplate without removing the motherboard. If not, you may need to remove the motherboard to access the rear for backplate installation.
For detailed instructions on installing various cooler types, see our comprehensive guide on how to mount AIO cooler.
Installing AIO Liquid Coolers
All-in-one liquid coolers add complexity to the installation process because they have two main components: the pump block that mounts to the CPU and the radiator that mounts to the case. The pump block typically uses a backplate mounting system, while the radiator requires case fan mounts for installation.
The pump block installation follows the same principles as air cooler backplate mounting. If your case has a cutout, you can install the backplate from the rear without removing the motherboard. The pump block is then secured from the front with screws or a mounting bracket. If your case lacks a cutout, motherboard removal may be necessary to install the backplate.
The radiator installation adds another consideration. The radiator must be mounted to case fan positions, typically at the top, front, or rear of the case. In some configurations, particularly when mounting the radiator at the top of the case, you may need to remove or reposition other components like RAM modules, motherboard heatsinks, or even the motherboard itself to provide clearance for the radiator and fans.
Before purchasing an AIO cooler, measure the available space in your case and verify compatibility with your motherboard layout. Some large AIO radiators (280mm, 360mm) may not fit in smaller cases or may interfere with tall RAM modules or motherboard heatsinks, potentially requiring component repositioning or motherboard removal.
Backplate-Based Cooler Installation
The backplate is the foundation of many high-performance CPU coolers. It distributes mounting pressure evenly across the motherboard and provides a secure anchoring point for the cooler. Understanding backplate installation is key to determining whether motherboard removal is necessary.
Backplates are typically installed by aligning them with the mounting holes around the CPU socket on the rear of the motherboard and securing them with screws, standoffs, or adhesive strips. The cooler’s mounting brackets then attach to the backplate from the front side of the motherboard, and the cooler itself mounts to these brackets.
If your case has a motherboard tray cutout, backplate installation is straightforward: simply remove the opposite side panel, align the backplate with the mounting holes, and secure it. The entire process can be done without removing the motherboard. Some backplates even use adhesive pads to hold them in place temporarily while you secure them from the front.
If your case does not have a cutout, you have two options: remove the motherboard to install the backplate, or install the backplate on the motherboard before placing it in the case. The second option is preferable if you are building a new system, as it avoids the need for later disassembly. However, if you are upgrading an existing system, motherboard removal is often unavoidable.
When You MUST Remove the Motherboard
While many cooler installations can be completed without motherboard removal, there are specific scenarios where removal is necessary or strongly recommended:
No Motherboard Tray Cutout: If your case lacks a cutout behind the CPU socket and your cooler requires backplate installation, you must remove the motherboard to access the rear. This is common in older budget cases and some compact form factor designs.
Backplate Access Blocked: Even with a cutout, some motherboards have components (capacitors, heatsinks, PCB traces) on the rear that may interfere with backplate installation. In these cases, carefully removing the motherboard provides better access and reduces the risk of component damage.
Cooler Clearance Issues: Some large coolers may not fit in the case with the motherboard installed due to clearance issues with the case panels, drive bays, or other components. Removing the motherboard may provide the necessary space for proper installation.
Complete System Overhaul: If you are already performing a major system overhaul that involves removing other components, it may be more efficient to remove the motherboard entirely and install the cooler on a clean workbench where you have full access to all sides.
Custom Loop Installation: Custom liquid cooling loops often require extensive motherboard access for fitting installation, tube routing, and component placement. Motherboard removal is typically recommended for custom loop builds to provide the necessary workspace and access.
To learn more about installing I/O shields during motherboard installation, check our guide on how to install I/O shield.
When You Can Keep the Motherboard Installed
Conversely, there are many situations where motherboard removal is completely unnecessary:
Push-Pin or Clip-On Coolers: As discussed earlier, coolers that use push-pin or clip-on mounting systems do not require access to the rear of the motherboard and can be installed entirely from the front. This includes most stock coolers and some aftermarket designs.
Cases with Large Cutouts: Modern cases with generous motherboard tray cutouts provide easy access to the back of the motherboard for backplate installation. If your case has a large cutout that fully exposes the CPU socket area, you can install any cooler without removing the motherboard.
Pre-Installed Backplates: Some motherboards come with backplates pre-installed or include easy-to-access mounting points that do not require rear access. Check your motherboard documentation to see if this applies to your specific model.
Low-Profile Coolers: Compact, low-profile coolers designed for small form factor builds often have simplified mounting systems that do not require backplate installation. These can typically be installed without motherboard removal in any case.
Step-by-Step Installation Guide
Follow these steps for a CPU cooler installation with the motherboard remaining in the case:
Step 1: Prepare Your Workspace. Turn off your computer, unplug the power cable, and press the power button to discharge any residual electricity. Ground yourself by touching a metal part of the case or using an anti-static wrist strap.
Step 2: Remove the Side Panels. Remove both side panels of your case to access both sides of the motherboard. This gives you full access to the motherboard tray cutout and the CPU socket area.
Step 3: Remove the Old Cooler. If replacing an existing cooler, disconnect the fan or pump header from the motherboard. Release the mounting mechanism (twist push-pins, unclip clips, or unscrew mounting brackets) and gently lift the cooler off the CPU. You may need to twist slightly to break the thermal paste seal.
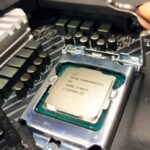
Step 4: Clean the CPU Surface. Use isopropyl alcohol (90% or higher) and a lint-free cloth to remove old thermal paste from both the CPU heat spreader and the new cooler’s contact surface. Allow both surfaces to dry completely before proceeding.
Step 5: Install the Backplate (If Required). If your cooler uses a backplate, access the rear of the motherboard through the case cutout. Align the backplate with the mounting holes and secure it according to the manufacturer’s instructions. Some backplates clip in, while others require screws or standoffs.
Step 6: Apply Thermal Paste. Apply a small amount of thermal paste to the center of the CPU heat spreader. A pea-sized dot is sufficient for most coolers. Do not spread the paste — the mounting pressure will distribute it evenly.
Step 7: Mount the Cooler. Carefully lower the cooler onto the CPU, aligning the mounting brackets with the backplate mounting points. Secure the cooler using the provided screws, clips, or mounting mechanism. Tighten in a cross pattern to ensure even pressure distribution.
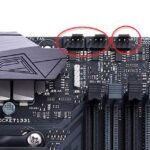
Step 8: Connect the Fan/Pump. Connect the cooler’s fan cable to the CPU_FAN header on your motherboard. If using an AIO, connect the pump to the AIO_PUMP or CPU_FAN header as specified by the manufacturer.
Applying Thermal Paste Correctly
Thermal paste is a critical component of CPU cooler installation that directly impacts cooling performance. Applying the right amount and in the correct pattern ensures optimal heat transfer between the CPU and the cooler.
The most widely recommended method is the pea-sized dot method: place a small dot of thermal paste (approximately 3-4mm in diameter) in the center of the CPU heat spreader. When the cooler is mounted, the mounting pressure will spread the paste evenly across the surface. This method works well for most cooler and CPU combinations.
Alternative methods include the X-pattern (applying paste in an X shape) and the line method (applying a thin line down the center). These methods may provide better coverage for larger CPUs, such as AMD’s Threadripper or Intel’s X-series processors, but the pea method is sufficient for mainstream consumer CPUs.
Avoid applying too much thermal paste, as excess paste can spill over the edges of the CPU heat spreader and potentially cause electrical shorts on nearby components. If paste does spill over, clean it immediately with isopropyl alcohol before powering on the system.
Common Mistakes to Avoid
Even experienced builders can make mistakes during CPU cooler installation. Here are the most common errors and how to avoid them:
Forgetting to Remove Plastic Protective Film: Many new coolers come with a protective plastic film on the contact surface. This film must be removed before installation. Installing a cooler with the film still attached will result in extremely poor thermal performance and potential overheating.
Over-tightening Mounting Screws: Applying too much force when tightening cooler mounting screws can damage the motherboard, crack the CPU heat spreader, or strip the mounting threads. Tighten screws until they are snug, then give them an additional quarter turn. The mounting pressure should be firm but not excessive.
Incorrect Fan Orientation: CPU cooler fans should be oriented to push air through the heatsink toward the rear or top of the case, matching your case’s airflow pattern. Installing the fan backward creates turbulent airflow and reduces cooling efficiency.
Ignoring Case Airflow: A high-performance CPU cooler cannot compensate for poor case airflow. Ensure your case has adequate intake and exhaust fans, and that cables and components do not obstruct airflow paths.
Not Testing After Installation: After installing a new cooler, always boot the system and monitor CPU temperatures using hardware monitoring software. Idle temperatures should be within 5-10°C of ambient temperature, and load temperatures should remain below the CPU’s thermal throttling threshold.
For more information about PC maintenance and cooling, visit our guides on how to mount AIO cooler and how to install I/O shield.
Frequently Asked Questions
Do I have to remove the motherboard to install an air cooler?
Not necessarily. Many air coolers can be installed without removing the motherboard, especially if your case has a cutout behind the CPU socket. Push-pin and clip-on coolers do not require motherboard removal at all. Only coolers with backplate mounting systems may require removal if your case lacks a cutout.
What is the CPU cooler cutout in the motherboard tray?
The CPU cooler cutout is an opening in the motherboard tray (the metal panel the motherboard is mounted to) that provides access to the rear of the motherboard behind the CPU socket. It allows backplate installation for CPU coolers without removing the motherboard from the case. Most modern mid-tower and full-tower cases include this feature.
Can I install an AIO cooler without removing the motherboard?
In many cases, yes. If your case has a CPU cooler cutout and sufficient radiator mounting space, an AIO cooler can typically be installed without removing the motherboard. However, clearance issues with RAM, VRM heatsinks, or case dimensions may sometimes require motherboard removal or component repositioning.
How do I know if my case has a motherboard tray cutout?
Remove the right-side panel of your case (opposite the motherboard side) and look at the metal tray. You should see an opening behind where the CPU socket is located. If the opening is large enough to access the backplate mounting area, your case has a cutout suitable for cooler installation.
Should I install the cooler before or after putting the motherboard in the case?
If you are building a new system, installing the cooler (or at least the backplate) before placing the motherboard in the case is often easier. If you are upgrading an existing system and your case has a cutout, you can install the cooler with the motherboard in place. If your case lacks a cutout, you will need to remove the motherboard to install a backplate-based cooler.
Do CPUs come with coolers included?
Some CPUs include stock coolers while others do not. AMD’s Ryzen processors typically include coolers (except for some high-end models), while Intel’s offerings vary by product line. Check our guide on do CPUs come with coolers for specific model information.
What if my cooler does not fit with the motherboard installed?
If your cooler physically cannot be installed with the motherboard in the case due to clearance issues, you have several options: reposition case components (drive bays, fans), choose a smaller cooler, use a different radiator mounting location, or remove the motherboard for installation. Measure carefully before purchasing to avoid this situation.
Is it safe to lay the case on its side for cooler installation?
Yes, laying the case on its side with the motherboard facing up can make cooler installation easier, especially for applying thermal paste and positioning the cooler. Just be careful not to place the case on a surface that could scratch the panels or damage ports. Ensure the case is stable before working inside it.